
Contents
- 1. In One Line
- 2. Quick Card
- 3. Before You Start
- 4. Sign-Up and Installation
- 4.1 Windows
- 4.2 iPhone
- 4.3 macOS, Linux, Android (per the official documentation, not tested)
- 4.4 Checking That Everything Works
- 5. First Settings, Security, and Privacy
- 6. Usage: Setting Up and Running Bots
- 6.0 First Exercise: One Task, One Output (About 10 Minutes)
- 6.1 Step 1: A New Bot
- 6.2 Step 2: Role and Rules in Memory
- 6.3 Step 3: A First Task for the Bot
- 6.4 Step 4: Saving as a Skill
- 6.5 Step 5: Weekly Routine
- 6.6 Step 6: A Ready-Made Template (Bot templates)
- 6.7 Step 7: Collaboration Between Bots
- 6.8 More Uses We Tested (About 3 Steps Each)
- 7. What Else You Can Do
- 8. Common Problems
- 9. Limits and Alternatives
- 10. Sources and Updates
- What This Guide Does Not Cover
1. In One Line
Grok Bot is a product from SpaceXAI (xAI) together with Cursor, where you set up "bots" (AI agents). Each bot works on its own cloud computer, signs in to the apps you connected (email, calendar, Drive) and carries out multi-step tasks. You can give it a role and rules, save a task that worked as a Skill (saved instructions), run it as a weekly routine, and connect several bots to work together.
There is no free plan. Access requires a paid subscription (tested hands-on, 14 November 2026). A new account was not offered a trial period. Prices are in Part 2.
A bot acts on your behalf. It reads emails, creates events and saves files. In our tests, emails were held for approval before sending, but creating a calendar event and saving to Drive went through without asking. The tool is suitable for non-sensitive information only, until there is an organizational agreement. Do the settings in Part 5 before first use.
Three things to know up front:
- All bots share one cloud computer. A separate bot is not a security boundary (Part 5).
- The main part is Part 6: a real chain that was tested, from a new bot to collaboration between bots, with the prompts (instructions) we typed.
- Hebrew works well in chat, in Word and in Google Slides. The Windows app interface is in English, and the iPhone interface is in Hebrew (Part 2).
2. Quick Card
By the end of this part you will know whether the tool fits you in terms of price, language and platform.
| Item | Status |
|---|---|
| Price | There is no standalone price. Access comes from an X Subscription (Premium and above) or a paid Cursor plan. See the tables below (checked: 2026-11-12 and 2026-11-14) |
| Free plan | None. In X Subscription, Free and Plus ($8) do not include Grok Bot (checked: 2026-11-12). On a new account, the access screen showed only a paid subscription (tested hands-on: 2026-11-14). The official FAQ describes a 7-day free trial for some accounts (Start Trial), as a usage credit (checked: 2026-11-15). It was not offered to us |
| Quota | A shared weekly quota (Weekly included usage). Its size in numbers is not published. After it, you can pay per use (On-demand) or with credits |
| Hebrew | Good (checked: 14–15 November 2026). Chat, a bot name in Hebrew, a Word document and Google Slides in Hebrew with right alignment, Hebrew dictation and an iPhone app in Hebrew. The Windows app interface is in English only. Full voice conversation: not tested |
| Platforms | Tested hands-on: Windows (version 1.1.0), iPhone, and the management site grok.com/dashboard. Per the documentation, not tested: macOS, Linux, Android 9+, Slack, Microsoft Teams, X Chat |
| Setup time | Not measured. A file of about 127MB, installation, sign-in and buying a subscription |
| Time to first result | Researching and comparing three tools into one Word document: 9 minutes. Full chain (bot, memory, Skill, routine): about 25 minutes |
| Security rating | Yellow (high caution). The bot acts on your behalf, shares a cloud computer with the other bots, and there is no documented data processing agreement (DPA). Suitable for non-sensitive information only |
Prices in dollars (per the official documentation: docs.x.ai/x-subscription/pricing, checked: 2026-11-12):
| Plan | Price | Grok Bot | Relative Weekly Quota |
|---|---|---|---|
| Free | $0 | Not included | - |
| Plus | $8 per month ($80 per year) | Not included | Base |
| Premium | $30 per month ($300 per year) | Included | 4x Plus |
| Super | $100 per month ($1,000 per year) | Included | 15x |
| Ultra | $200 per month ($2,000 per year) | Included | 50x |
Team seats: $30, $100 or $200 (Premium, Super, Ultra), and you can mix them. Plus is not available to teams.
Prices in shekels, as actually shown (checked: 2026-11-14, access screen on the Cursor site, monthly plan, before tax, including the first-month promotion):
| Plan | First Month | Then (per Month) |
|---|---|---|
| Premium | ₪46 (about 50% off) | ₪90.90 |
| Super | ₪150 | ₪299.90 |
| Ultra | ₪305 | ₪609.90 |
The subscription renews automatically. You can cancel at least 24 hours before renewal. Third-party models in Cursor are not included. Shekel prices depend on the promotion, the country and tax, so you may see a different price.
Not verified: the prices of Cursor Pro, Pro+ and Ultra (third-party source only, not verified with the vendor), the price of Cursor Teams, and the prices of SuperGrok, Grok Business and Enterprise. Cursor and SuperGrok do not stack, and the higher of the two is used (Help Center, checked: 2026-11-12, not re-verified because the link now redirects to grok.com/help).
How much it actually used (checked: 14–15 November 2026, grok.com/dashboard, Premium plan). This is one example, not a promise:
| Point | Weekly Usage | Tokens | Extra Cost |
|---|---|---|---|
| After installation and first research | 1% | 3.7 million | $0 |
| After calendar, email and a routine | 2% | 5 million | $0 |
| After everything (3 bots, Skill, 2 routines, a prospecting round) | 6% | 15.4 million | $0 |
3. Before You Start
By the end of this part you will know what to prepare so that sign-up does not get stuck.
- Budget: a paid monthly subscription (Part 2). Buy monthly, not yearly, until the tool is proven for you. Set a cancellation reminder in your calendar.
- Account for sign-in: you sign in with a Google, X, Apple or GitHub account (tested: Google). Deleting a Grok Bot account also deletes the Cursor account, and the email on the account cannot be changed (per the Help Center, checked: 2026-11-12. Not re-verified on 2026-11-15, because the link now redirects to grok.com/help. Worth checking again before publishing). So use a dedicated account for the trial, not your organization's main account.
- Computer: tested on Windows 11. During installation you can choose a single-user install (the default in the test). Not tested on a computer with an organizational policy that blocks installations.
- Apps to connect: Gmail, Google Calendar and Google Drive were tested. Outlook, SharePoint and OneDrive are mentioned in the documentation and were not tested.
- Organization: if this is a work computer or your organization's Google Workspace account, ask your IT manager before connecting. The bot gets access to the email and files of the account you connected.
- Dummy data: prepare a folder in Drive and an email to your own account for the trial. Do not start with customer data (Part 5).
- Phone: if you want to approve actions remotely, the iPhone app and notifications must be turned on (Part 4.2).
- Free time: about an hour for installation, settings and a first exercise.
4. Sign-Up and Installation
By the end of this part you will have an account, an app connected to Gmail, Calendar and Drive, and a check that everything works. Tested hands-on on Windows and iPhone on 14 November 2026. A step that was tested but has no screenshot is marked "No screenshot for this step". What was not tested is marked "Per the official documentation".
4.1 Windows
Download and Signature Check
Open the Official Site
Type
x.ai/botin your browser. You will see the heading Meet Grok Bot and the Download for Windows button. If a different page opens, check that the address is x.ai.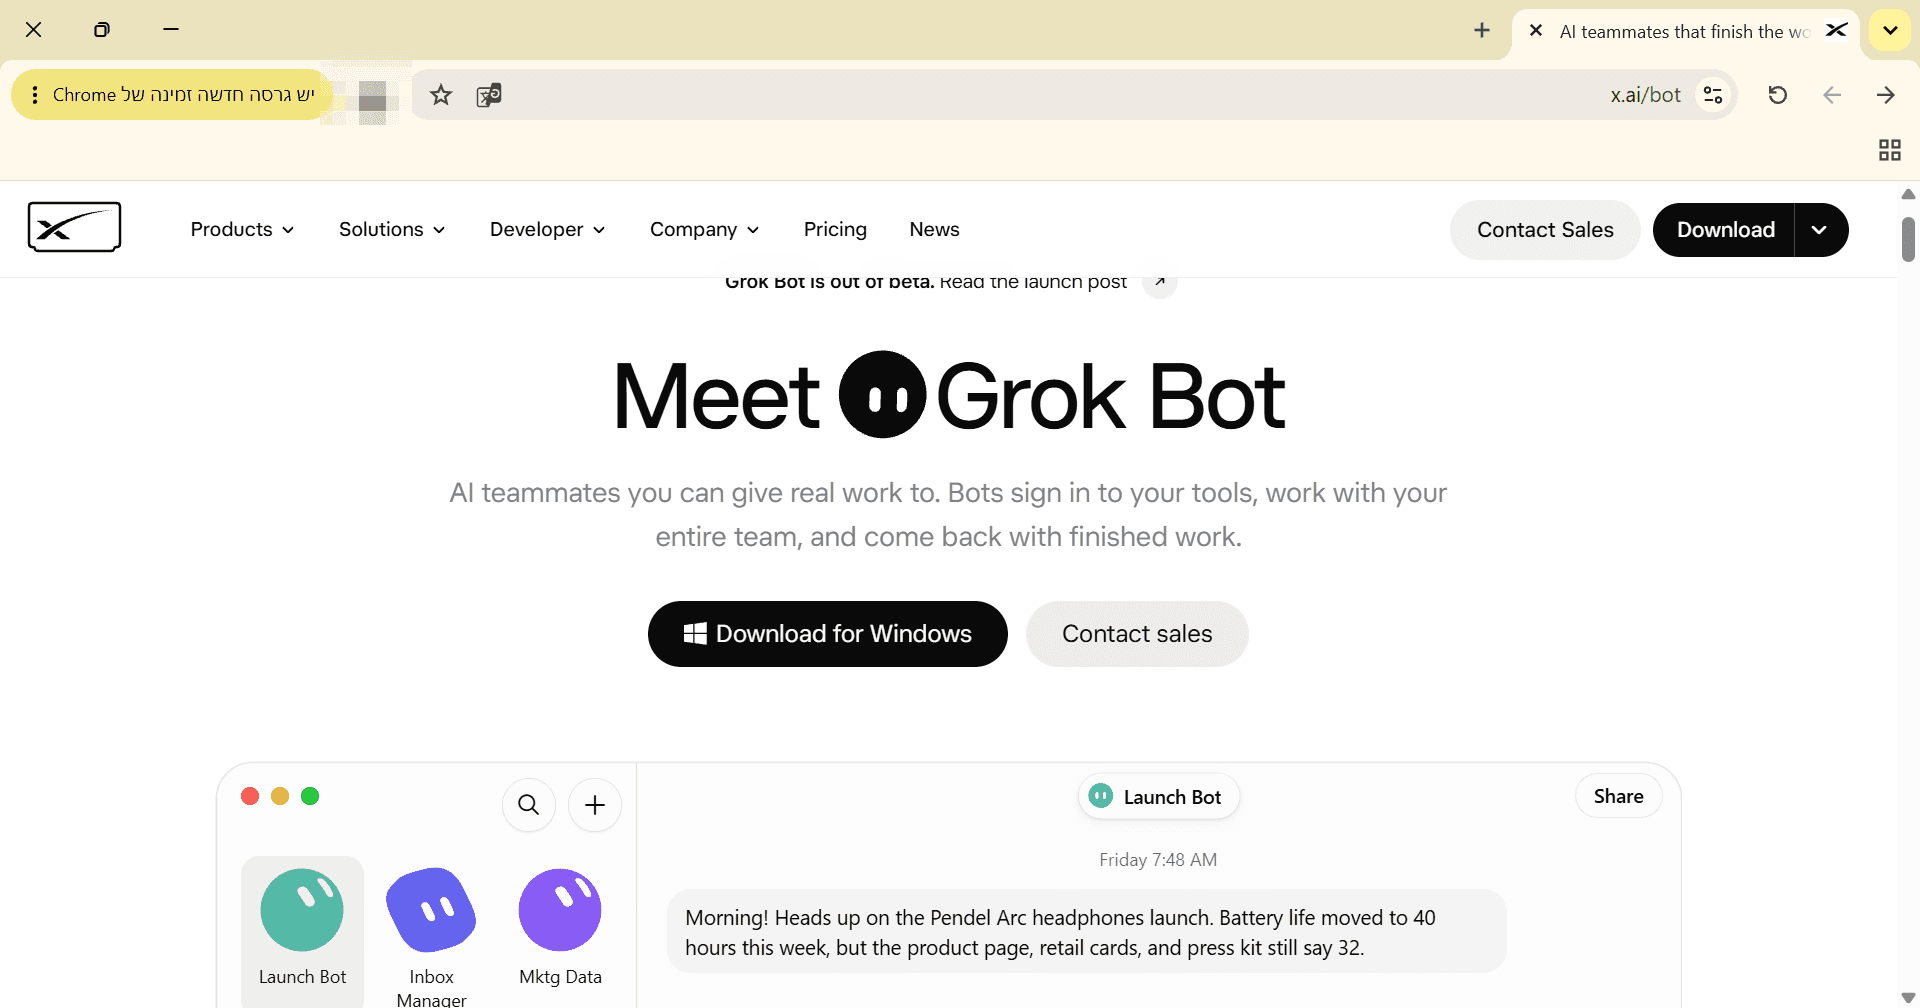
The x.ai/bot page with the download button Download
Click Download for Windows. The file
Grok_Bot_1.1.0_Setup.exedownloads, about 127MB (the version may change). If nothing downloads, check your Downloads folder.Note: On the announcement page (x.ai/news/introducing-grok-bot), the download buttons pointed to the address api2.cursor.sh. Download only from x.ai/bot, and even then check the signature in the next step.
Open PowerShell
Click Start, type
PowerShell, and press Enter. A window opens with a line that ends with the>sign. No screenshot for this step.Check the Digital Signature
The signature shows who published the file and that it was not changed along the way. It does not guarantee the software is safe. Copy, paste (Ctrl+V), and press Enter:
Get-AuthenticodeSignature "$env:USERPROFILE\Downloads\Grok_Bot_1.1.0_Setup.exe" | Format-List Status, SignerCertificateRead the Result
Good result: Status is Valid, and the signer name is Anysphere, Inc. This is what our check showed. The signer differs from the product name because Anysphere is the company behind Cursor, which the app is built in partnership with (checked: 2026-11-14). Any other status, or a different signer name: do not install, delete the file, and download again from x.ai/bot. An alternative without the command line: right-click the file, Properties, the Digital Signatures tab (not tested). No screenshot for this step.
Installation
Run the File
Double-click
Grok_Bot_1.1.0_Setup.exe. The Grok Bot Setup window (the installation wizard) opens. If Windows shows a SmartScreen warning or a UAC window, make sure the publisher matches the signer from step 5 before you continue (we did not record whether they appeared; this is a general description of Windows). No screenshot for this step.Choose Who to Install For
On the Choose Installation Options screen there are two options: Anyone who uses this computer (all users), which installs for all users on the computer, and Only for me (User), which installs for your account only. In our test we chose Only for me (User), which was also the default. Click Next >.
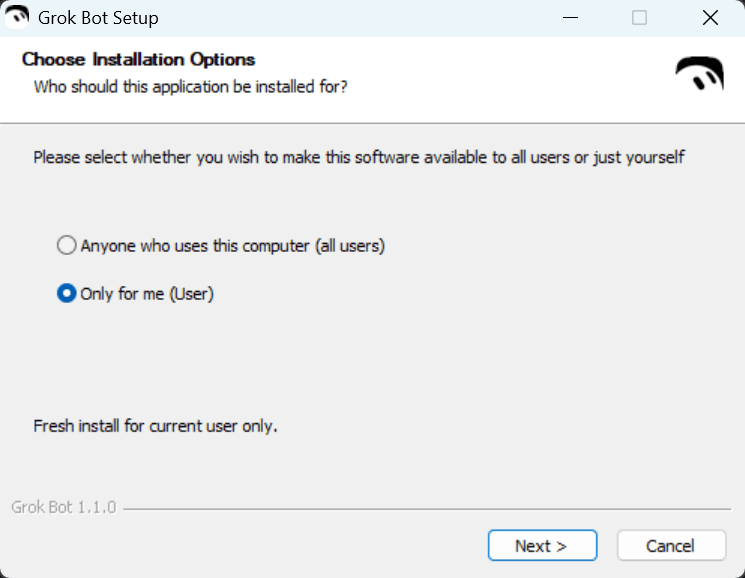
Installation type selection screen Confirm the Install Location
On the Choose Install Location screen, a default folder inside the user's AppData appears, and about 420MB of free space is required (Space required: 419.5 MB). Leave it as is and click Install. If there is not enough space, clean up the disk or click Browse... to choose another folder.
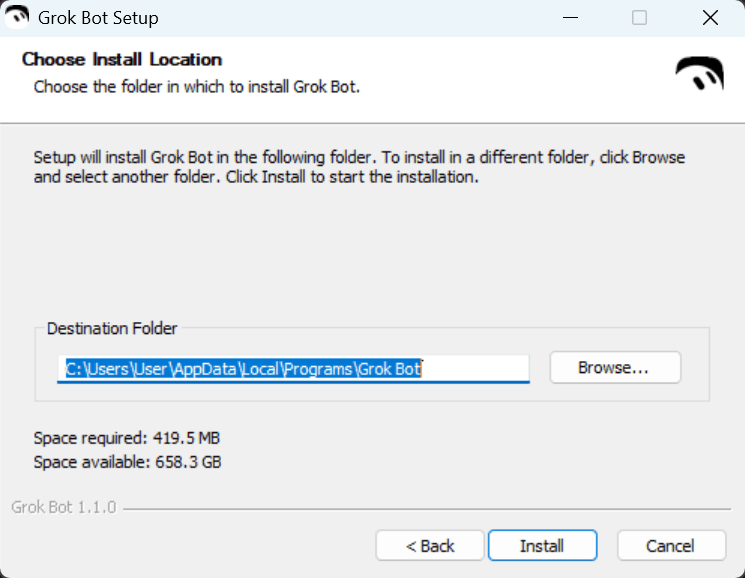
Install location selection screen Finish
On the Completing Grok Bot Setup screen, the Run Grok Bot box is already checked. Click Finish. The app opens. If it did not open, search for Grok Bot in the Start menu.
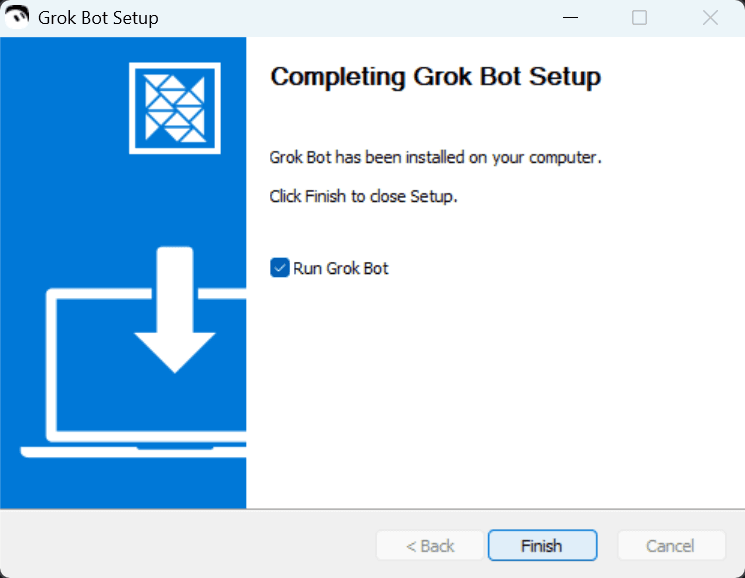
Installation finished screen
Sign-In and Subscription
Sign In
On the Grok Bot screen, click Sign in →. A browser opens. The screen also states that use is subject to the Terms. Read them before you continue.
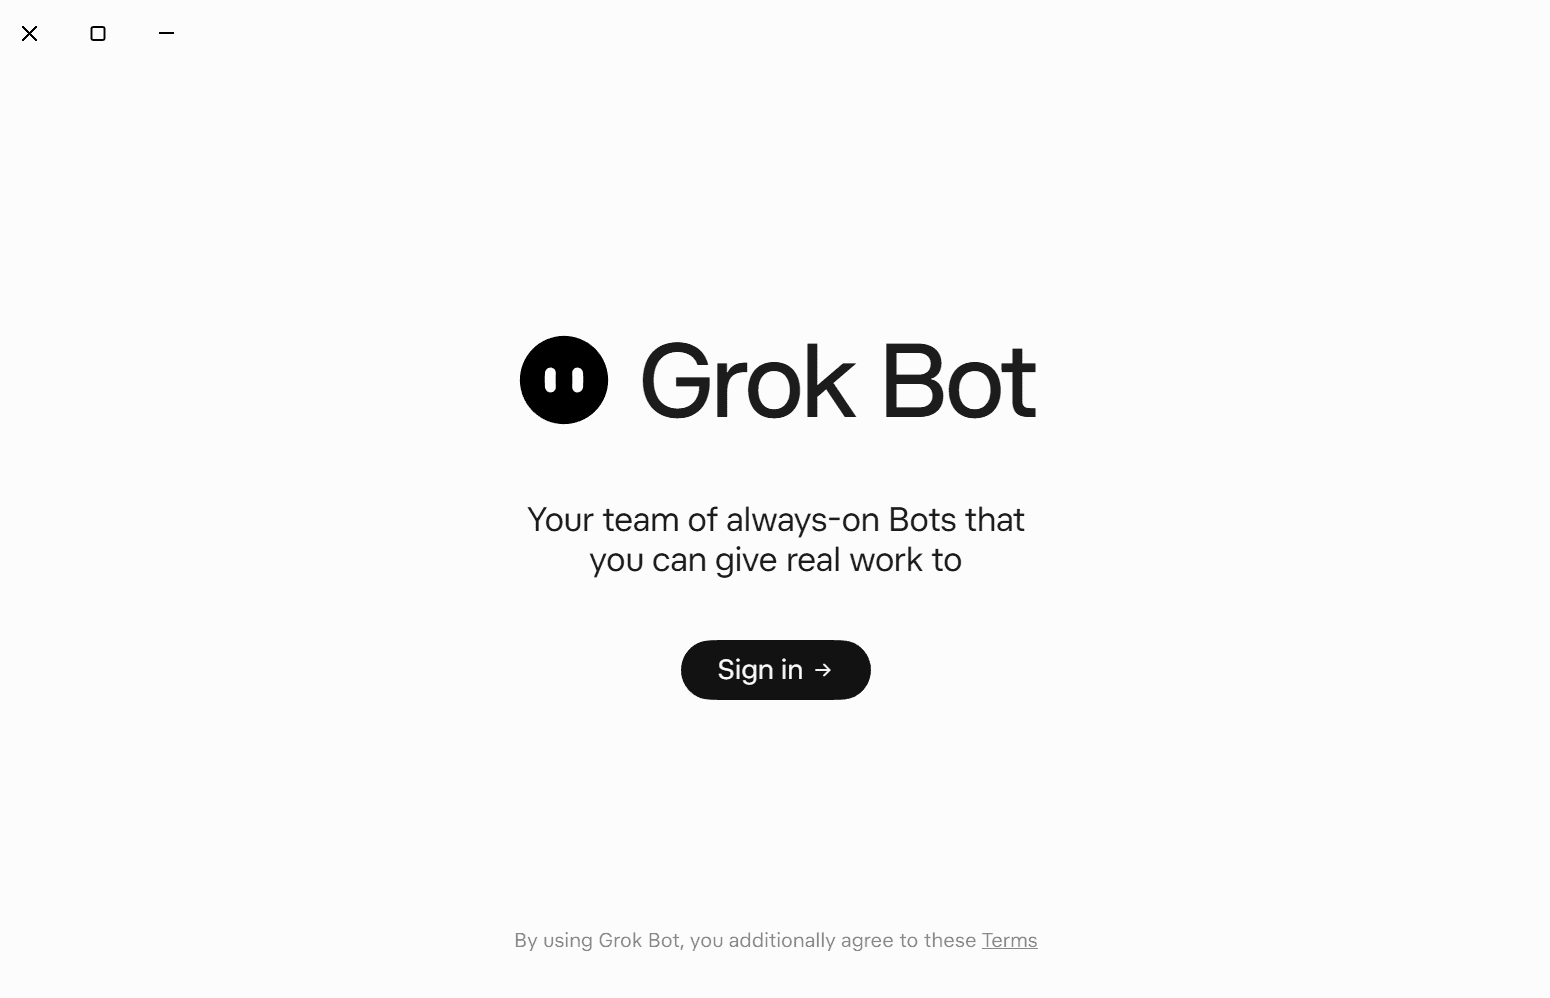
The app's welcome screen Choose a Sign-In Method
On the Log into your Grok Bot account page there are Login with Google, Login with X, Login with Apple, and Login with GitHub, plus more options below. Tested hands-on: Google, with a dedicated test account. Choose an account that fits the decision from part 3, because you cannot change the email address later.
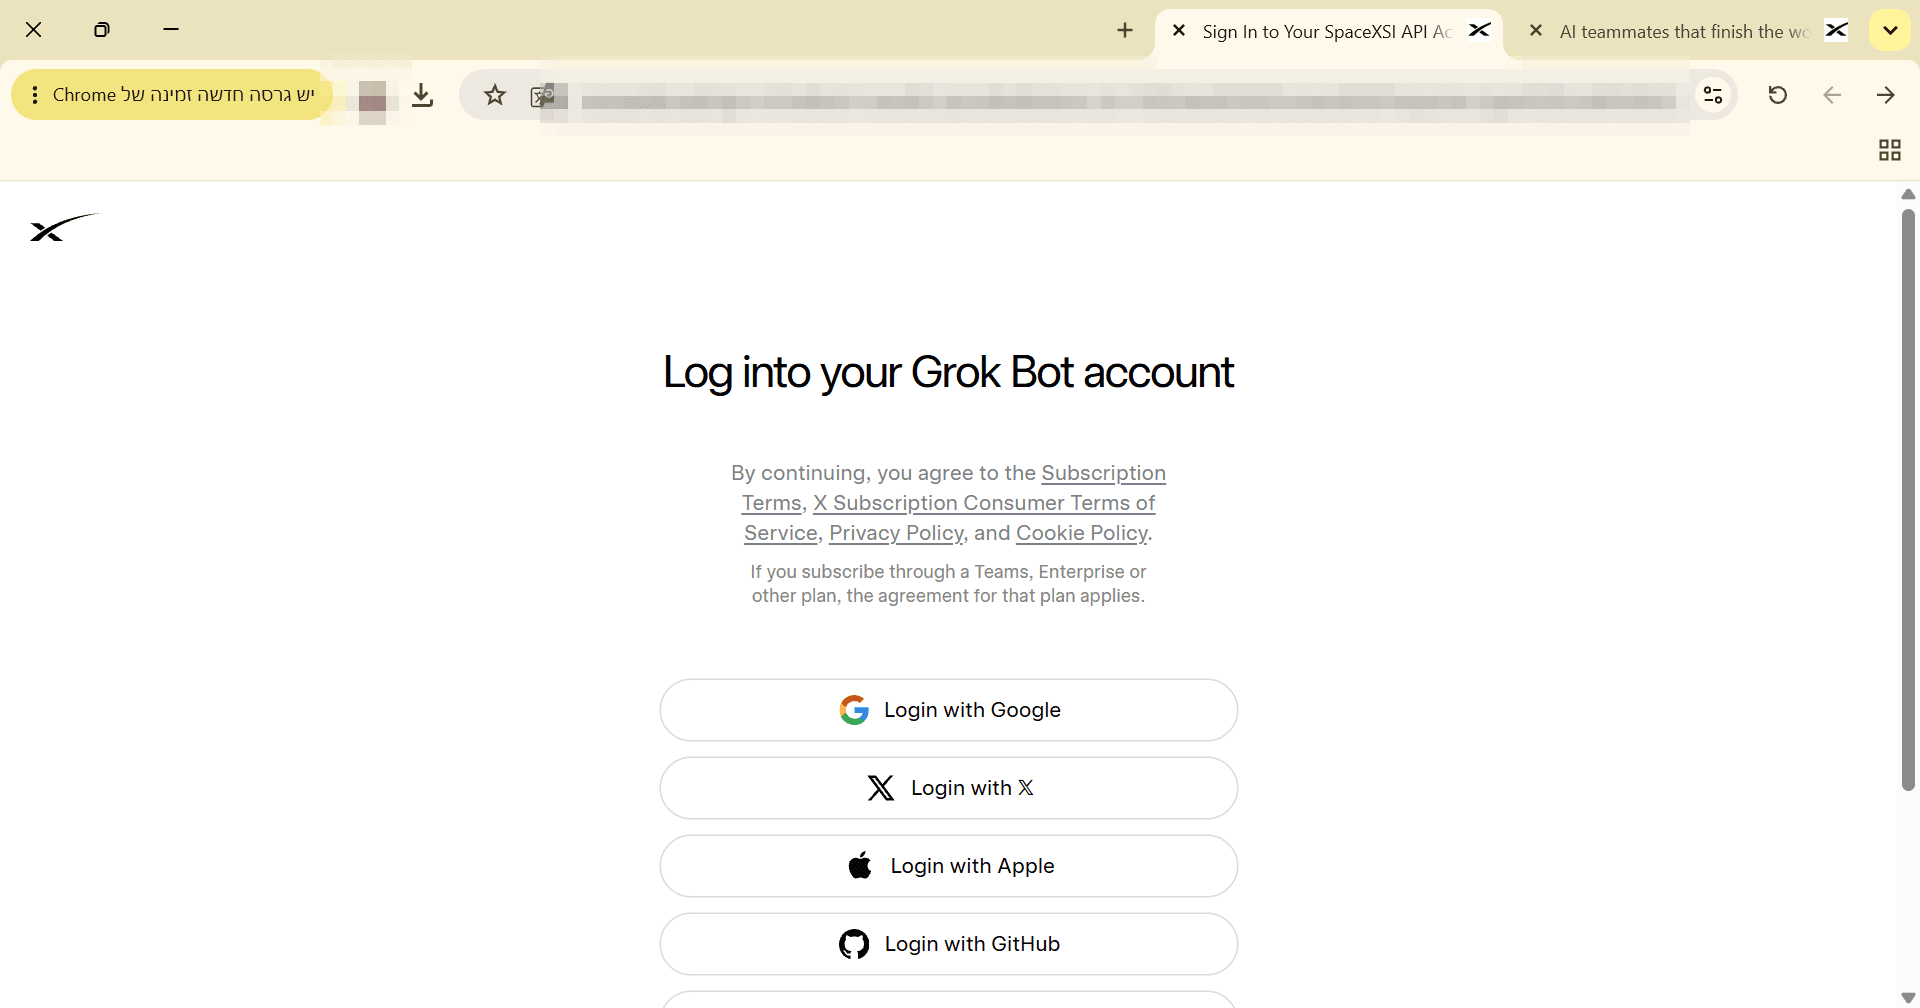
Sign-in method selection page If you don't have a suitable subscription,
The browser shows Grok Bot is included with Premium and above, with a See Plans button. This is the state of a new account with no subscription.
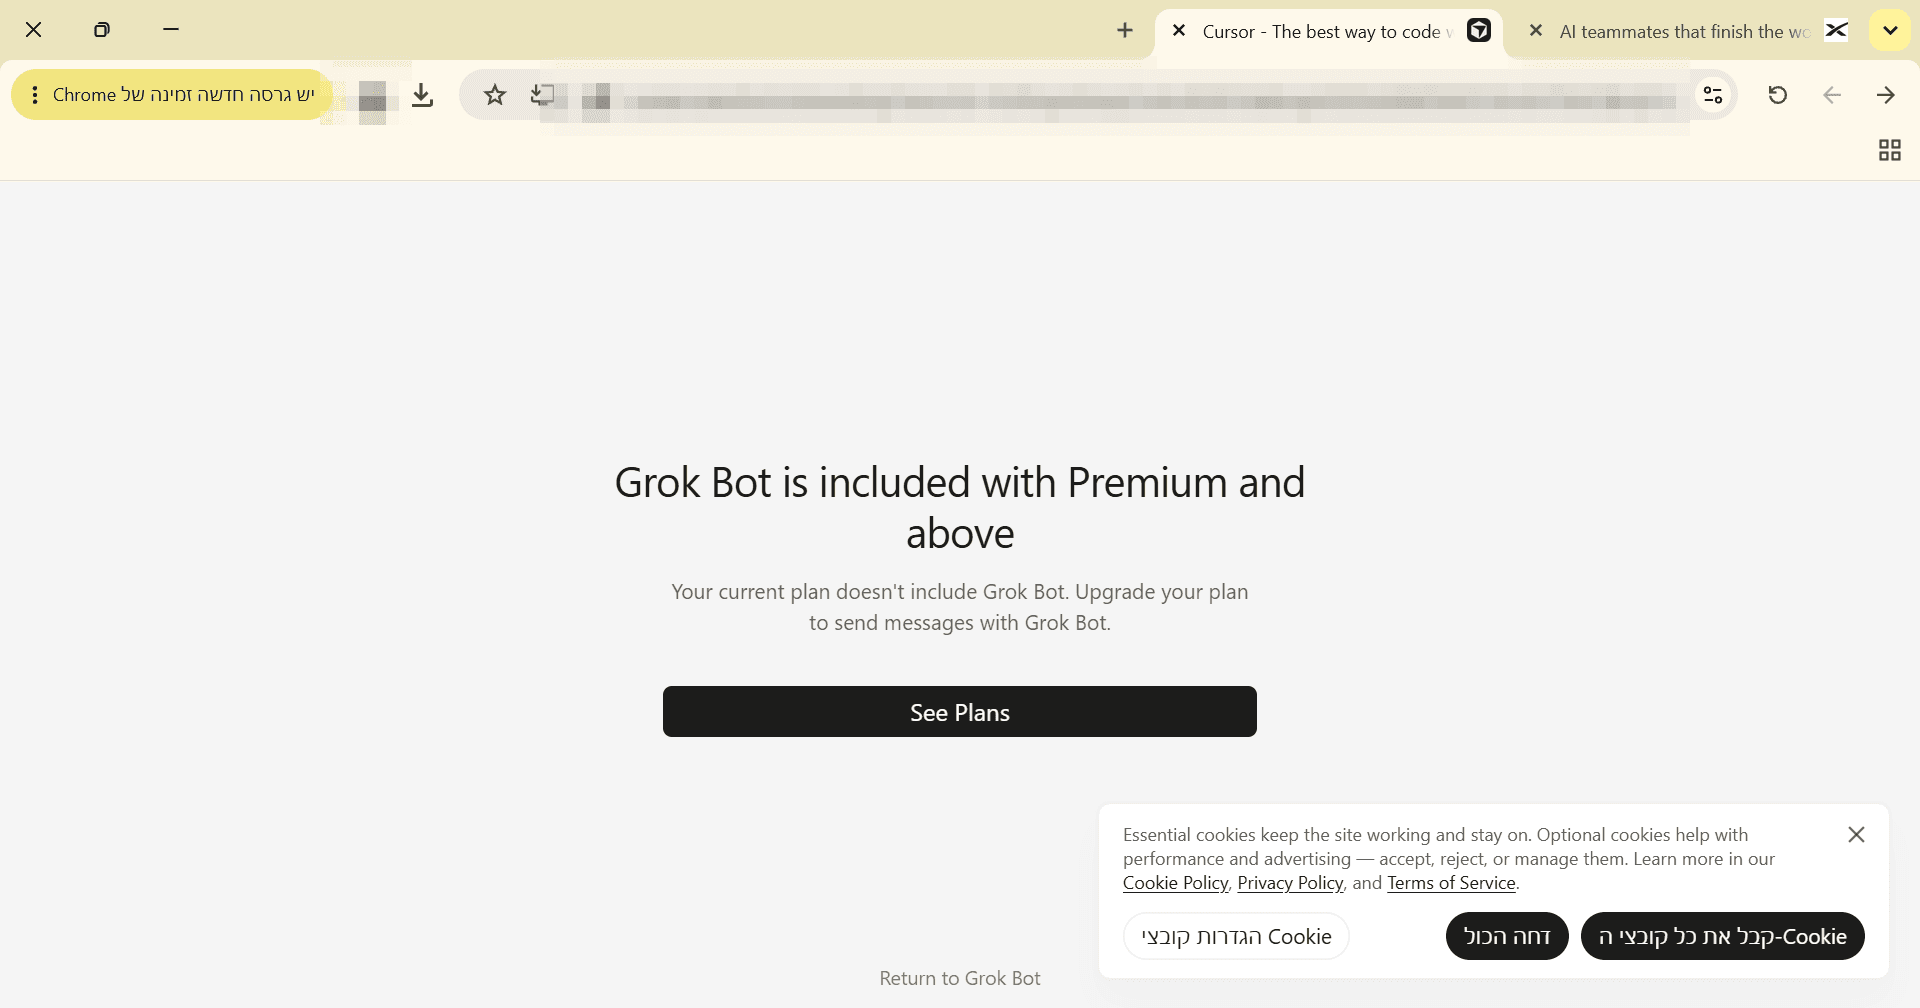
Screen "Included with Premium and above" Return to the App
In our test, the browser showed All set! Feel free to return to Grok Bot with an Open Grok Bot button, and the browser asked whether to open the app. Click the button to open Grok Bot (or go back to the app window manually). The access button inside the app opens the plans screen on the website again.
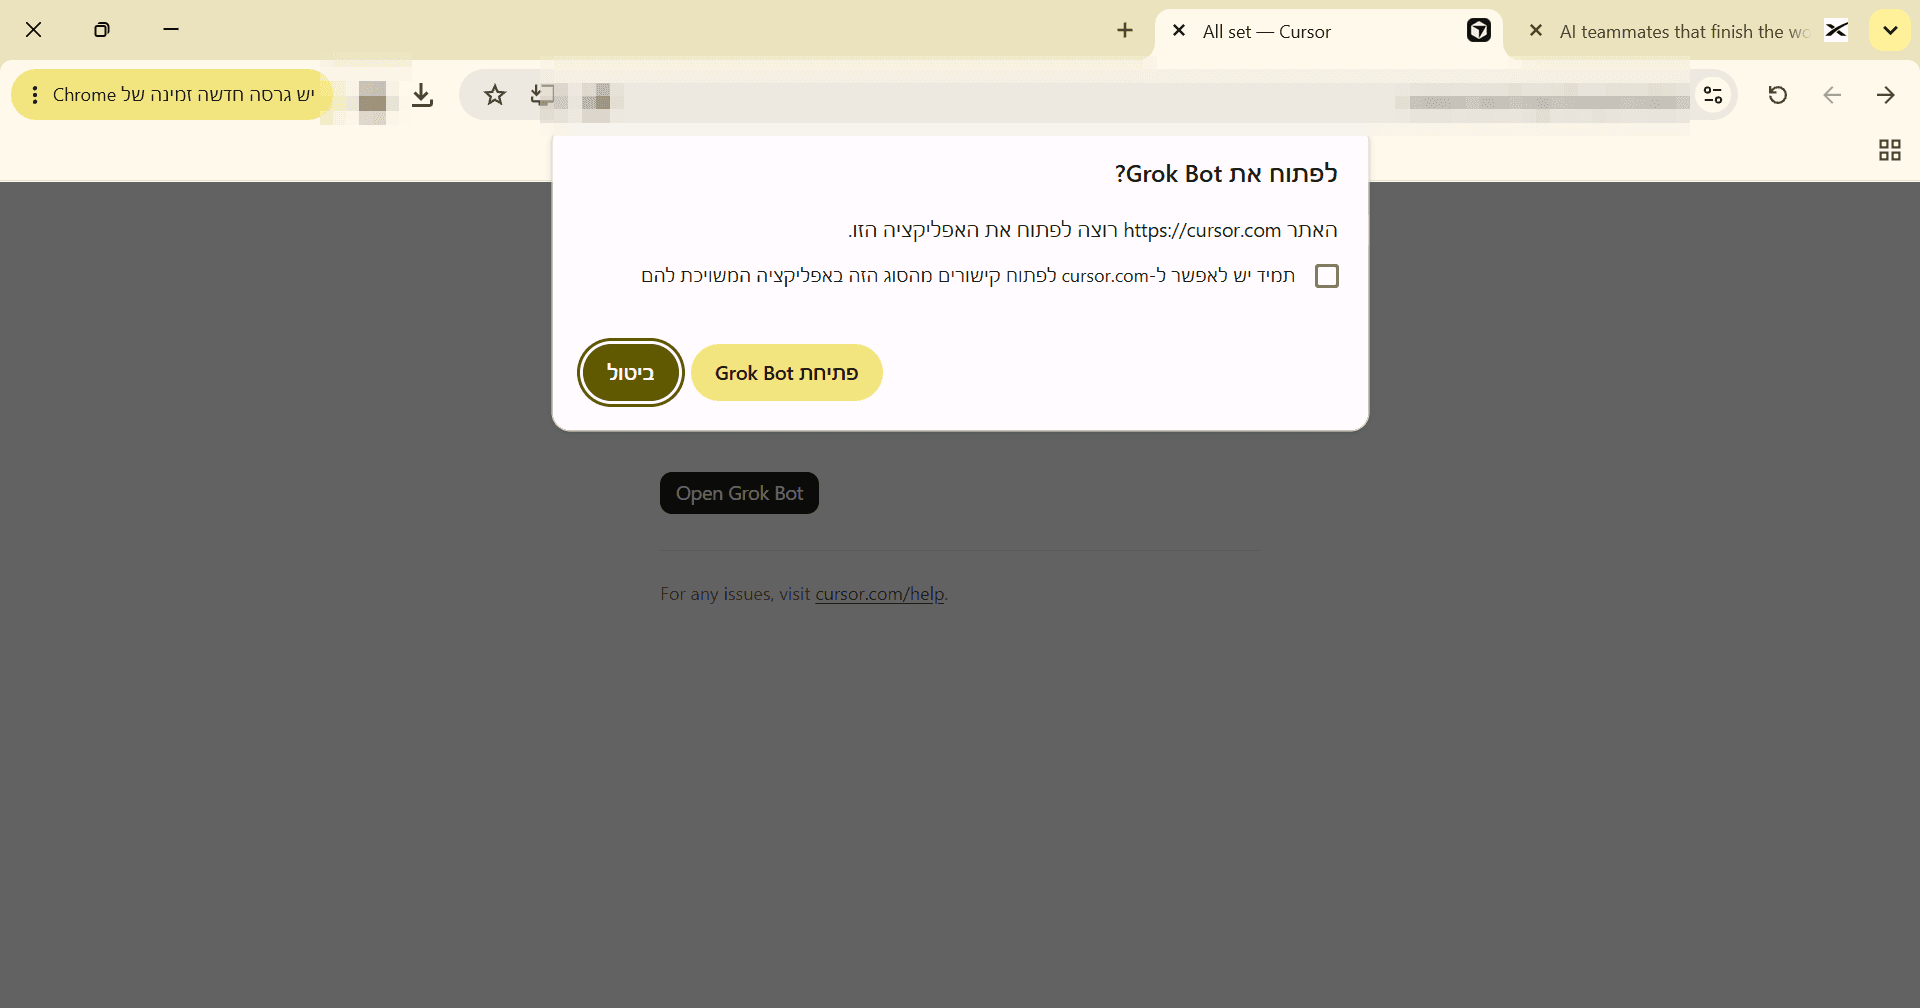
Browser dialog for opening the app 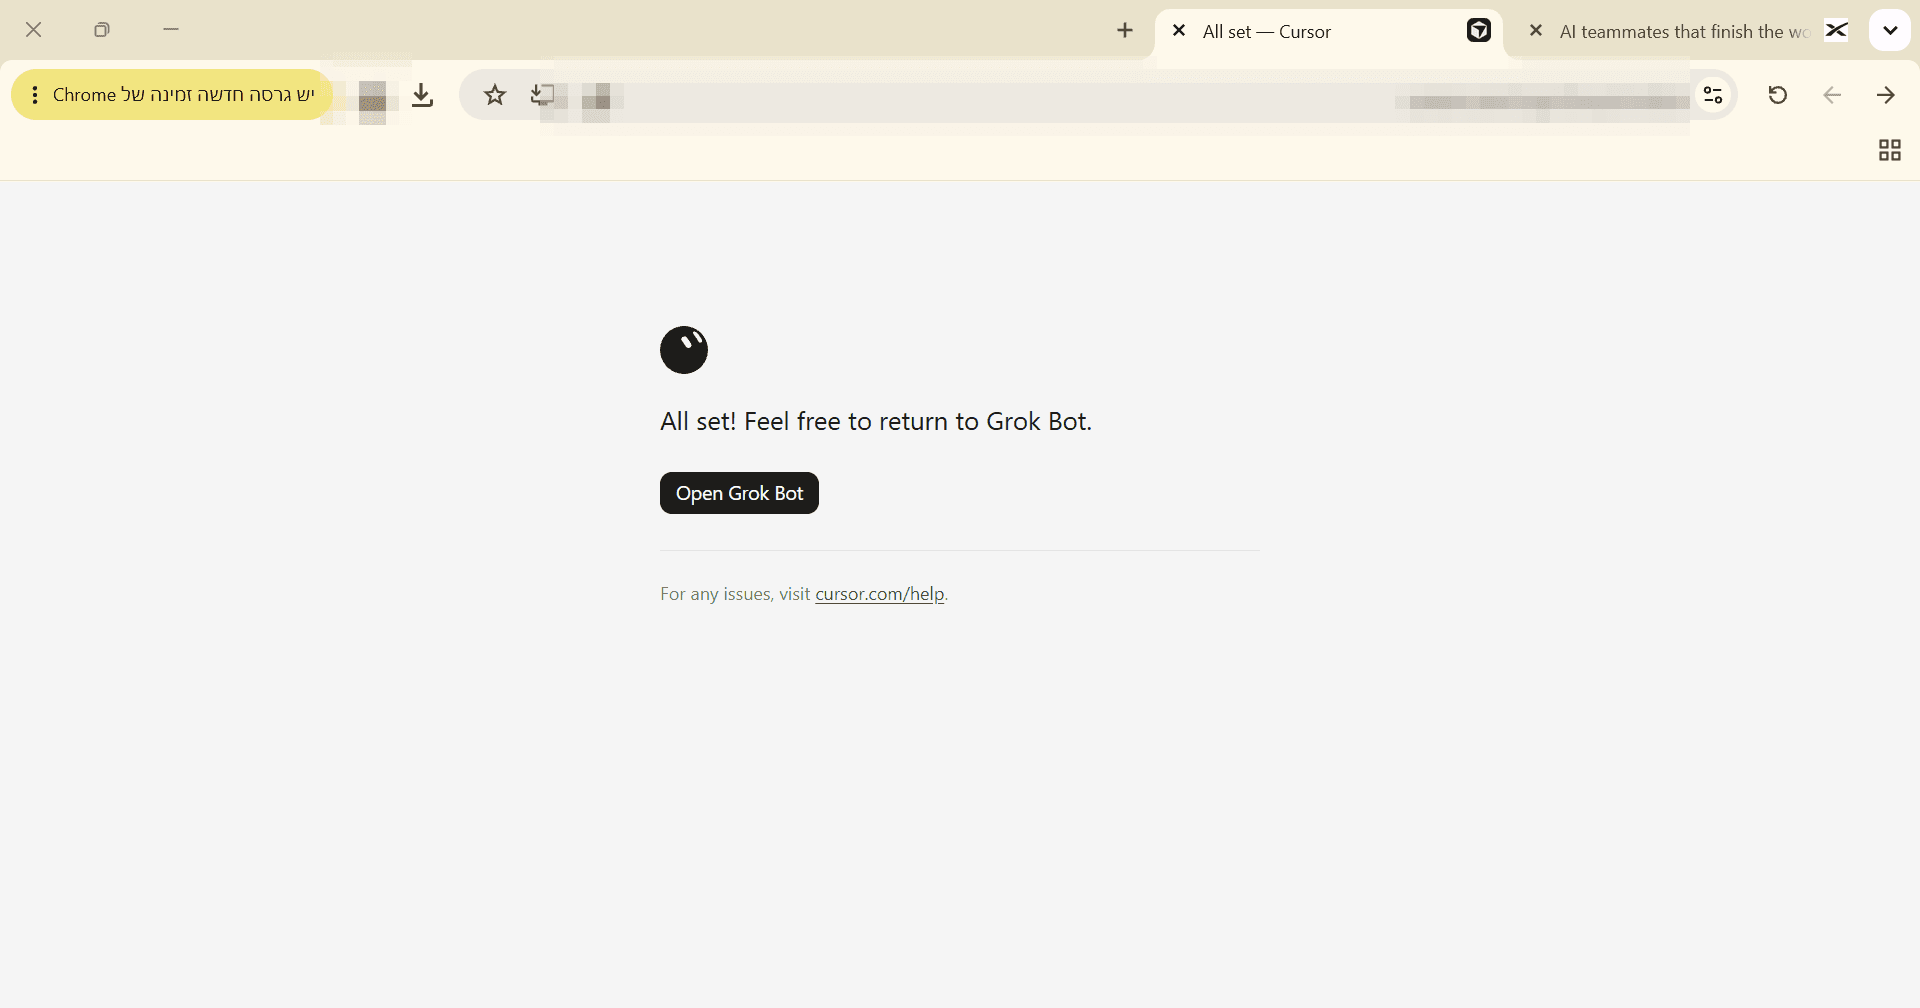
"All set" screen Decide on a Plan
The One subscription. Access to everything. screen opens, with a Monthly / Annual toggle and three plans: Premium, Super, and Ultra. What to choose: Premium monthly is enough to start. The whole test, including routines that ran on their own, used 6% of Premium's weekly quota. Under the price it says 50% off, meaning the first month is discounted, and then the full price applies (part 2). Click Claim offer only if you are ready to pay. Annual makes sense only after the tool has proven itself.
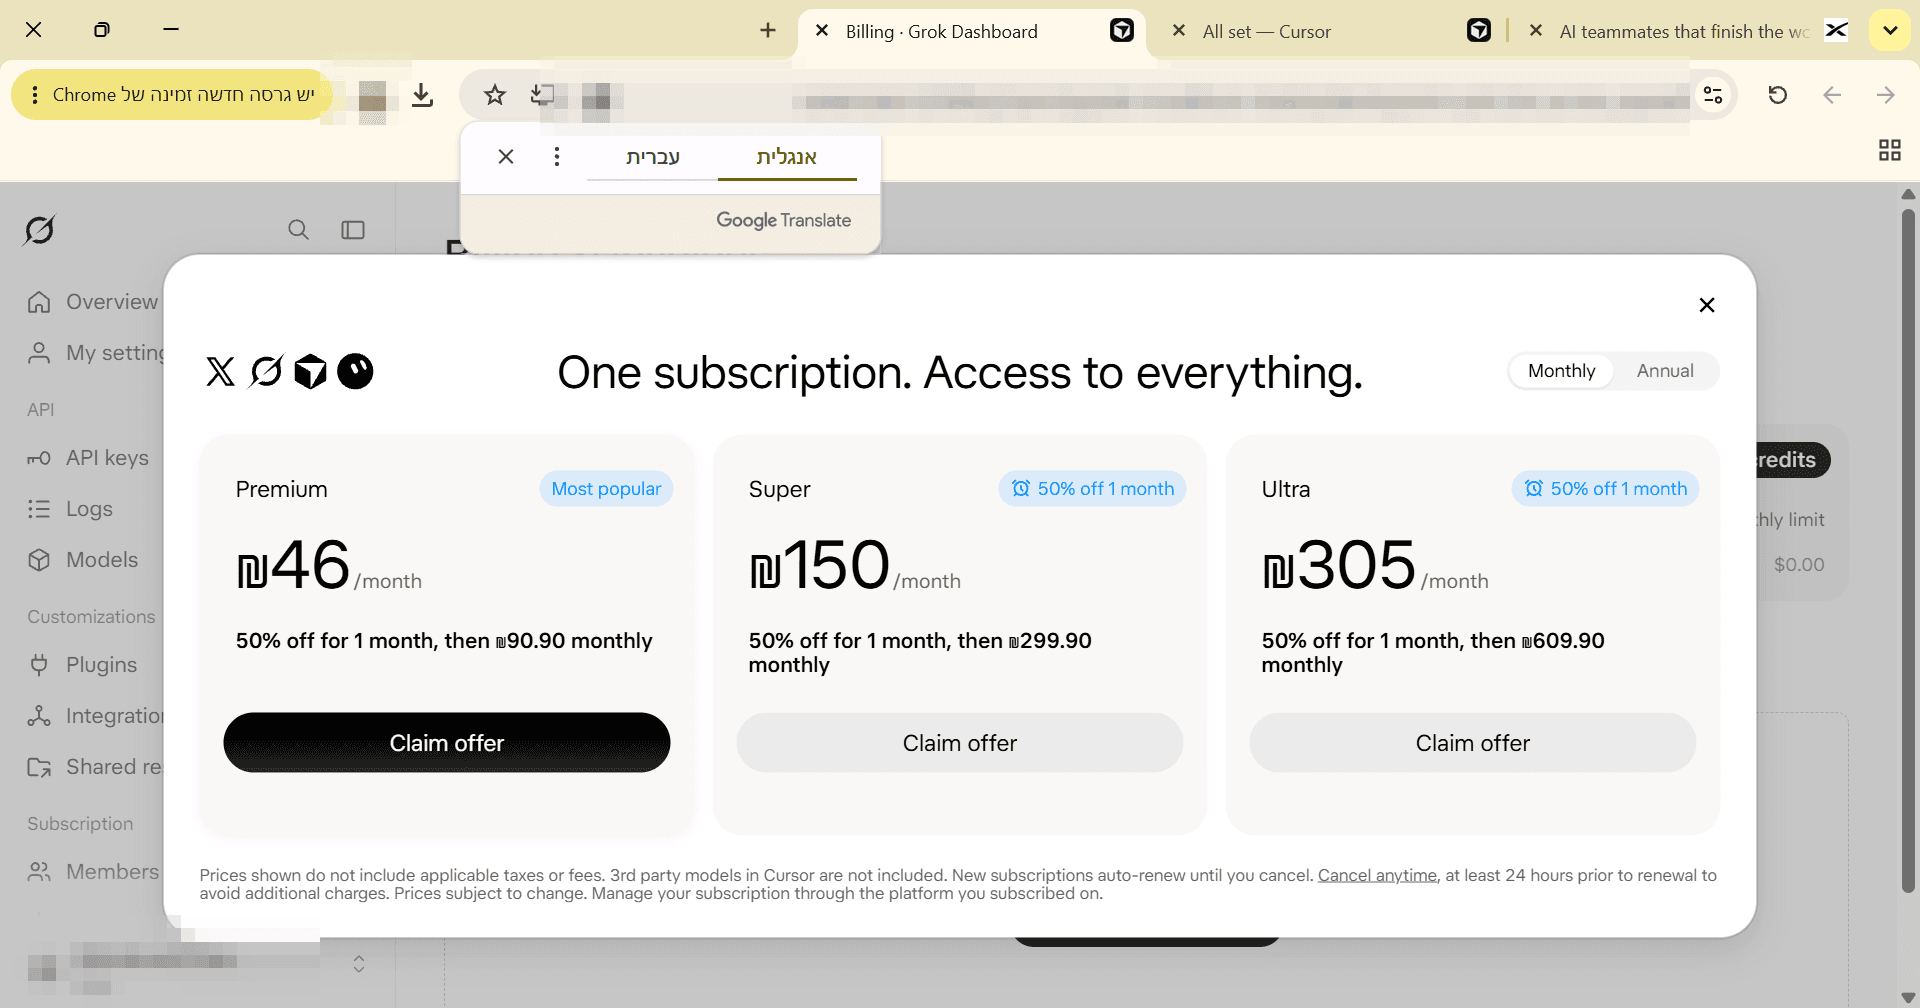
Plans and prices screen Pay
The payment screen was not captured. Enter payment details only on the official Cursor or xAI site, and never on any other page. After payment, the The Ultimate AI Subscription screen appears with a Continue button. Click it.
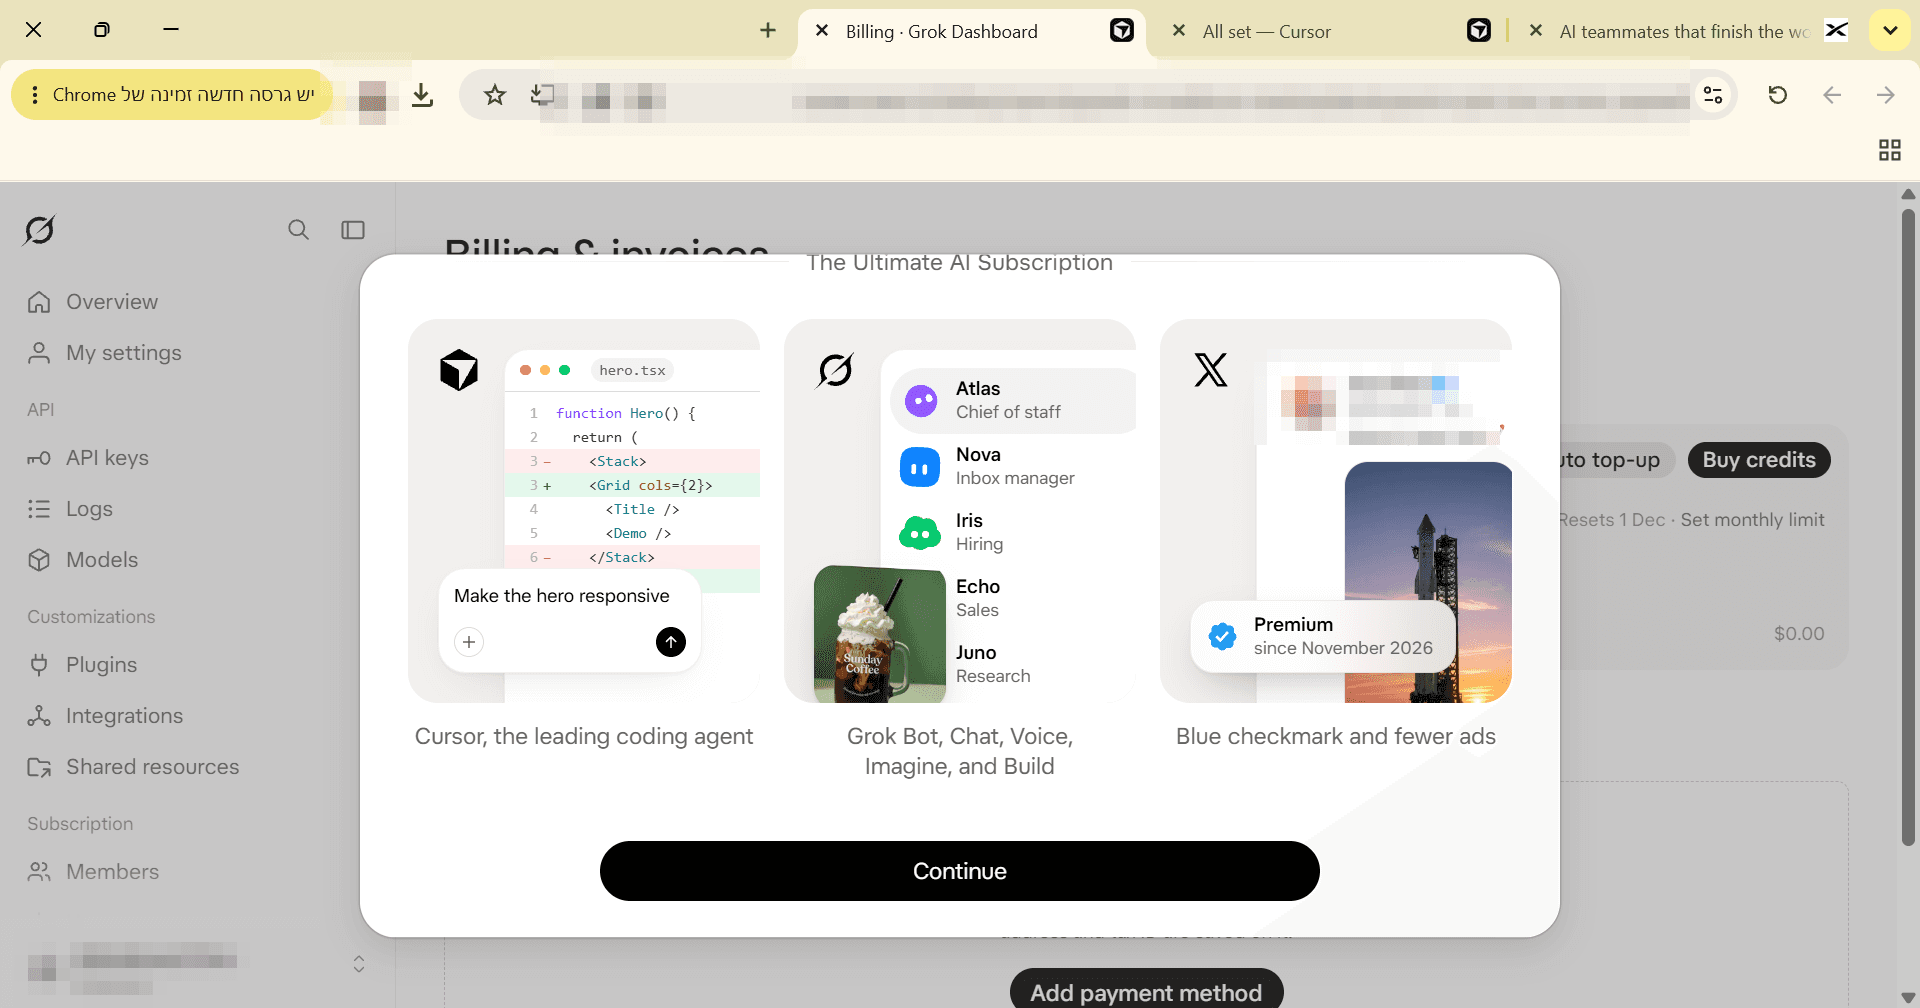
"The subscription" screen after payment
The First Introduction Screens
Open the Introduction
The app shows a Meet Grok Bot screen with a line of text and a Next button. Type a name or nickname and click Next. What exactly the screen asks for was not documented, and we did not test whether the field is required.
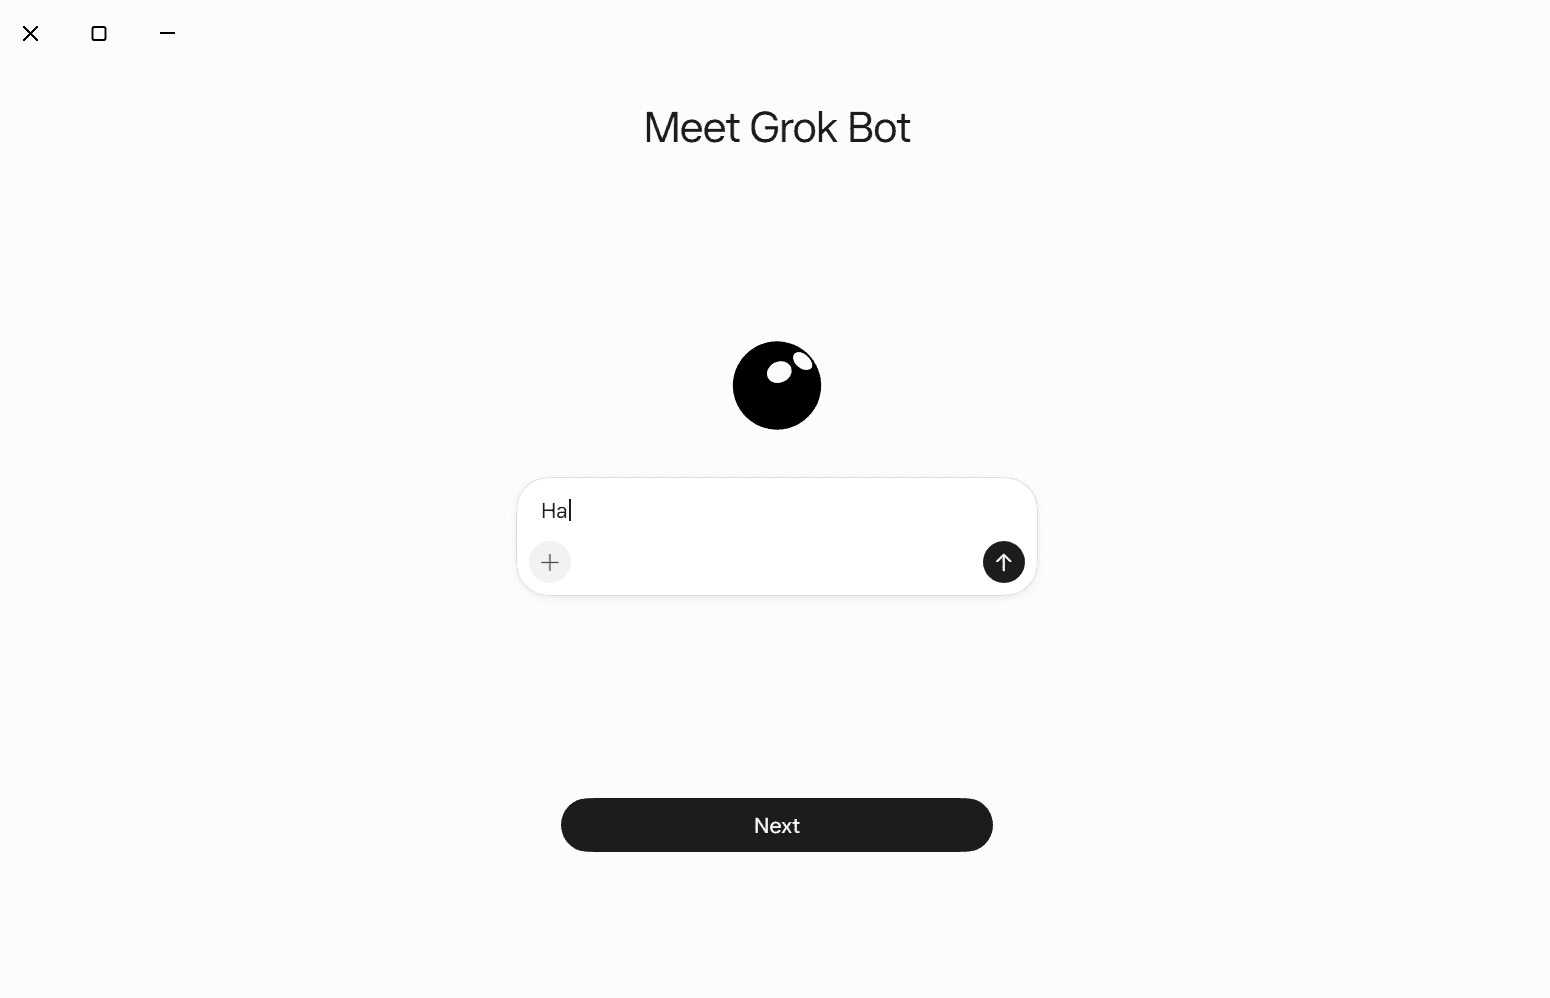
Meet Grok Bot screen Go Through the Explainer Screens
Two explainer screens appear: Grok Bot has its own computer and works just like you (the bot has its own computer), and Give each Bot a job (give each bot a role). On both, click Next. If you get confused, there is a Back button.
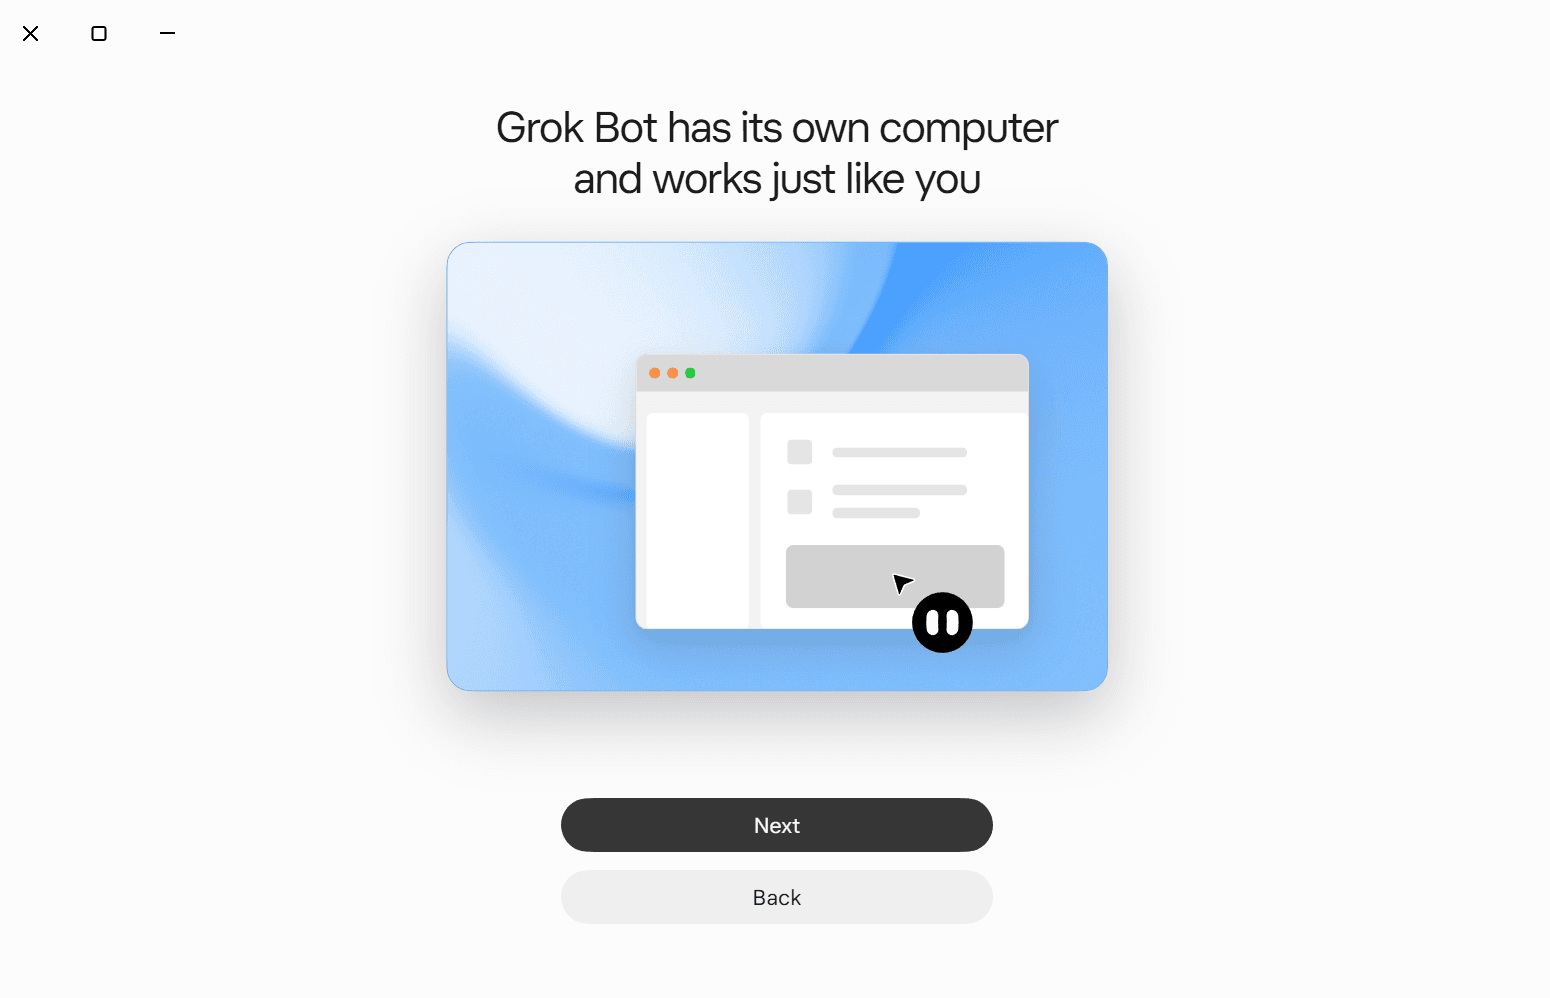
Screen "It has its own computer" 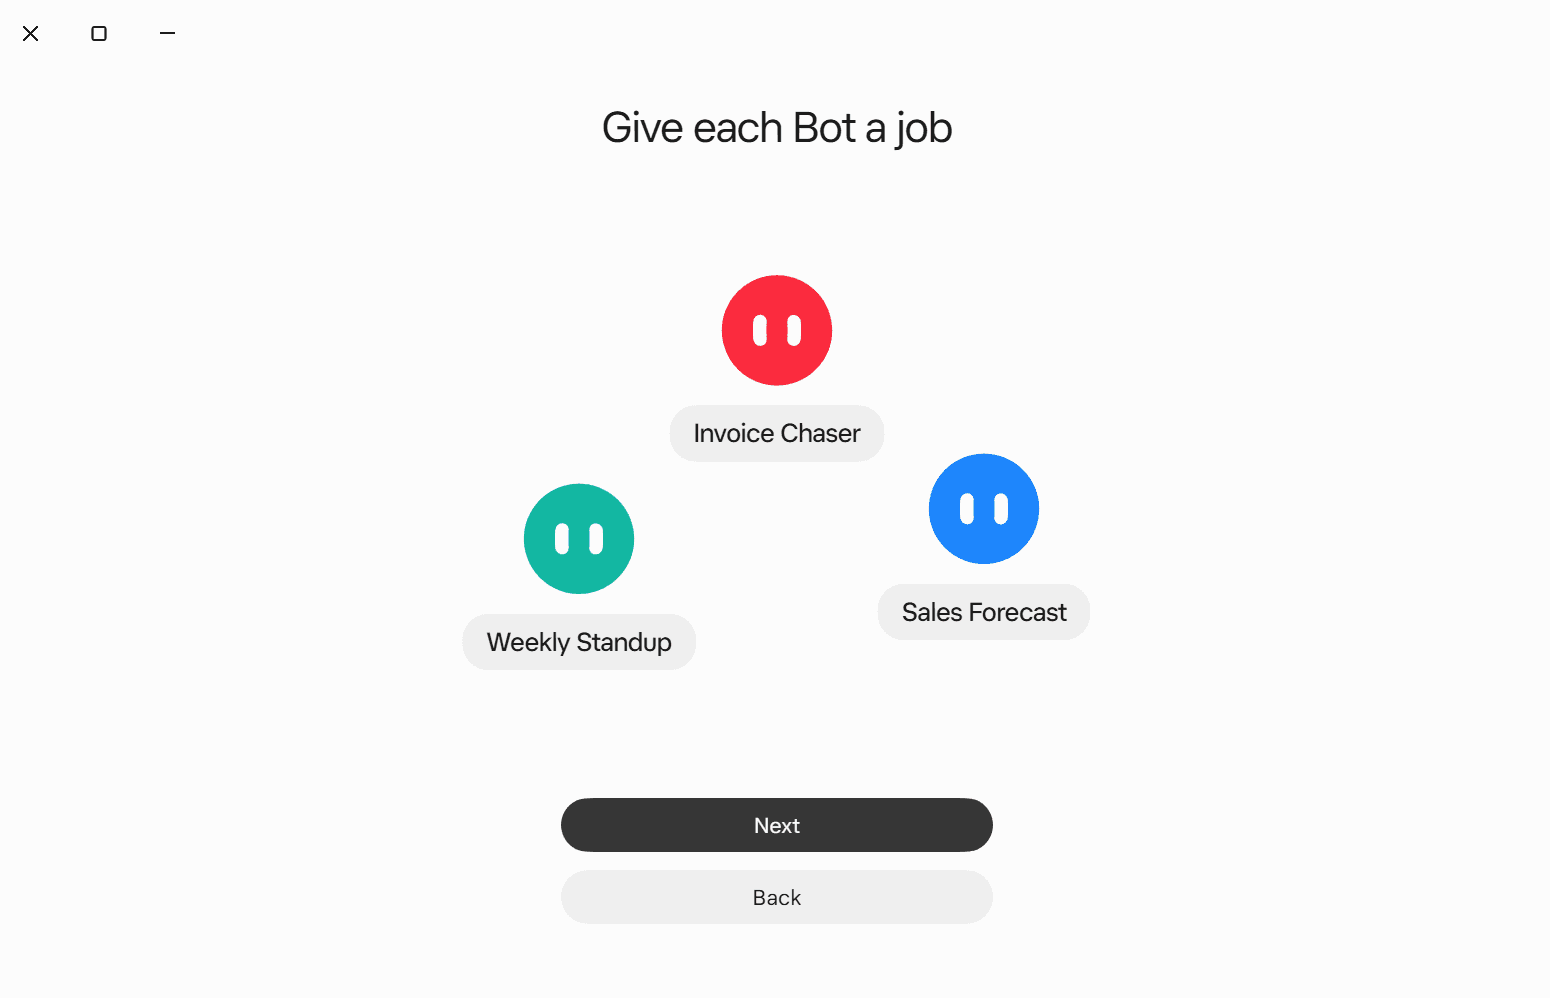
Screen "Give each bot a job" You Can Skip the Marketing Question
The How did you first hear about Grok Bot? screen is a survey. Click Skip if you do not want to answer.
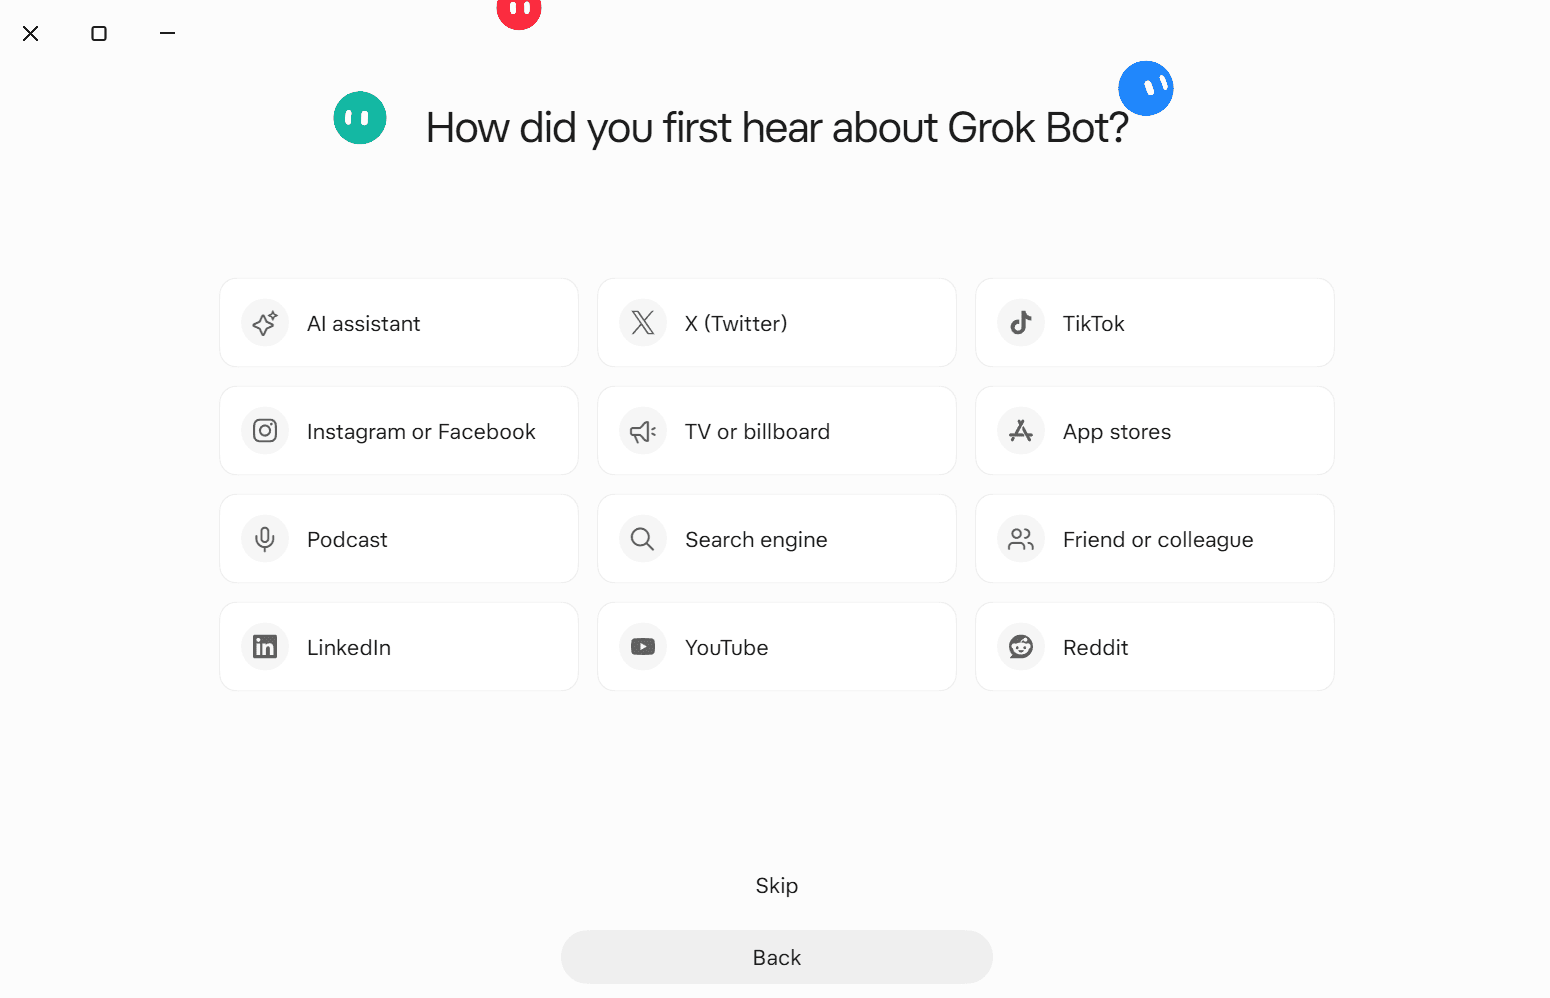
Screen "How did you hear about Grok Bot"
Connecting Gmail, Calendar, and Drive
This is the important decision in the setup: which access to give the bot. In our test we connected Gmail, Google Calendar, and Google Drive, all in a dedicated account. Connect only what the exercise needs.
Note before you connect: The bot will get access to your email, calendar, and files. Read the security card in part 5 first, and set an "Ask first" rule (step 25) before you connect Calendar and Drive.
Choose an App
The Connect your apps screen shows Gmail and Google Calendar with an Add button. Click Add next to Gmail. You can also choose Skip for now and connect later (part 6, stage 4).
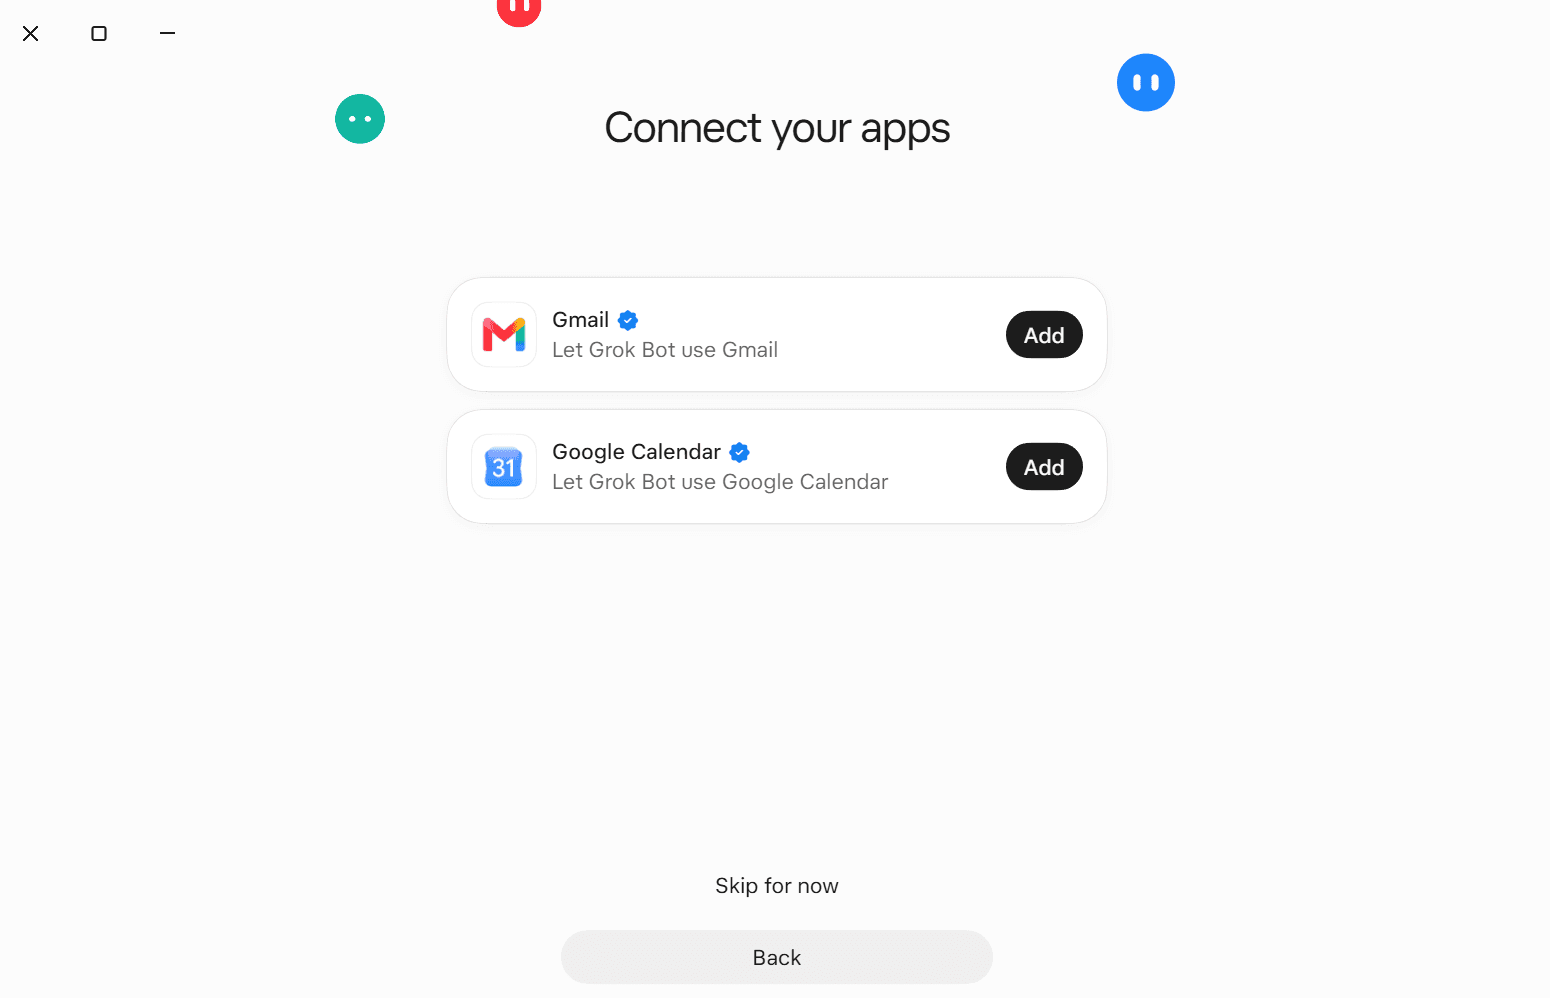
Connect your apps screen Read What the Connection Says
A Connect to Gmail window appears and says: Grok Bot does not see your password; you decide what it is allowed to do; you can remove the connection at any time. Click Continue.
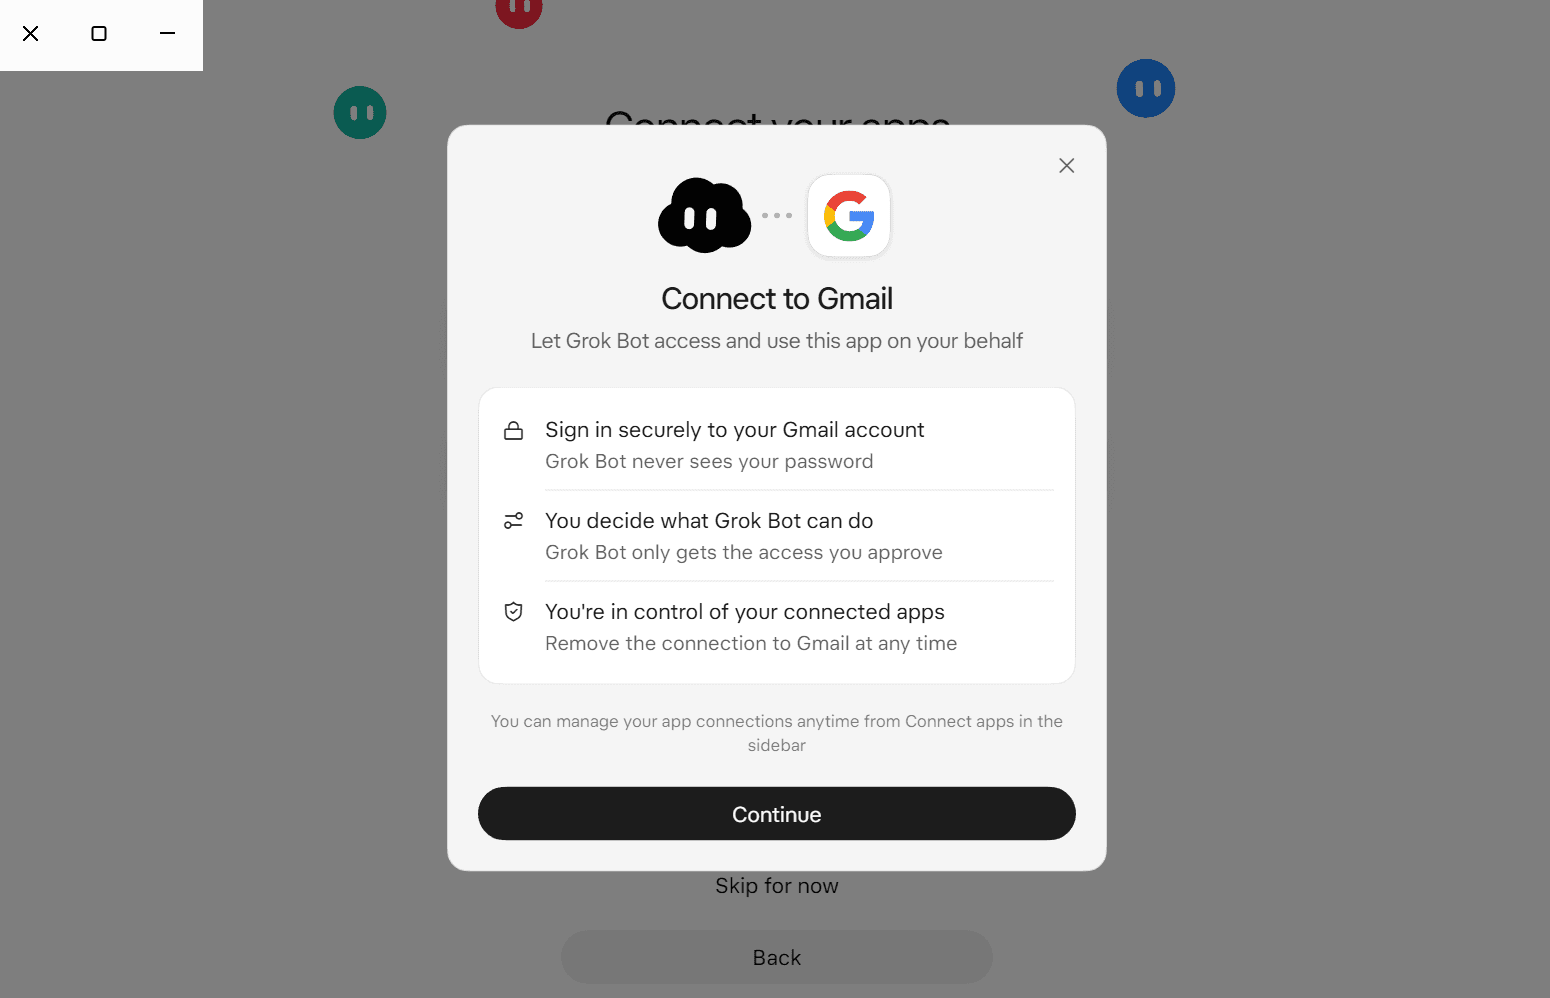
Connect to Gmail window Choose a Google Account
A Google page opens (in Hebrew in our test), Choose an account, with the app name Grok. Choose the dedicated account. If your account does not appear, click Use another account.
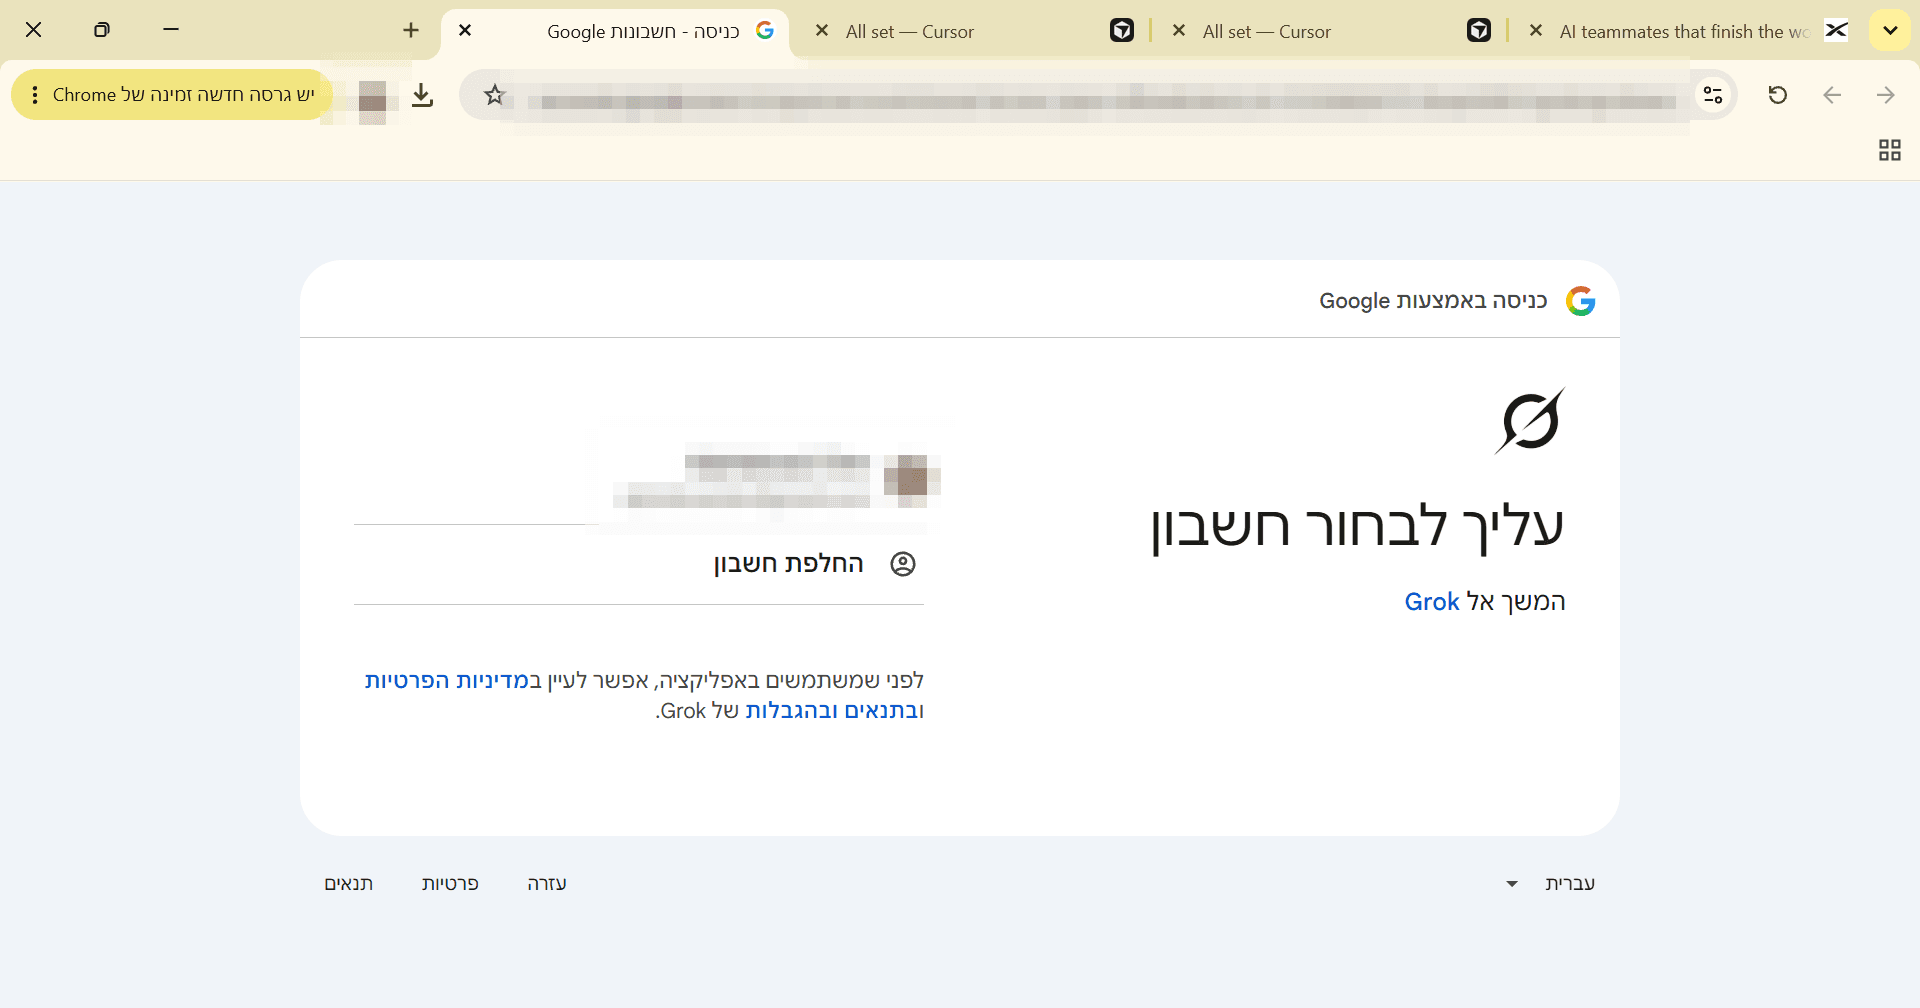
Google account selection Approve Permissions in Google
Two Google permission screens appear (in Hebrew in our test). The first, Sign in to Grok, says that Google will give Grok access to your email address, with the buttons Continue and Cancel. The second, The Grok app wants access to your Google Account, states that the app already has access to certain features and has partial access to 7 services, and again shows Continue and Cancel. Neither screen showed a detailed list of permissions, so what exactly was approved was not documented. Per the official documentation, Gmail gets access here to read and send emails. What to choose: Click Continue only in the dedicated account, after you have read the security card in part 5. If the page asks for something that does not fit the exercise, click Cancel. You can disconnect later at grok.com/dashboard › Customizations › Plugins.
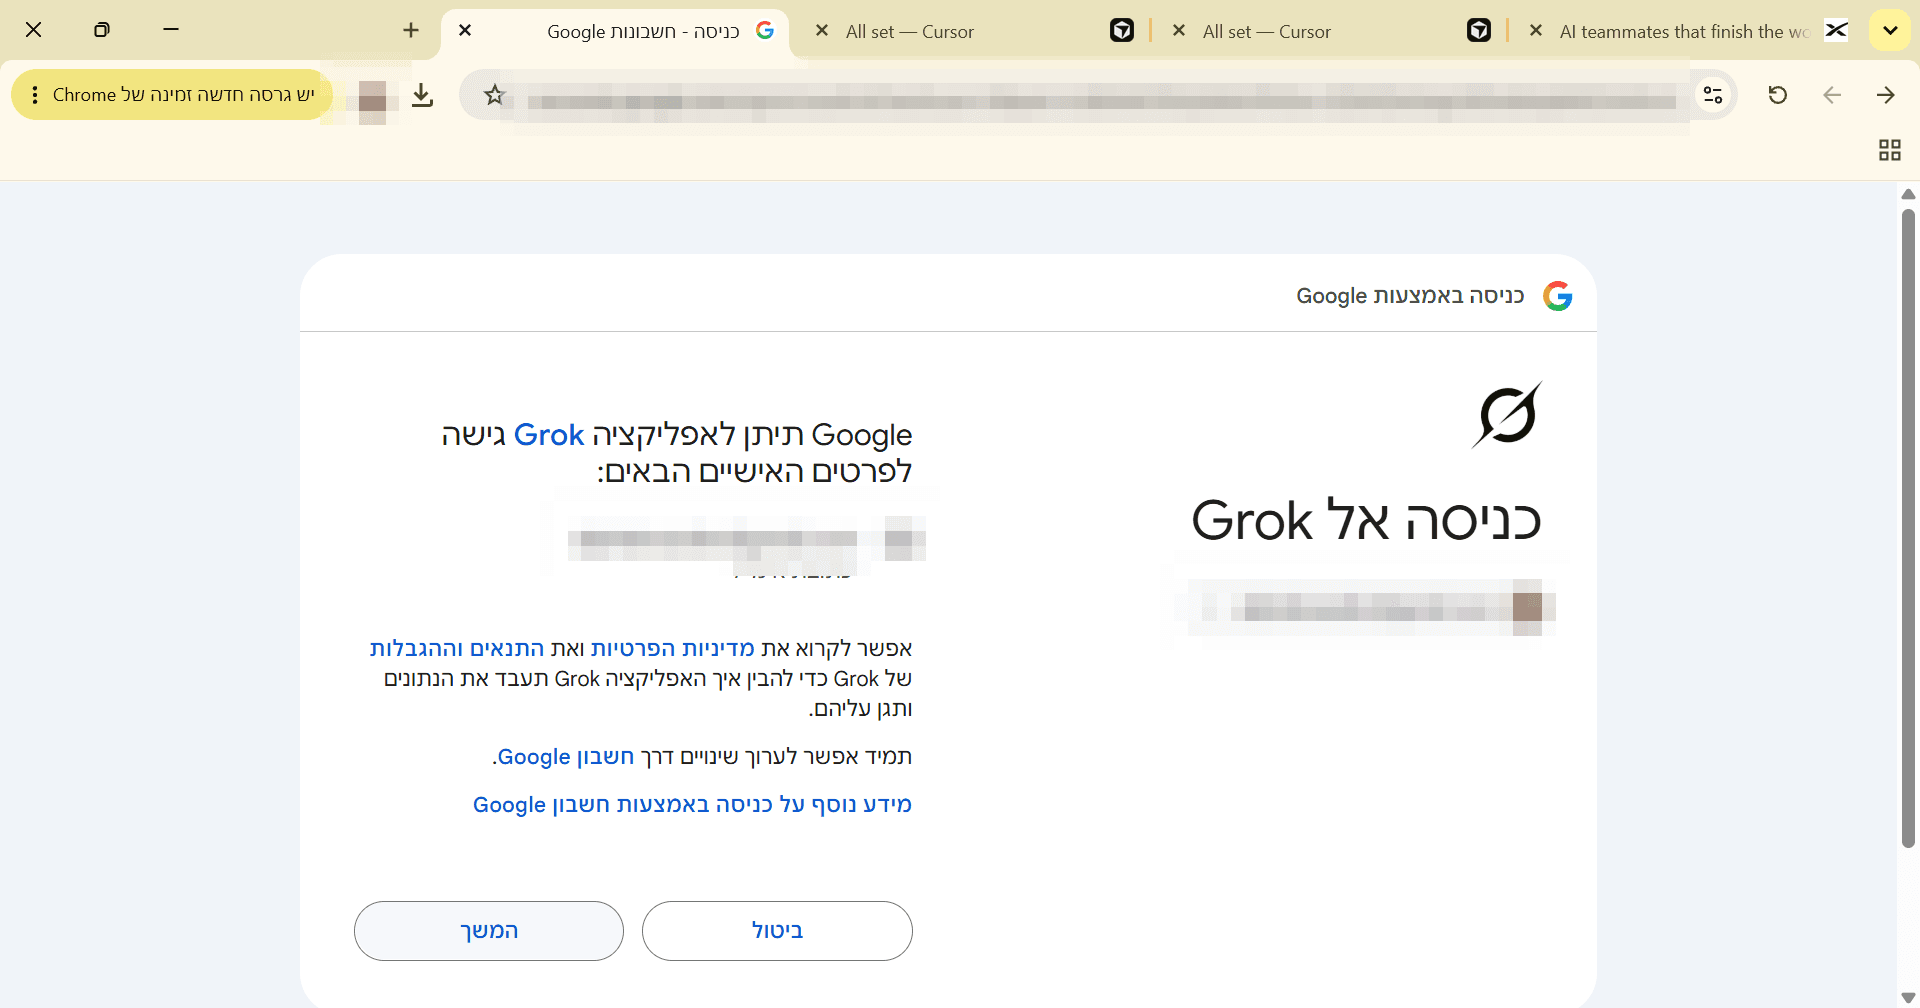
Permissions screen 1 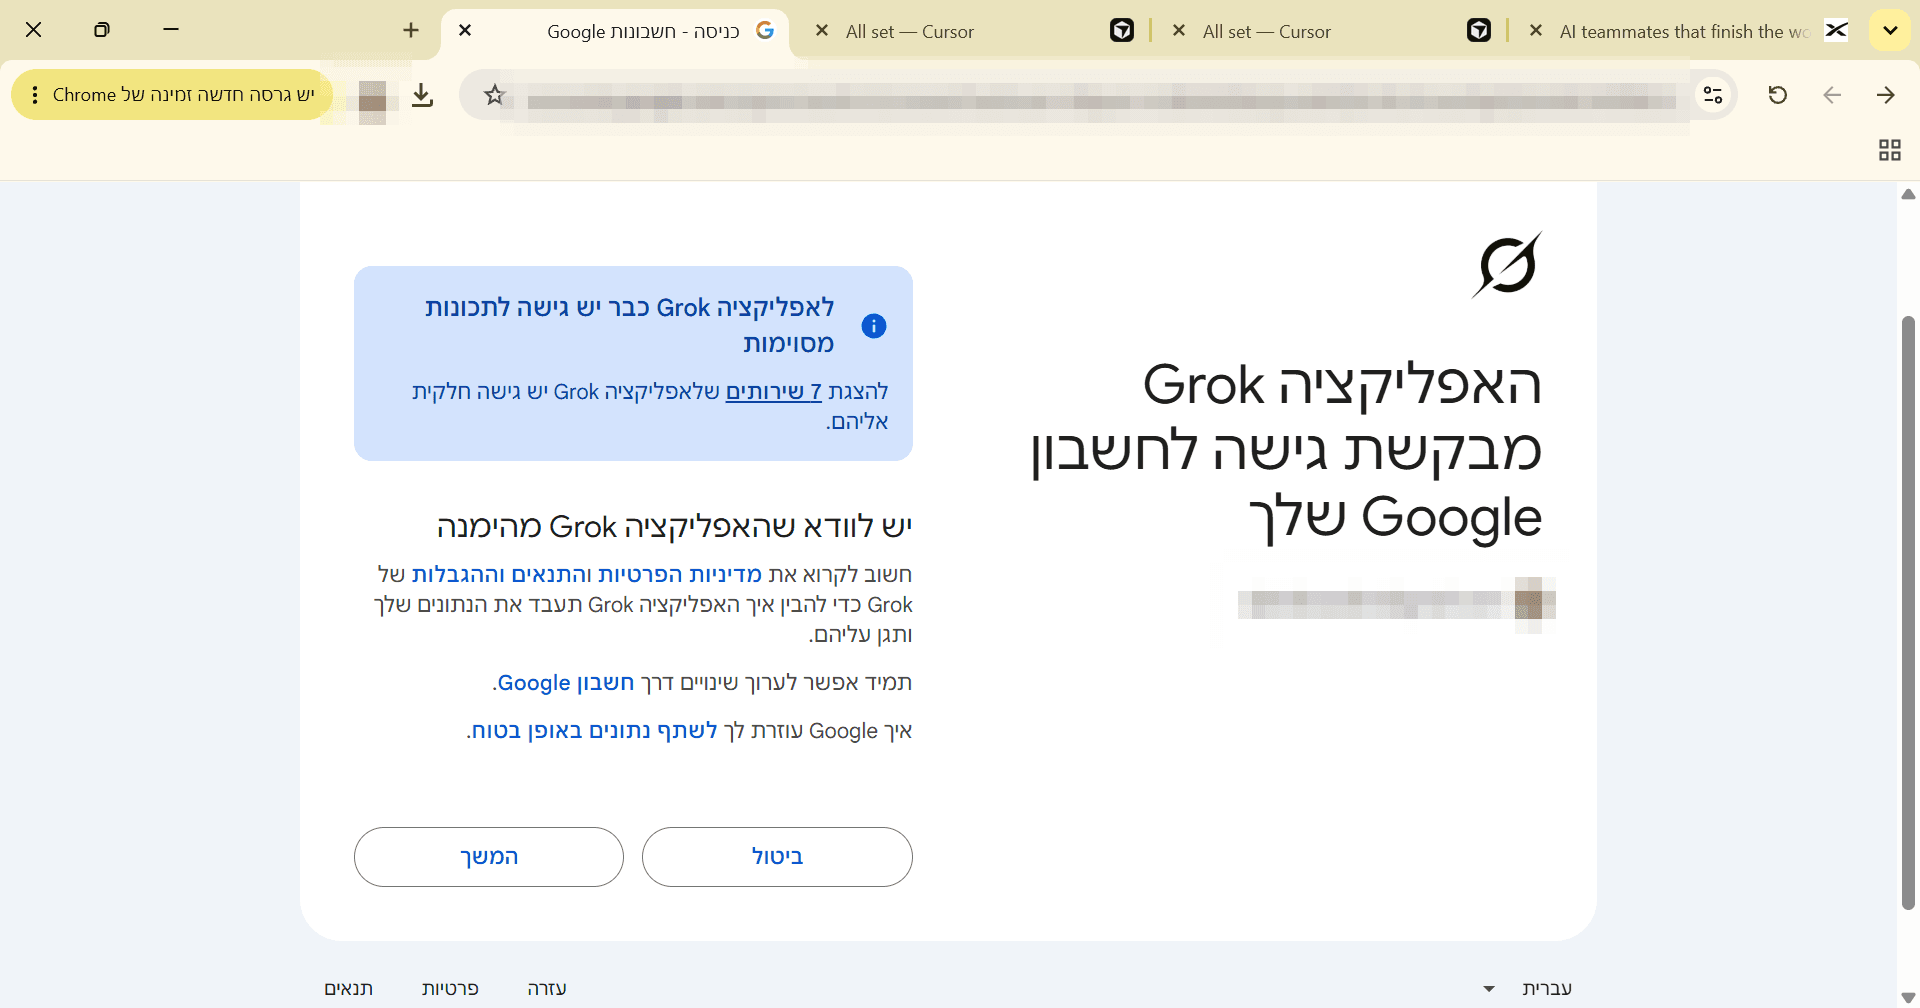
Permissions screen 2 Return to the App
On the Authorization complete! You can close this tab page, click Return to Grok Bot. The browser may ask whether to open the app; if so, click the button to open Grok Bot. The address on the page is localhost, and that is normal (the connection returns to your computer).
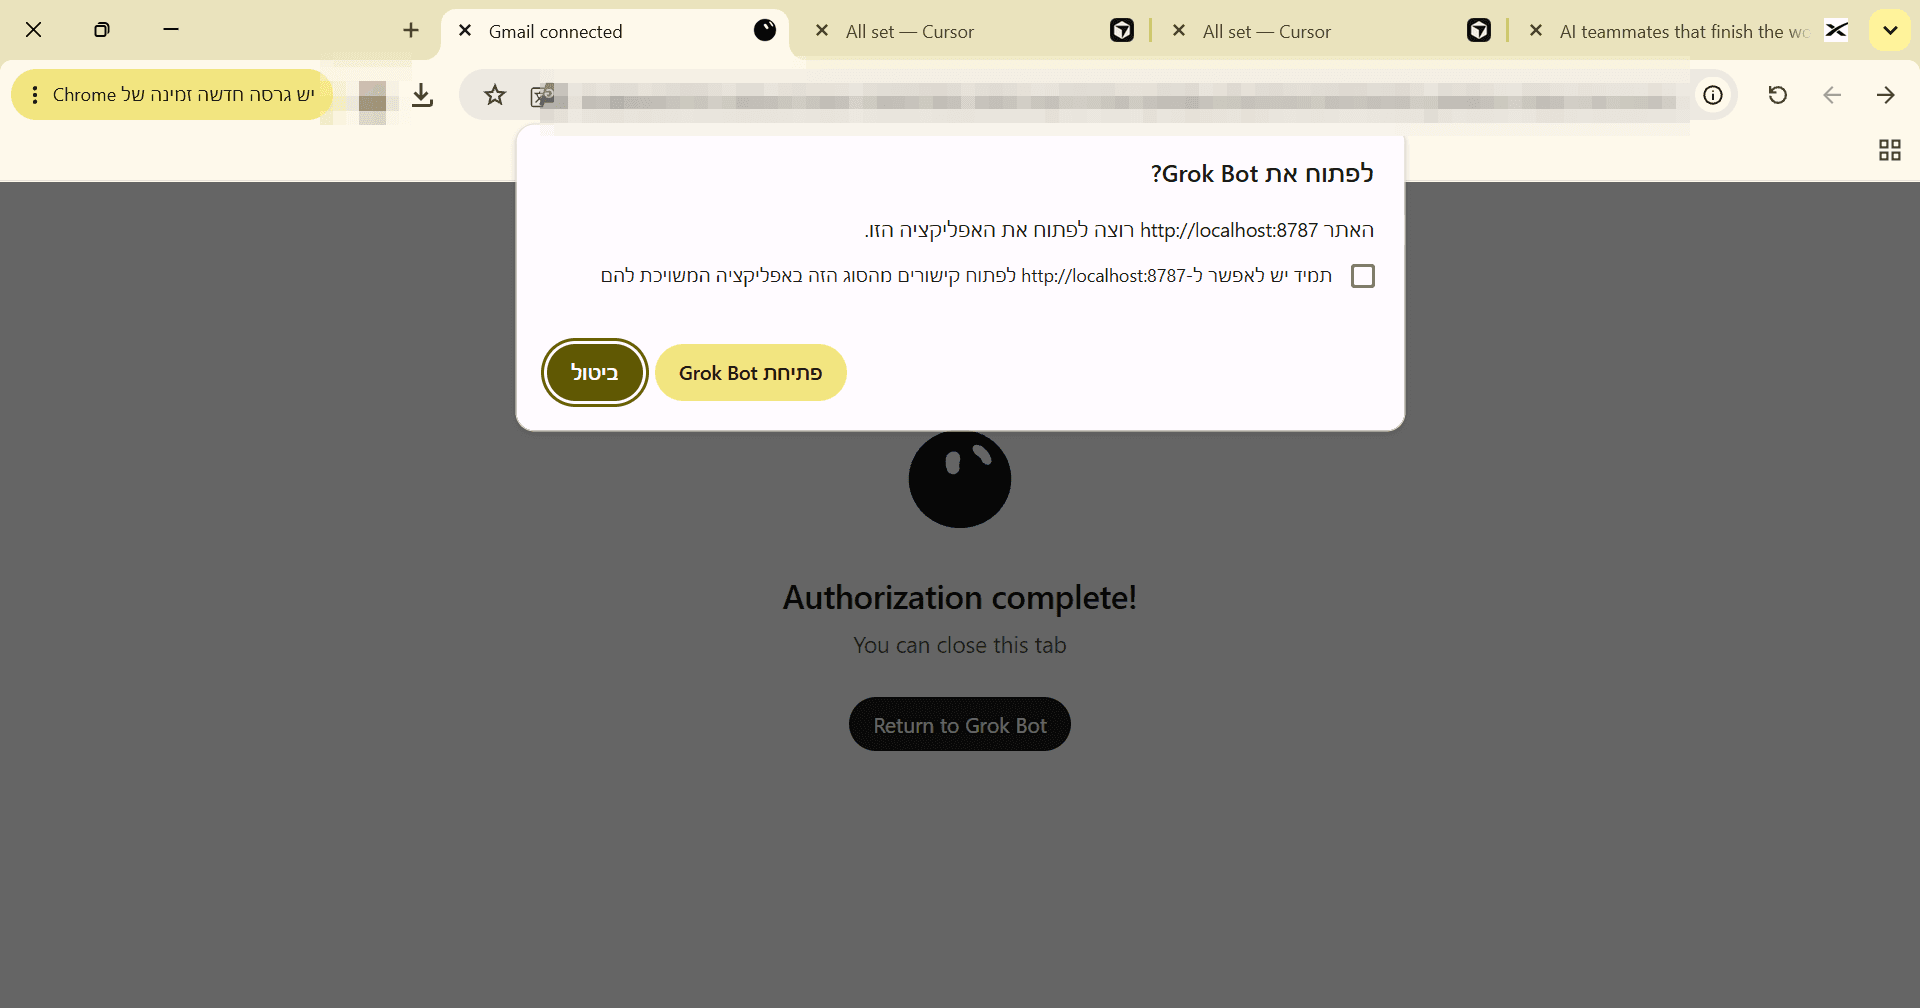
App opening dialog after authorization 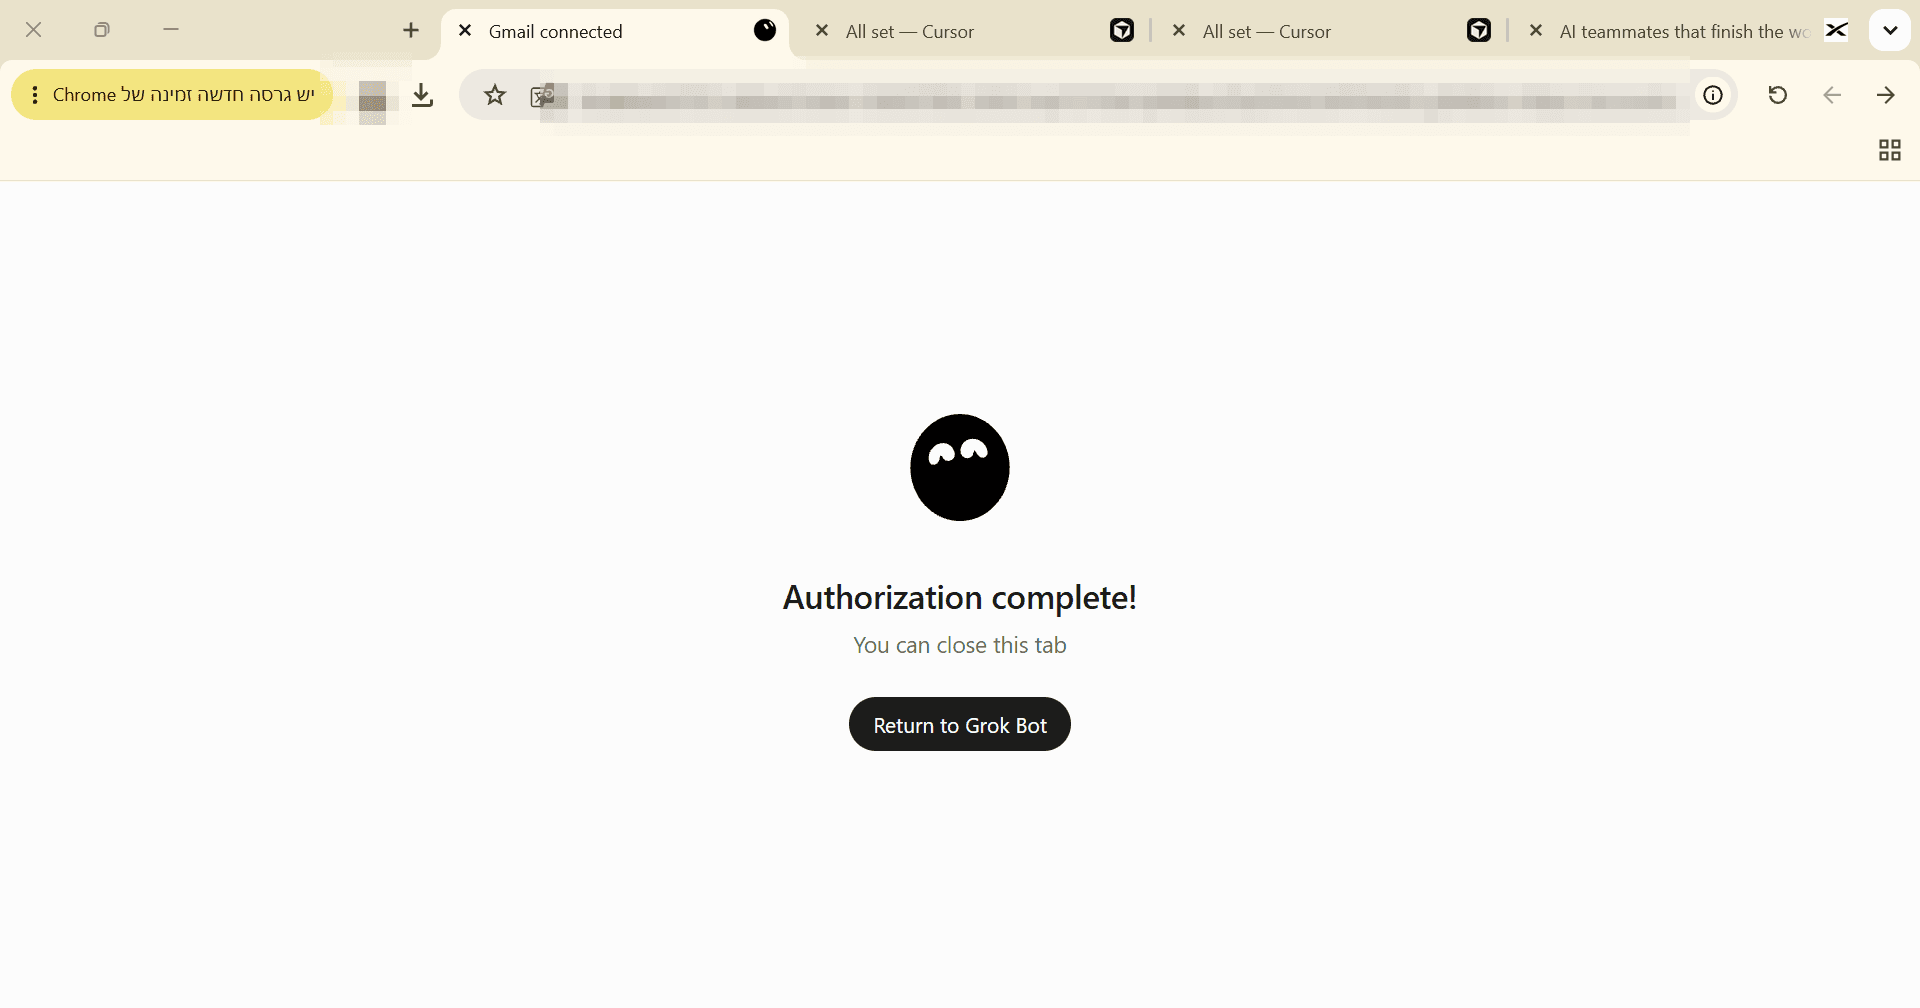
Authorization complete screen Choose a Name for the Bot
In the chat, the bot opens with: What would you like to call me? You can always change this later. with four options: Lumi, Bean, Grok Bot, and Something else. You can also type a name in Hebrew in the input line. In our test we typed a name in Hebrew and the bot switched to Hebrew.
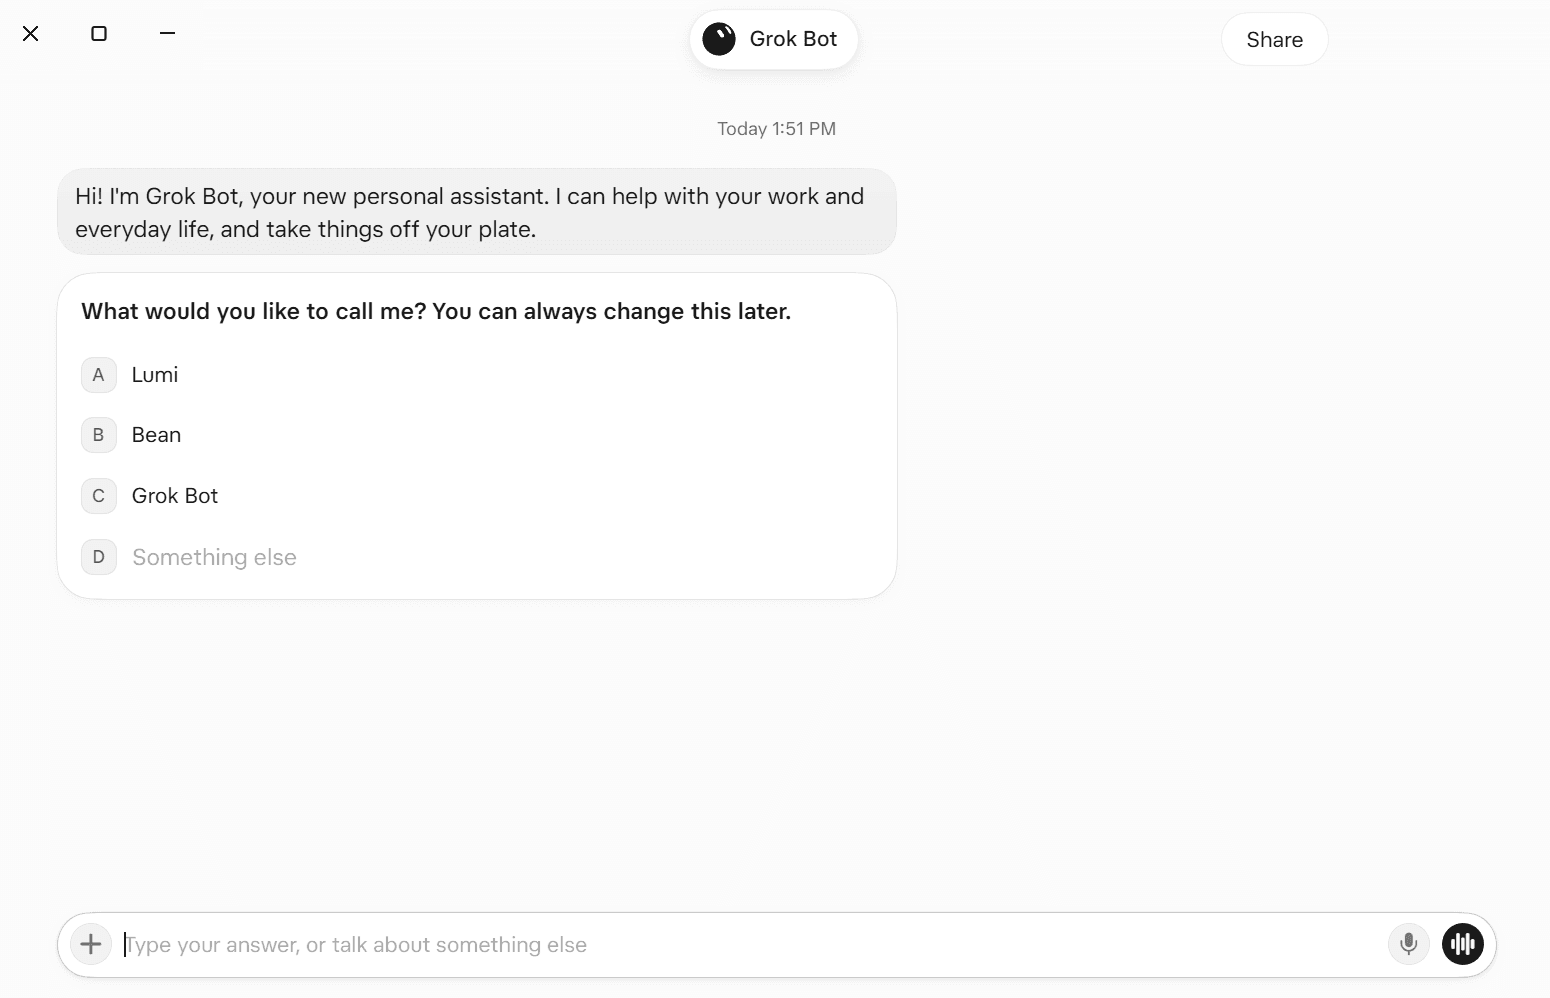
The name question 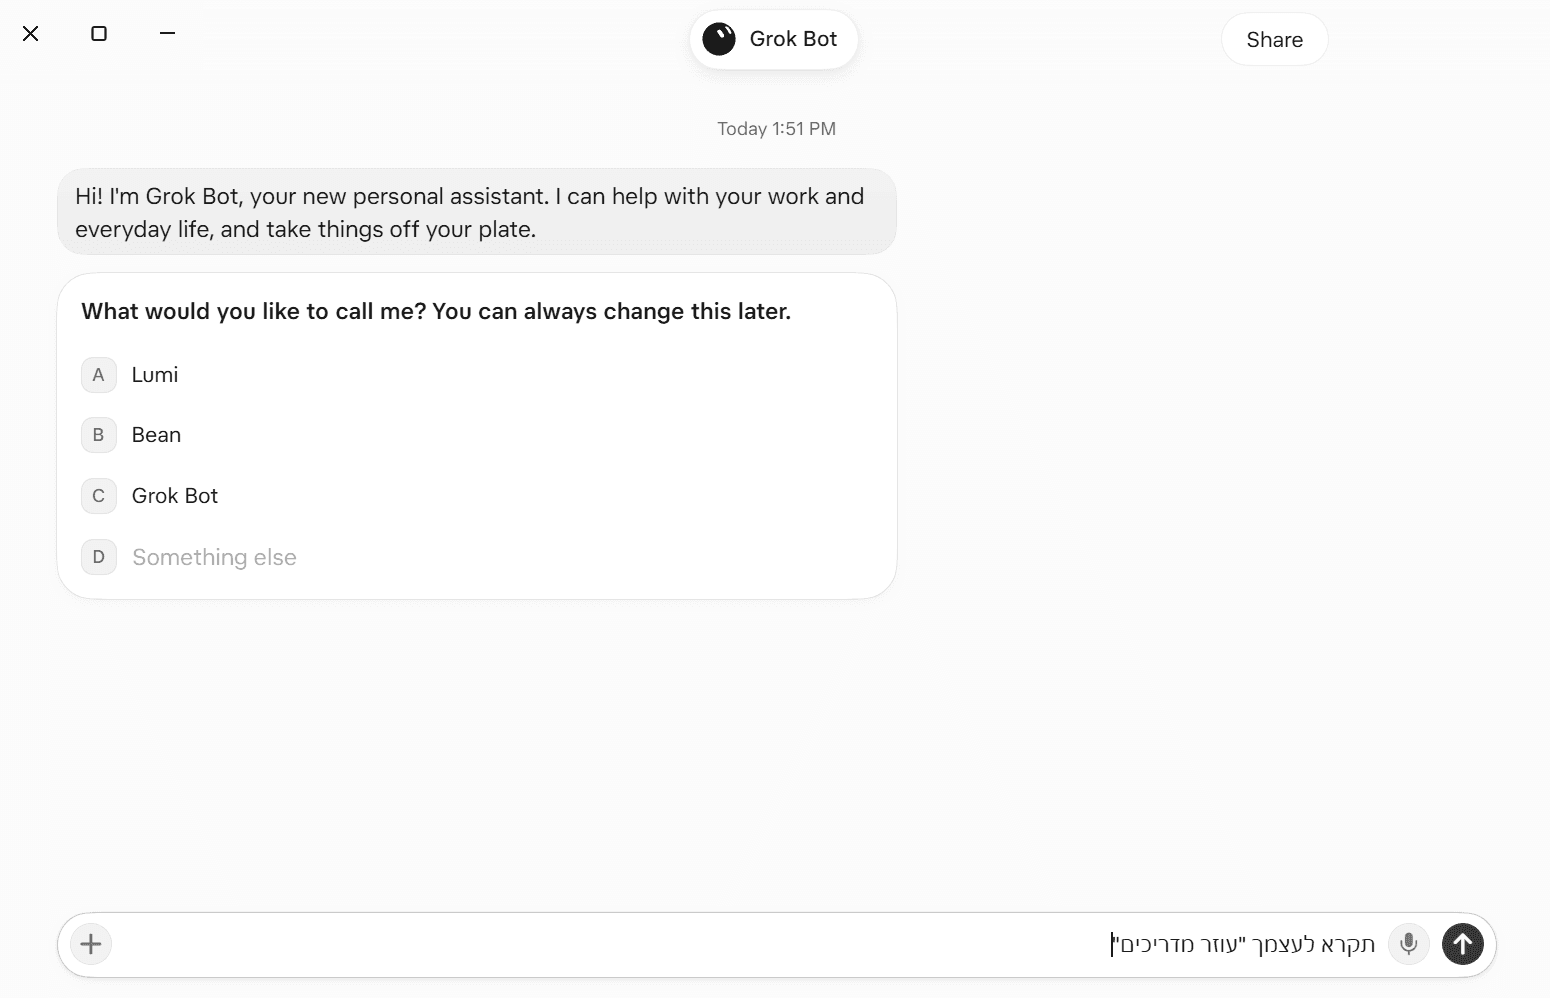
Typing a name in Hebrew Set an Ask first Rule Before Calendar and Drive
Before you connect more access, send the bot an "Ask first" rule in the chat. The ready-made prompt is in part 5, in the section How to Add an Ask first Rule. This prompt was not sent in our test, so it is not verified that the bot saves it or that it stops a calendar event from being created or a file from being saved to Drive. It is a suggestion to try and verify. Send it, then ask the bot: "Which rules do you have saved?". The rule should appear in the list. If it does not, send it again. After you connect Calendar, test with an unimportant event in the test account (in the section How to Add an Ask first Rule in part 5). No screenshot for this step. If you connect only Gmail for the exercise, you can skip the next two connections.
Connect Calendar and Drive
Later in the introduction, the bot helps you connect more apps. We connected Google Calendar and Google Drive in the dedicated account, the same way as Gmail (steps 19-23). Which screens appeared in these two connections, what Google's permission screens showed, and what was chosen in them was not documented, and there is no screenshot. What is known: at the end, all three connections appeared as Connected. Per the official documentation, Calendar gives the bot access to the calendar, and Drive (and also Docs and Sheets) gives edit permission on files. What to do: Connect only what you need (Drive is needed in parts 6.5 and 6.8, Calendar in 6.8 a). On every Google permission screen, read what is requested, and click Continue only in the dedicated account. If it asks for more than the exercise needs, click Cancel. If you skipped this, you can connect later: the squares icon in the bots sidebar › Connect Apps. Note: creating a calendar event and saving to Drive went through without an approval card in our test.
After the Installation
Notice Origin
Origin also appeared in the list of connected apps, although we did not connect it. It is a developer plugin that you can ignore (part 5).
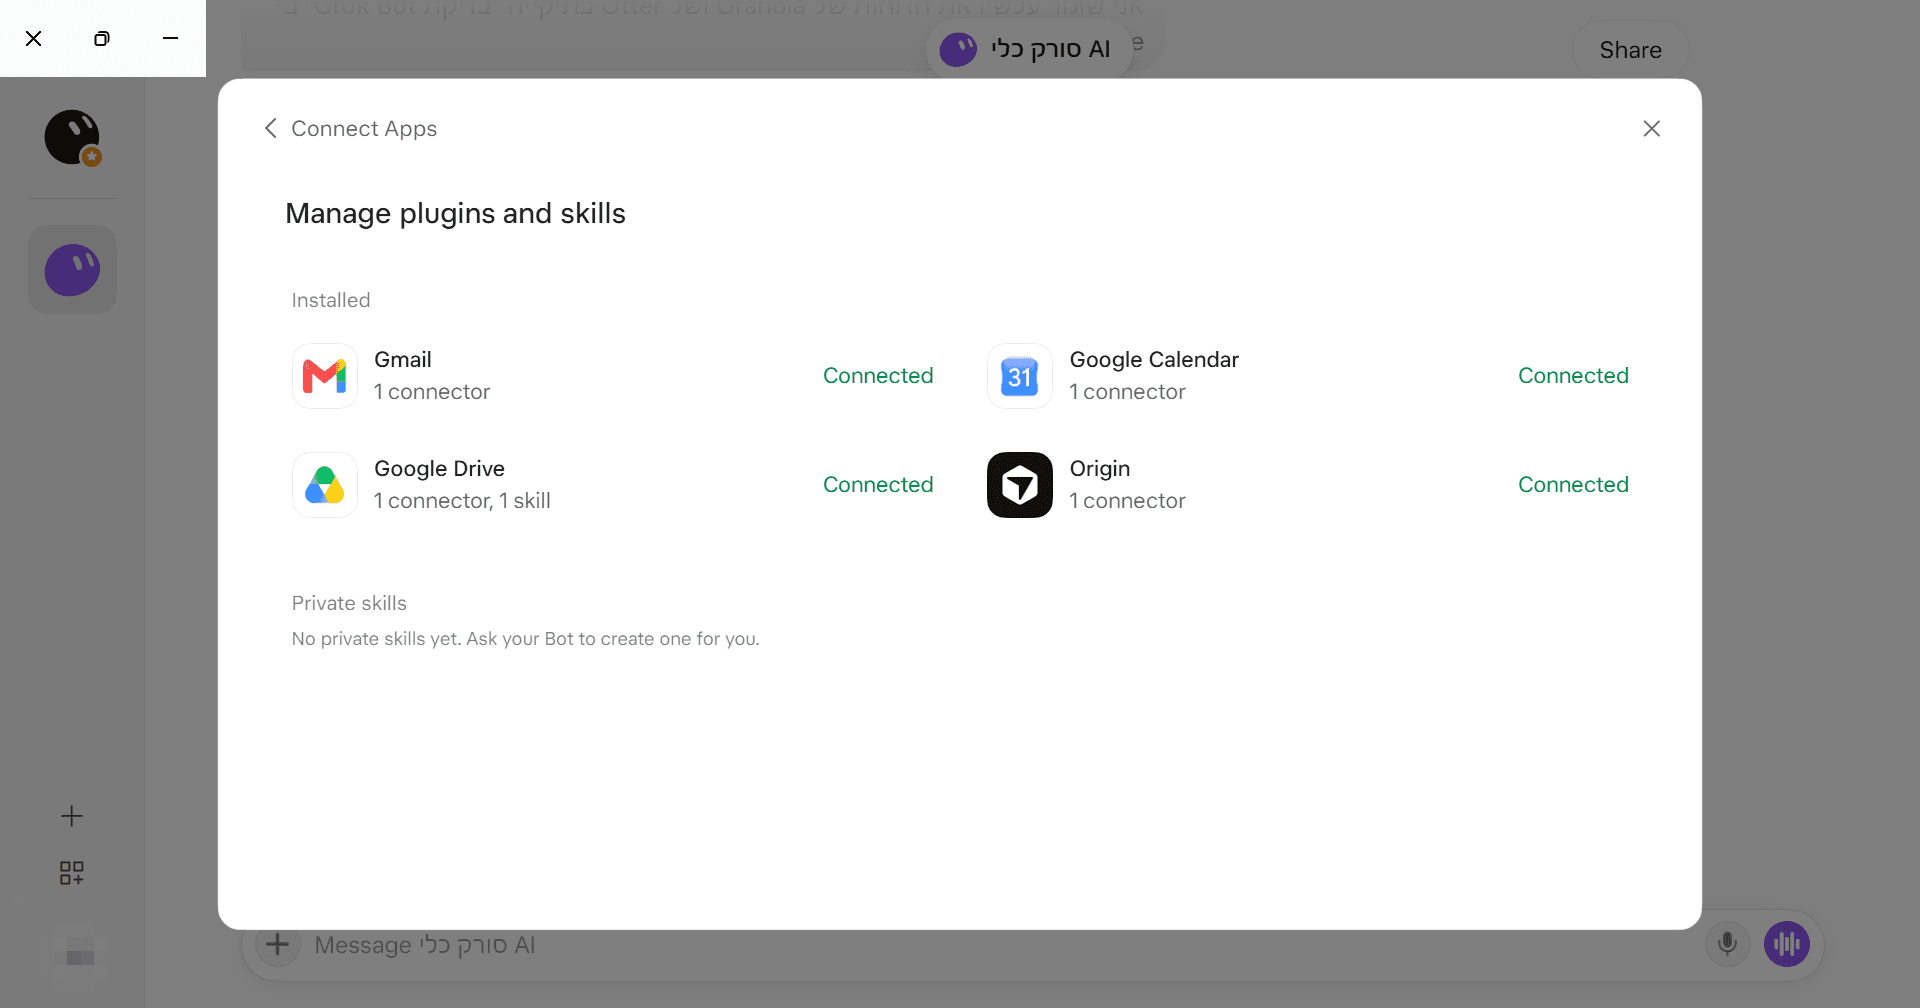
Origin in the list of connected apps
4.2 iPhone
Install
On your phone, open x.ai/bot and tap Download (in the top right corner) and then iOS. According to the site, this item links to the App Store. iOS 18 or later is required (per the official FAQ, checked: 2026-11-15). In our test, the installation was done from this link. The app name in the store, the button that was tapped, and the store screen were not documented. The app name in the store is not verified: the link appears to lead to the general Grok app, so do not rely on a specific name. In the store, before you install, make sure the publisher is xAI, SpaceXAI, or Cursor, and do not install any other app. No screenshot for this step.
Sign In
Open the app and sign in with the same sign-in method and the same account you used on the computer (in our test: Google, a dedicated account). After you sign in, the conversation from the computer appears on the phone in full. If it does not appear, check that you signed in with the same account. The sign-in screen on the phone, and which sign-in buttons it shows, were not documented. No screenshot for this step.
Turn On Notifications
On our device, notifications were off, so no notification arrived for an approval card. On an iPhone, open Settings › Notifications › [app name] › Allow Notifications. This is the general iOS path and was not tested hands-on, and the app's name in the list was not documented. We also did not document whether the app asked for notification permission on first launch. If it asked, choose Allow. Without notifications, you will not know the bot is waiting for you. No screenshot for this step.
Check That the Card Arrives
On the computer, ask the bot to send an email to yourself (Part 6.8 b). A Mail card marked Approval required should appear on the phone. In our test the card did appear (see Part 6.8), but we did not document whether a notification arrived after notifications were turned on. No screenshot for this step.
App Interface
On the phone it is in Hebrew. No screenshot for this step.
4.3 macOS, Linux, Android (per the official documentation, not tested)
Per the FAQ, the download is from x.ai/bot or from cursor.com/dashboard/bot. You need a Cursor account that is not in Legacy Privacy Mode. No step was carried out, and there are no screenshots.
4.4 Checking That Everything Works
At the end of the installation, run three short checks. This way you will know the bot is connected and responding before any real documents come into the picture.
Send in the Chat
(the typing line at the bottom):
Write me three lines in Hebrew about what you can do for me in office work.
What should happen: an answer in Hebrew, right-aligned, with three points (in our test: reading emails, managing the calendar, and preparing documents in Drive). If there is no response, check the quota at grok.com/dashboard (Part 5).
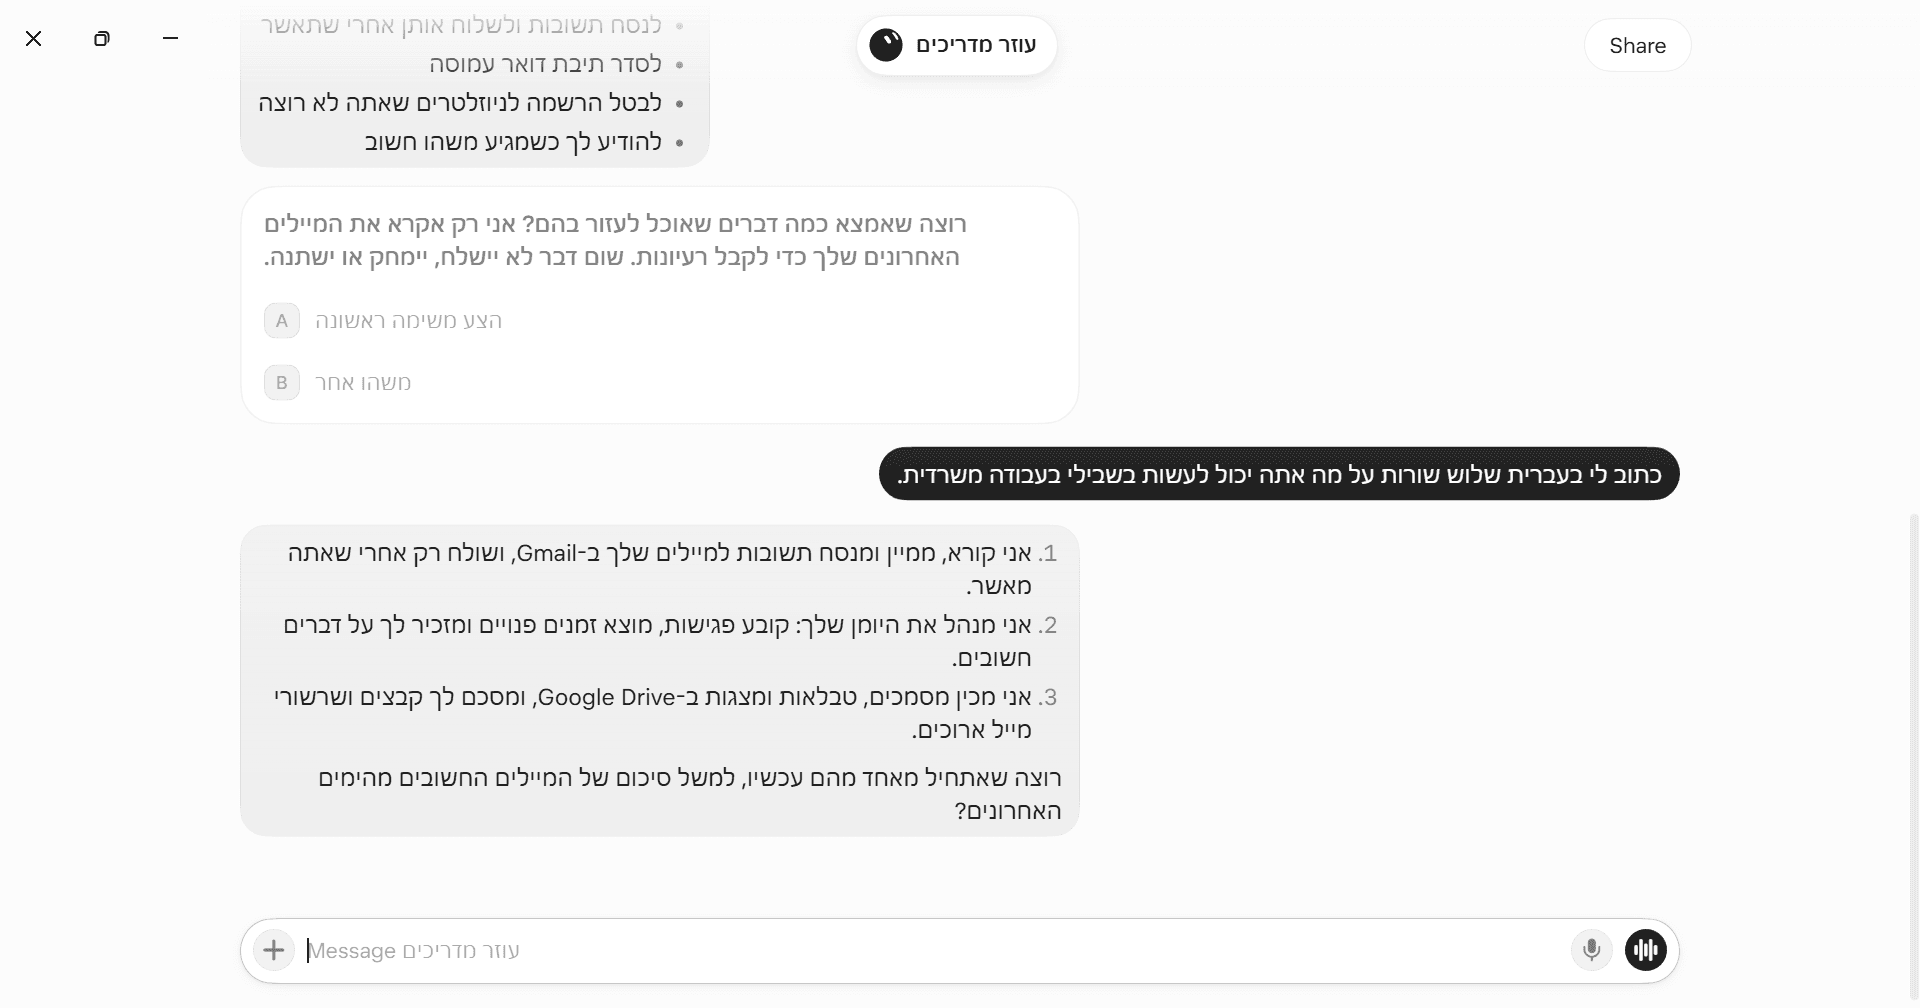
Check the Connections
Open grok.com/dashboard › Customizations › Plugins. You should see Gmail, Google Calendar, and Google Drive with a green dot.
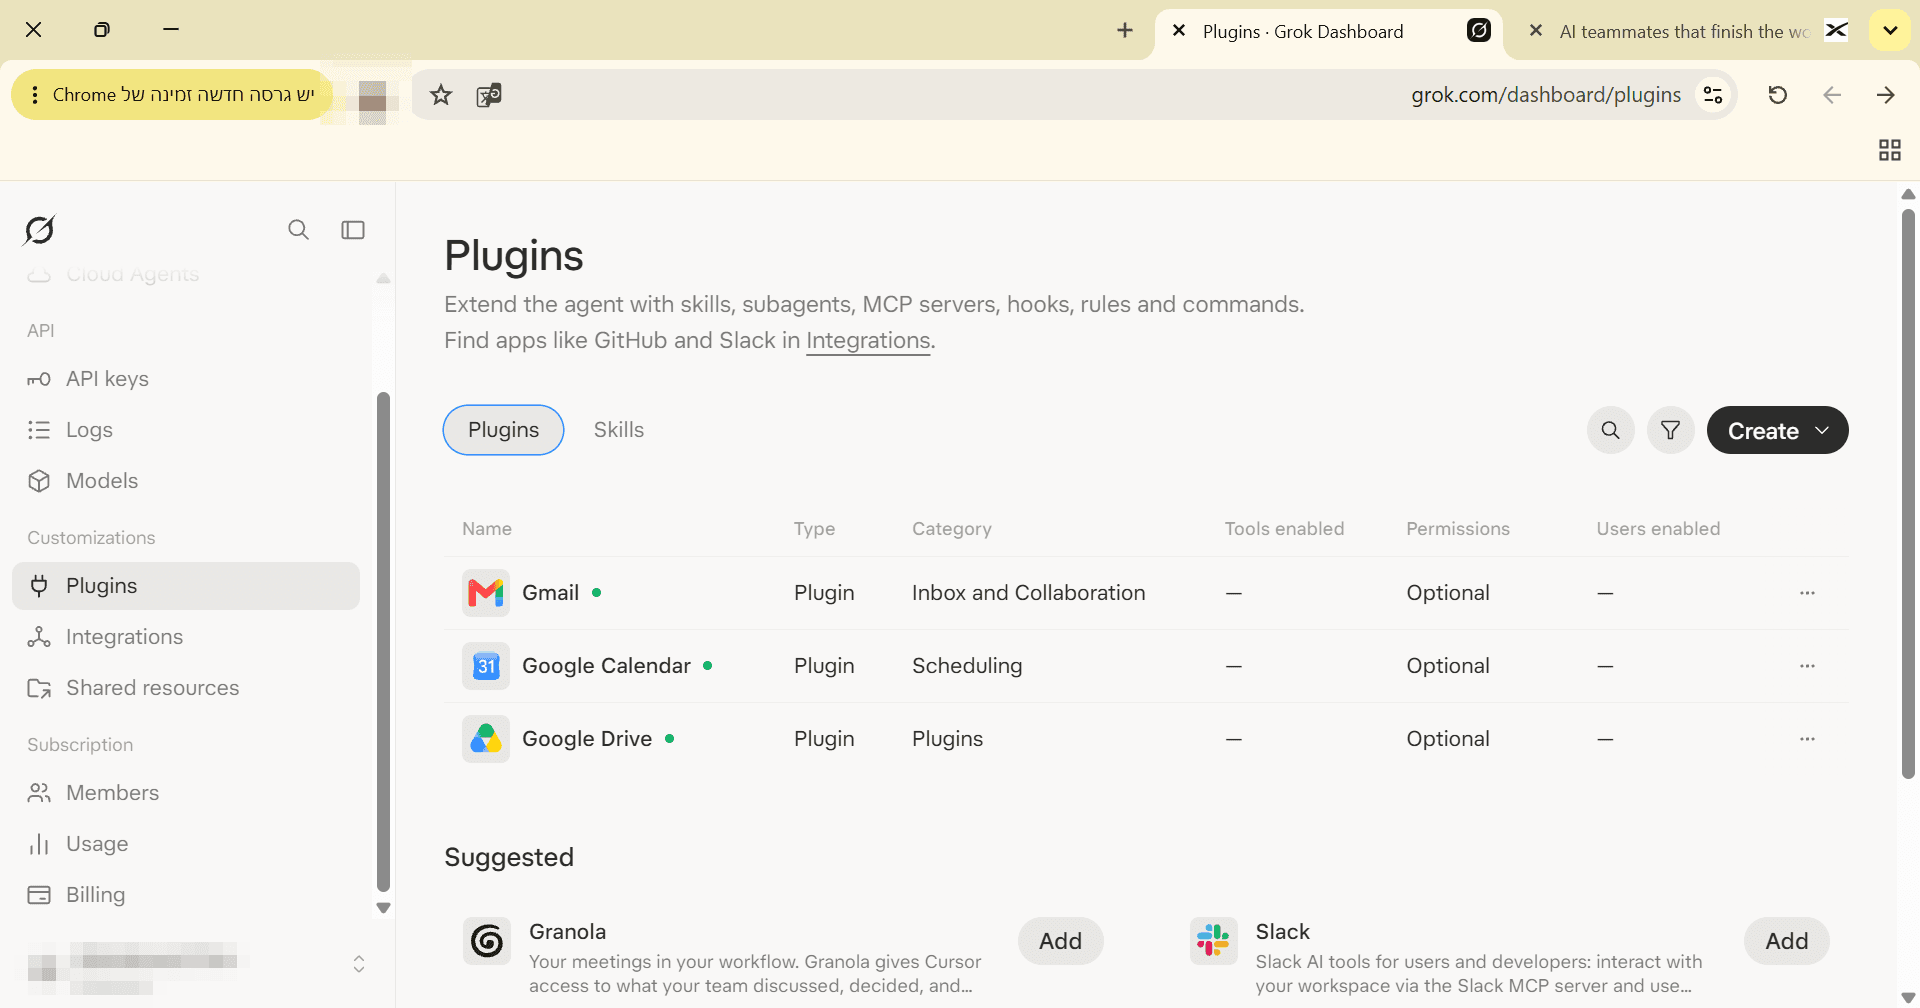
List of connected plugins Check Usage
On the same site, Subscription › Usage: after the installation and a first research task (3.7 million tokens), we saw 1% used and $0.00 in extra usage.
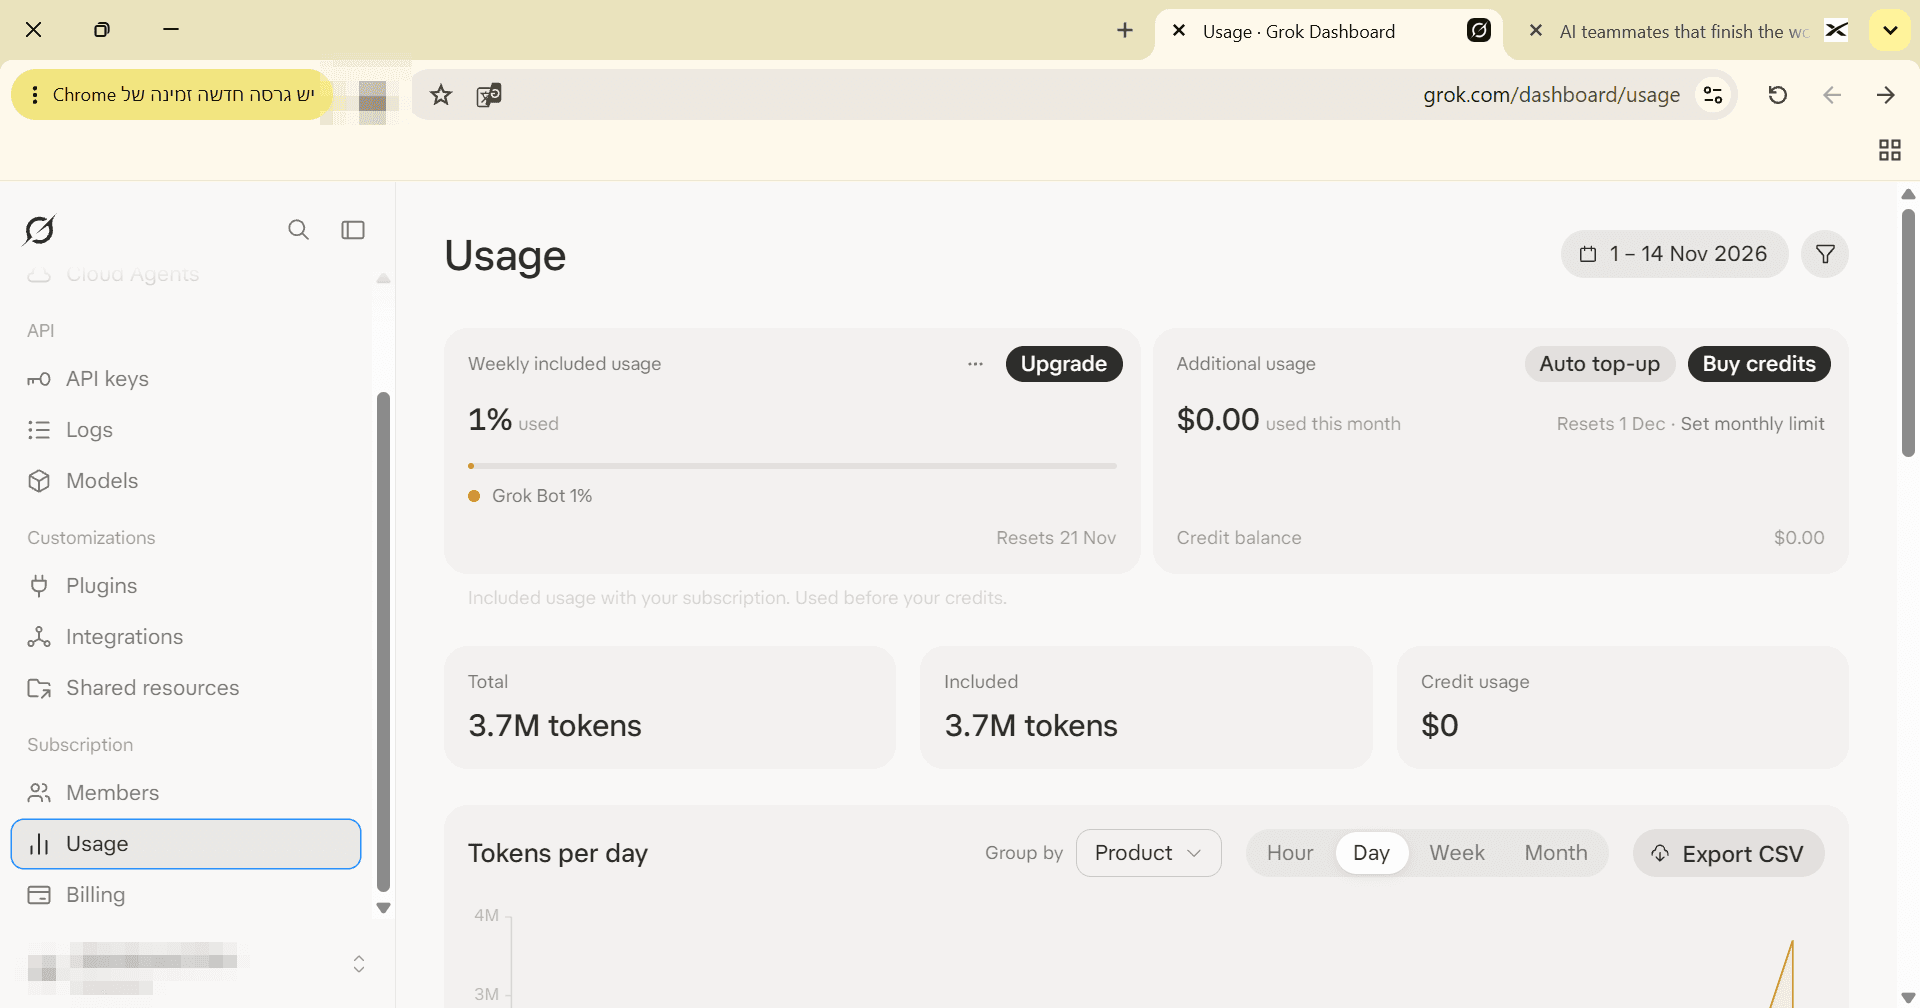
Usage page
5. First Settings, Security, and Privacy
By the end of this part, you will know what to change before the bot gets a real task, and what not to put into it.
Security Card: Yellow (High Caution)
Rating: yellow (checked: 2026-11-12 from official sources, and later in a hands-on test). Bottom line: suitable for non-sensitive information only, until there is an enterprise agreement.
- The bot acts in your name on a cloud computer, with sign-in access to the apps you connected. Per the documentation, it can also handle passwords and credit cards (Vault), phone calls, and publishing.
- All bots share one cloud computer. Files, cookies, and sign-ins are shared. A separate bot is not a security boundary, so do not split a "sensitive bot" from a "regular bot" and assume they are isolated.
- Approvals: Auto-review (an automatic check before an action) is on by default, but it is model-based. In our test, sending an email always stopped for approval, on the computer, on the phone, and between bots. Creating a calendar event and saving a file to Drive went through without a card. Reading emails also did not stop.
- Training: In Privacy Mode, your information is not used for training. Legacy Privacy Mode is not supported. The setting comes from your Cursor account.
- DPA (data processing agreement): not mentioned in the documentation. Without a DPA, do not process customers' personal information. Ask for it from the Cursor account team. Storage location and sub-processors: trust.cursor.com. For Amendment 13 to the Israeli Privacy Protection Law, check with your legal adviser. This is not legal advice.
- Standards (SOC 2 Type II, ISO 27001) belong to Cursor. Not verified that they cover Grok Bot.
- Vault (a safe for sign-ins and cards): not tested, encryption is not documented, and a saved card pays without approval for each purchase.
- Public Bot templates are sometimes written by a third party, and a public template exposes its settings, Skills, and routines.
- 2FA and minimal permissions: turn on two-factor authentication (2FA) for the account you use to sign in to Grok Bot and for the Google account, and connect apps only with an account that has minimal permissions (not an admin account).
- On behalf of the company: accepting the Grok Bot terms on behalf of the company means the company, as the operator, is responsible for the agent's actions, including unintended ones. Do not accept them without approval from someone authorized to do so in the organization.
- Routines and publishing: routines (Routines) run in the cloud without supervision. Do not use them to publish on social networks, and for any publishing, keep a human approval step before it goes out.
Security: the main risk is an unintended action in your name. Add Ask first rules for anything that cannot be undone, and send a test to yourself before involving other people. How to add the rule in the Windows app: in the section How to Add an Ask first Rule later in this part.
Settings to Change Right Away
| Setting | Path | Default | What to Choose | Why |
|---|---|---|---|---|
| Auto-review | Settings › General › Bot (desktop); Settings › Bot (phone). In our Windows app, Settings was not found (checked 14 November 2026); per the documentation, not tested hands-on | On | Leave it on | Checks an action before it runs and shows approval cards |
| Custom Rules | Below Auto-review (per the documentation, not tested; not available in the Windows app 1.1.0). A suggestion, not tested by us: a rule in the chat, see "How to Add an Ask first Rule" below the table | Empty | Add Ask first for sending, publishing, buying, and deleting. Up to 20 Allow rules and up to 20 Ask first rules, up to 1,000 characters. Ask first takes priority | An extra layer of safety on top of Auto-review. Without the rule, a calendar event and saving to Drive go through without a card |
| Always allow | On the approval card (per the documentation) | Not enabled | Do not click it for actions that cannot be undone | It is a permanent rule that applies from then on, and approving does not undo an action that was already carried out |
| Execution on this computer | Bot settings (the setting's name was not verified) | Not tested | Ask every time | Running commands on your computer |
| Vault | Settings › Vault (not tested) | Empty | Do not save a credit card | A saved card pays without approval |
| Timezone | Settings › Bot › Timezone (per the documentation, not tested) | Unknown | Set Israel time before creating routines | Routine times depend on it. The bot asked for "Israel time" in our prompts |
| Extra payment cap | grok.com/dashboard › Subscription › Usage › Set monthly limit (the button appears on the page, checked; the setting itself was not made) | Unknown | Set a low cap, or $0 | Usage beyond the quota is billed per use, and according to user reports (source tier 1, not verified) it happens without a warning. The cap does not stop a run that has already started (per the documentation) |
| Auto top-up | Usage › Auto top-up | Off | Leave it off | Automatic credit top-up adds charges |
| Phone notifications | Settings › Notifications › [app name] (general iOS path, not tested) | Off in the test | Turn on | This is the only way an approval card reaches you |
| Privacy Mode | Cursor account (exact path not tested) | Not tested | Make sure the account is in Privacy Mode, not Legacy | An account that is not in Privacy Mode may allow your information to be used for improvement |
| 2FA (two-factor authentication) | Google account and the Grok Bot sign-in account (path not tested) | Not tested | Turn on | The bot signs in to apps on your behalf, and without 2FA a stolen password opens them too |
How to Add an Ask first Rule
In the Windows app 1.1.0 we did not find a Settings screen (checked 14 November 2026), so we did not reach Settings › General › Bot, where per the documentation you set Custom Rules (on the phone: Settings › Bot, per the documentation, not tested). What we did test is something close but different: the main bot created a new bot and saved a role and four prohibitions in its memory, and the new bot remembered them (Part 6.2). We did not send an Ask first prompt to the main bot during testing. The suggestion: tell the bot in chat to save a rule in memory, and verify it yourself. Send this to the main bot, before you connect Calendar and Drive:
Save a permanent rule in memory: before any action that cannot be easily undone (sending an email or message, creating or changing a calendar event, deleting or changing a file in Drive, publishing, paying), show me what you intend to do and wait for me to write "yes". The rule applies even when I ask for the action myself.How to verify (not tested by us): (1) Ask the bot: "Which rules do you have saved?". The rule should appear. If not, send it again. (2) After connecting the calendar, ask for an unimportant event in the test account (Part 6.8 a). The bot should show what it intends to do and wait for "yes".
Note: this does not replace Custom Rules. In a new bot, a role and prohibitions were saved in memory, and the bot kept the instruction "do not send emails" in routines, but we did not send an Ask first rule to the main bot, and we did not test that such a rule stops creating a calendar event or saving to Drive. After connecting the calendar, ask for an event (Part 6.8 a). If it is created without asking, do not rely on the rule: disconnect the calendar or Drive in grok.com/dashboard › Customizations › Plugins.
Another option: in the side menu of grok.com/dashboard there is My settings. We did not check whether it has bot settings.
Setting a cap: on the Usage screen, click Set monthly limit and enter a low amount (per the documentation; not done in testing). The Auto top-up button opens an Automatic top-ups window with two amount fields ("Top up when balance is below" and "Top up amount") and the buttons Cancel and Save. We opened the window only to take a screenshot, and saving was not recorded. Leave it off.
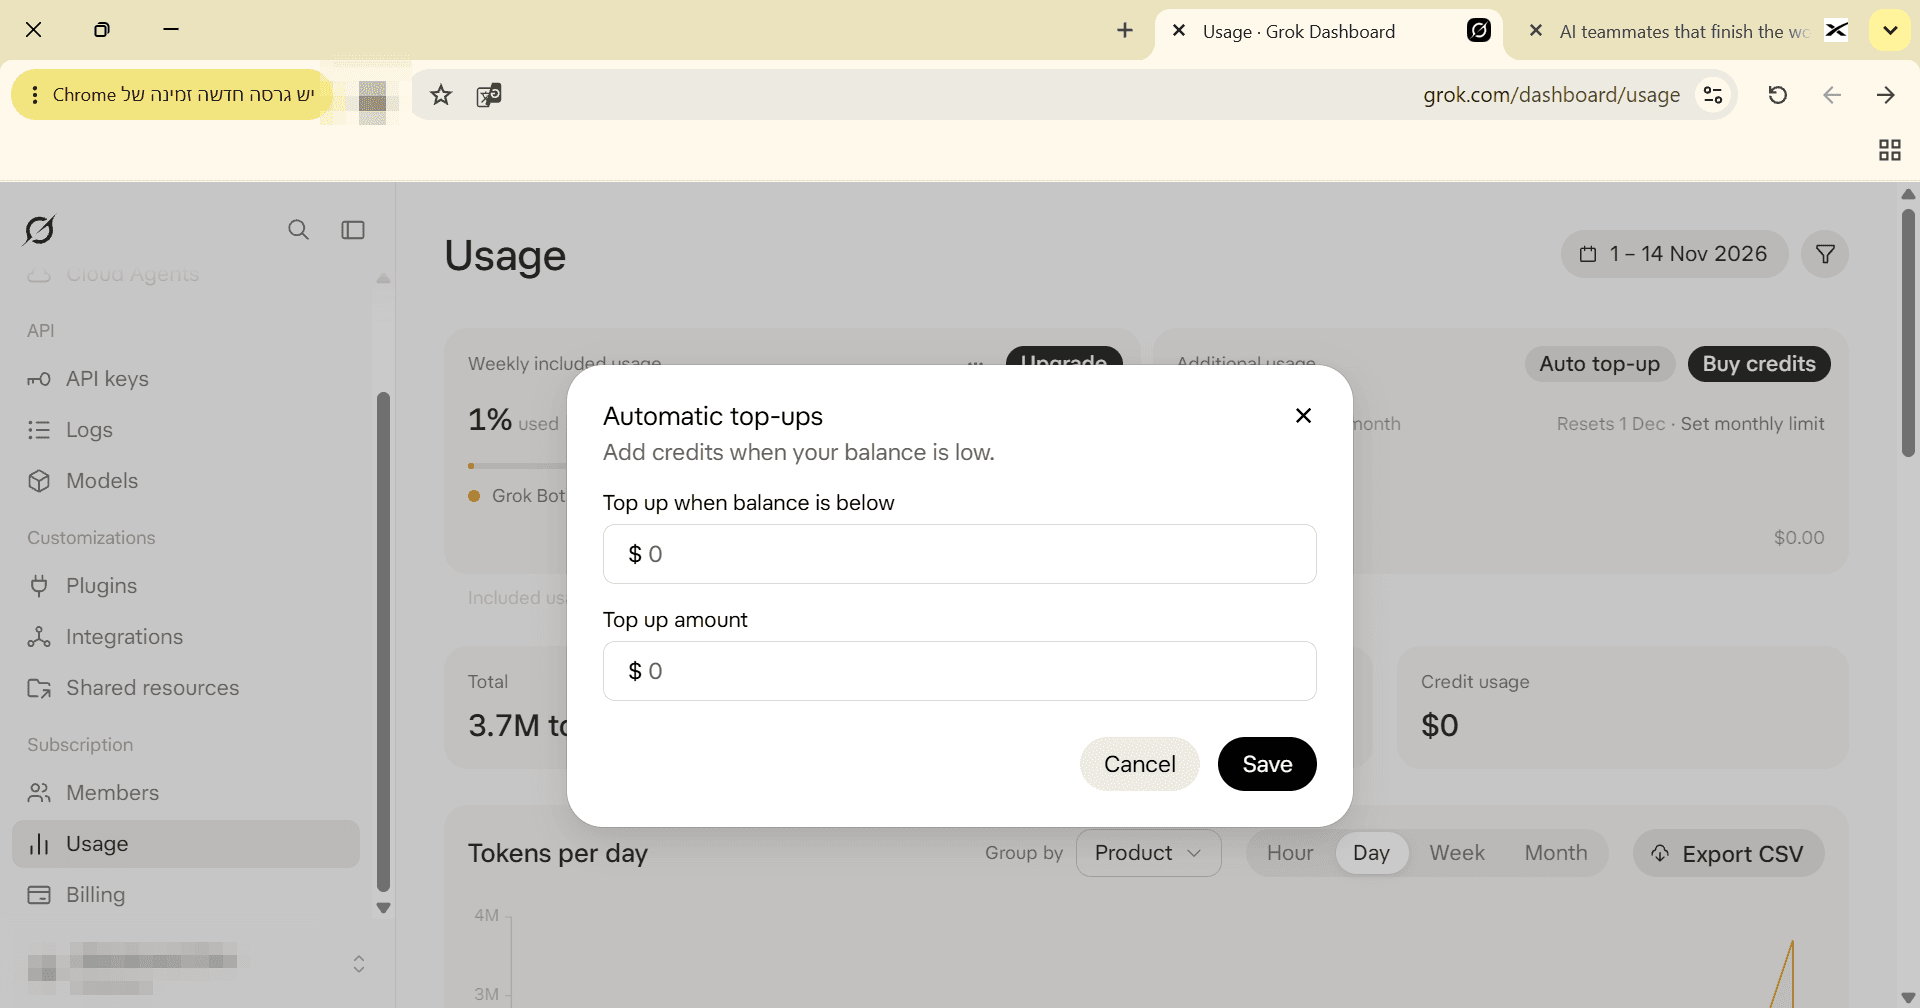
Where to see usage: grok.com/dashboard › Subscription › Usage shows Weekly included usage as a percentage with a reset date, Total tokens, Tokens per day, and Export CSV. Check it before you turn on routines, because frequent routines and triggers burn quota.
Where to manage connections: in the app, the squares icon in the bots bar (on the left) › Connect Apps. There, "4 connected" › Manage plugins and skills. On the website: grok.com/dashboard › Customizations › Plugins, where you can disconnect a connection through the three dots on its row.
Origin and the "Cursor skills" list: Origin appeared in the list although we did not connect it, and at the bottom of the Plugins page there is a list of about 40 skills for developers. They are meant for coding. You can ignore them.
What Not to Put into the Bot
- Personal information about customers, patients, or employees (including ID numbers and third-party payment details).
- Passwords, keys, and verification codes in chat.
- A company credit card in the Vault.
- Accounts with admin permissions (domain, cloud, bank, accounting).
- Trade secrets, contracts, and internal financial information.
- The organization's official publishing accounts, without a human approval step.
- People who did not agree to a conversation or a recording.
What to Do When the Experiment Ends
Disconnect connections (Plugins, the three dots), delete files the bot created in Drive and /workspace (deleting a bot does not delete files and sign-ins on the cloud computer), and cancel the subscription at least 24 hours before renewal. To delete a bot: right-click its avatar in the bots bar › Delete. This was checked only as far as the menu, and we did not perform a deletion.
6. Usage: Setting Up and Running Bots
By the end of this part you will be able to set up a bot with a role and rules, give it a task, save the task as a Skill, run it as a weekly routine, import a ready-made template, and connect several bots to work together. Everything shown here was tested hands-on in Hebrew, in a test account with dummy data, between 14 and 15 November 2026.
How it is built. There is a main bot (Chief of Staff, marked with an orange star) that coordinates other bots. The bot you set up in the introduction is the main bot. After it you can set up more bots, each with its own role, memory, and rules.
6.0 First Exercise: One Task, One Output (About 10 Minutes)
The goal: see that the bot works, and get a Word document in Hebrew with sources.
Send to the Main Bot
the prompt in chat. Replace the tool names with the tools you are interested in:
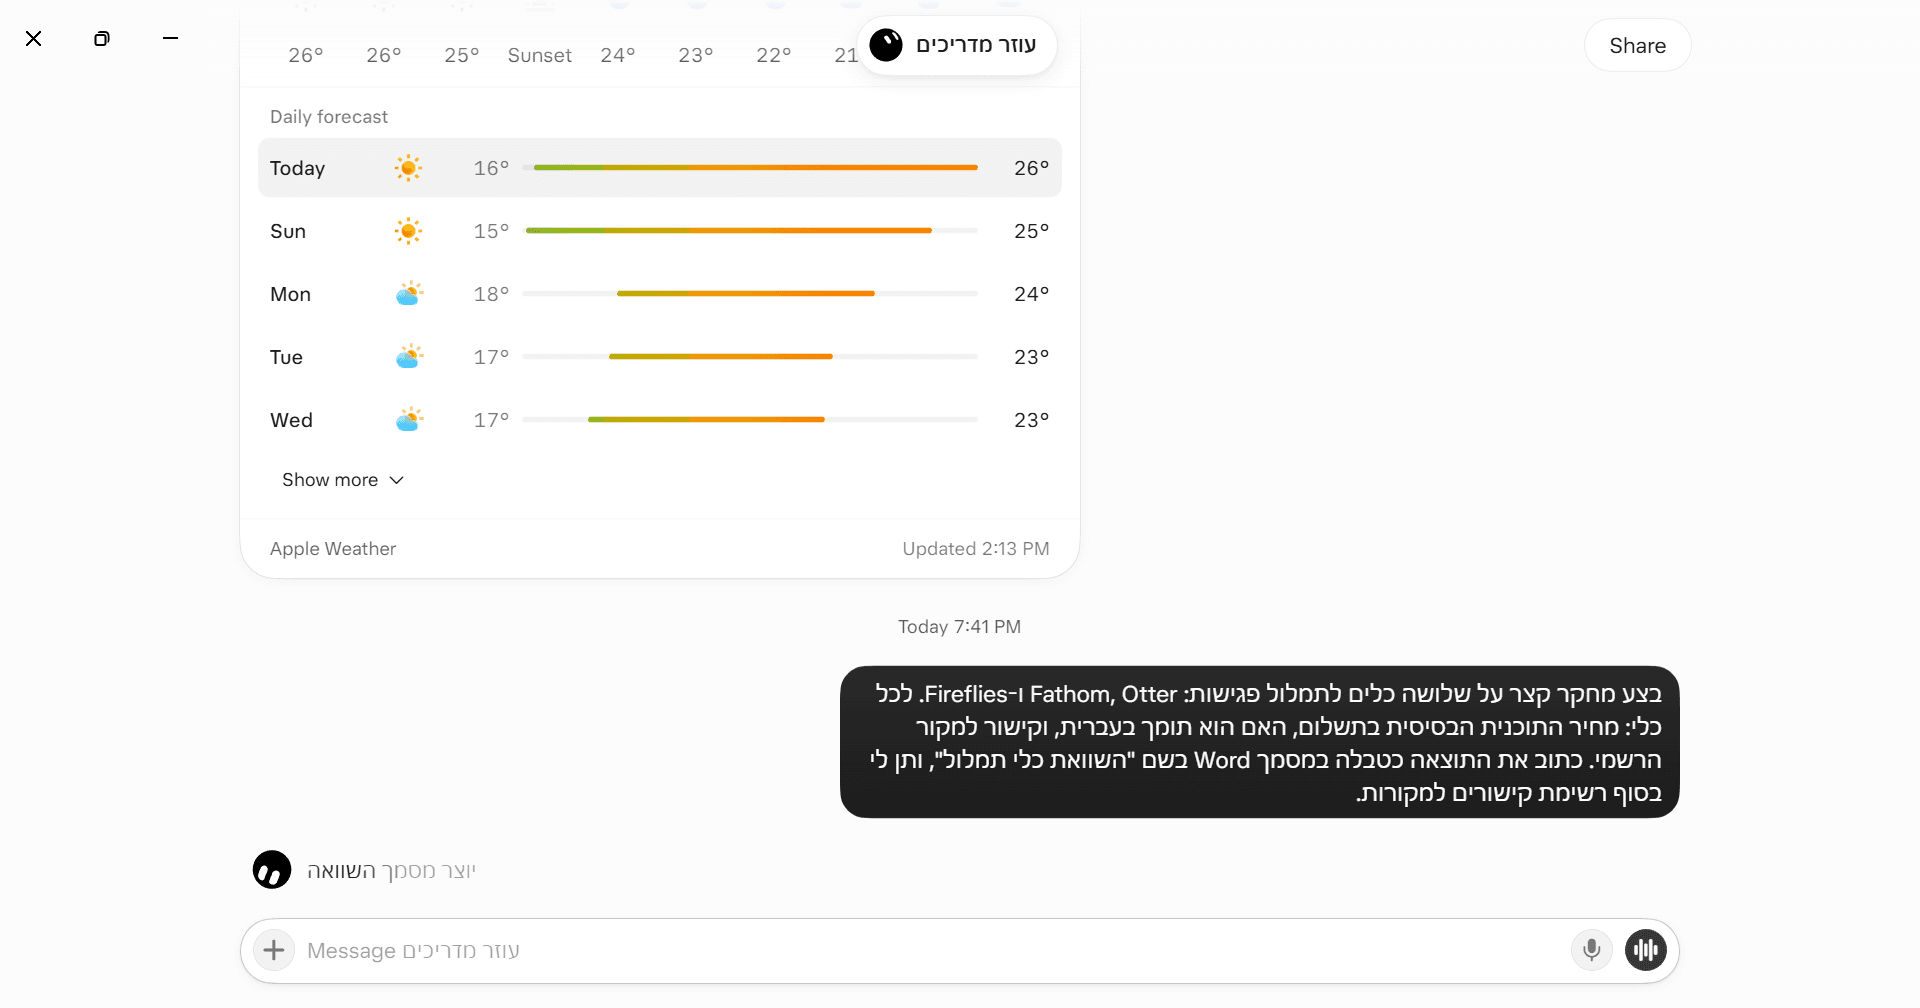
Do short research on three meeting transcription tools: [Tool A], [Tool B], and [Tool C]. For each tool: the price of the basic paid plan, whether it supports Hebrew, and a link to the official source. Write the result as a table in a Word document named "[document name]", and at the end give me a list of links to the sources.
After you send it, the bot shows "Creating comparison document" and works for a few minutes. If needed, click the bot at the top of the chat to see its activity.
Get the Output
A
.docxfile appears in the chat (in testing: 38kB, 9 minutes) with a short summary in Hebrew and a list of sources. Open it from the chat or from the Library bar.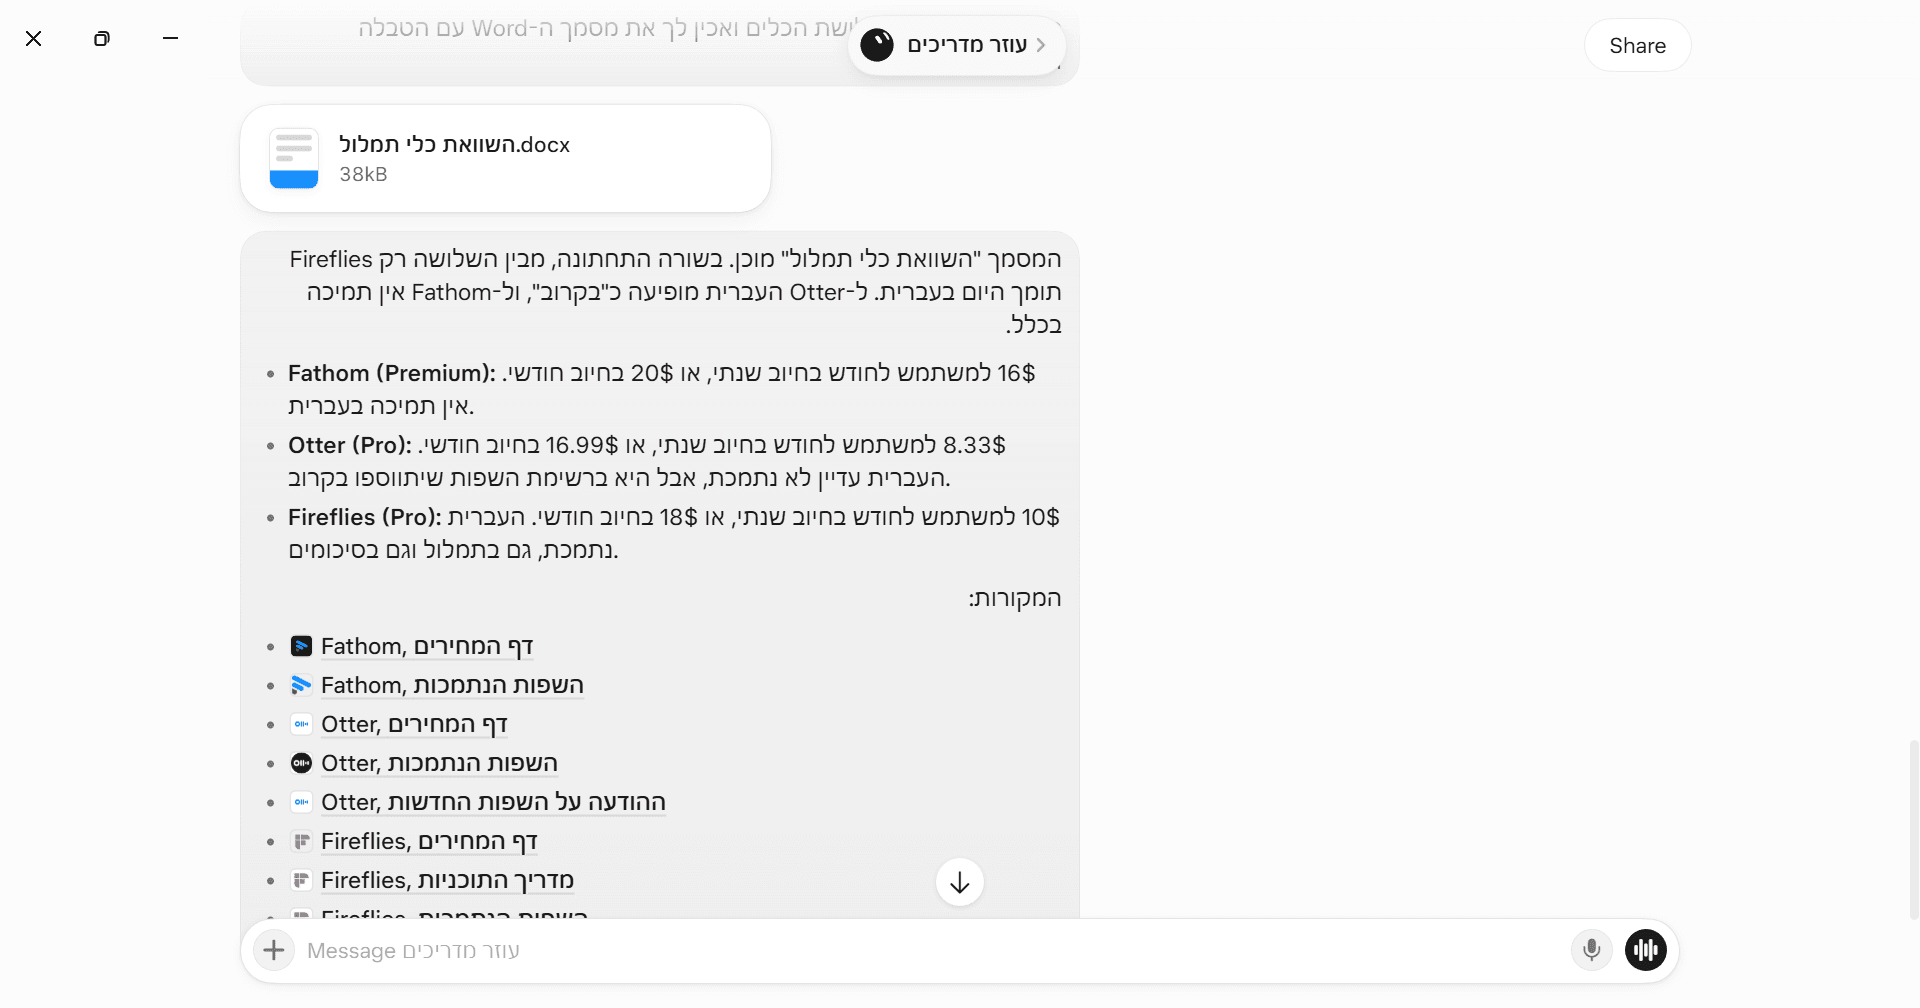
The document and the summary in the chat Check the Numbers
In testing, the prices and sources were correct. Even when it looks accurate, verify the price against the official pricing page before you pass it on. When we asked for proof, the bot gave a price and an official link for each tool.
Tip: give the bot the output you want (table, Word), sources, and limits ("do not send emails"). The more focused the request, the better the result.
6.1 Step 1: A New Bot
Why: a separate bot for each role keeps instructions organized, and you can run it again and again. There are two ways.
Way A: ask the main bot. We asked the main bot where the button is. It answered that it does not know and did not want to guess, and offered to create a separate bot itself, with a chat, memory, and a name.
Send a Request
to the main bot. Word the role and rules yourself. Here is a template based on what we sent:
Create a new bot named "[bot name]" with the role and rules I am about to write, and save them in its memory. Role: to check new AI tools for [the goal]. When I give it a tool name, it checks it only on the tool's official sites and writes a short report in Hebrew that answers four questions: 1. What the tool does, in two sentences. 2. What plans and prices it has, including the date you checked. 3. Whether Hebrew is supported. 4. Where the data is stored, and whether there is a DPA. Next to every claim there will be a link to the official source. If there is no official source, it writes "not verified". Permanent rules: it may not send emails, sign up for services, enter payment details, or publish anything. After you create it, tell me where I can find it in the app.What You See
A gray Messaged row with the new bot's name, followed by a message from the main bot: the bot was created, the role and rules were saved in memory, and you can reach it by clicking the link or through the bar on the side. In testing it was a bot named "AI Tool Scanner". If it did not happen, ask again and clearly add "create a new bot".
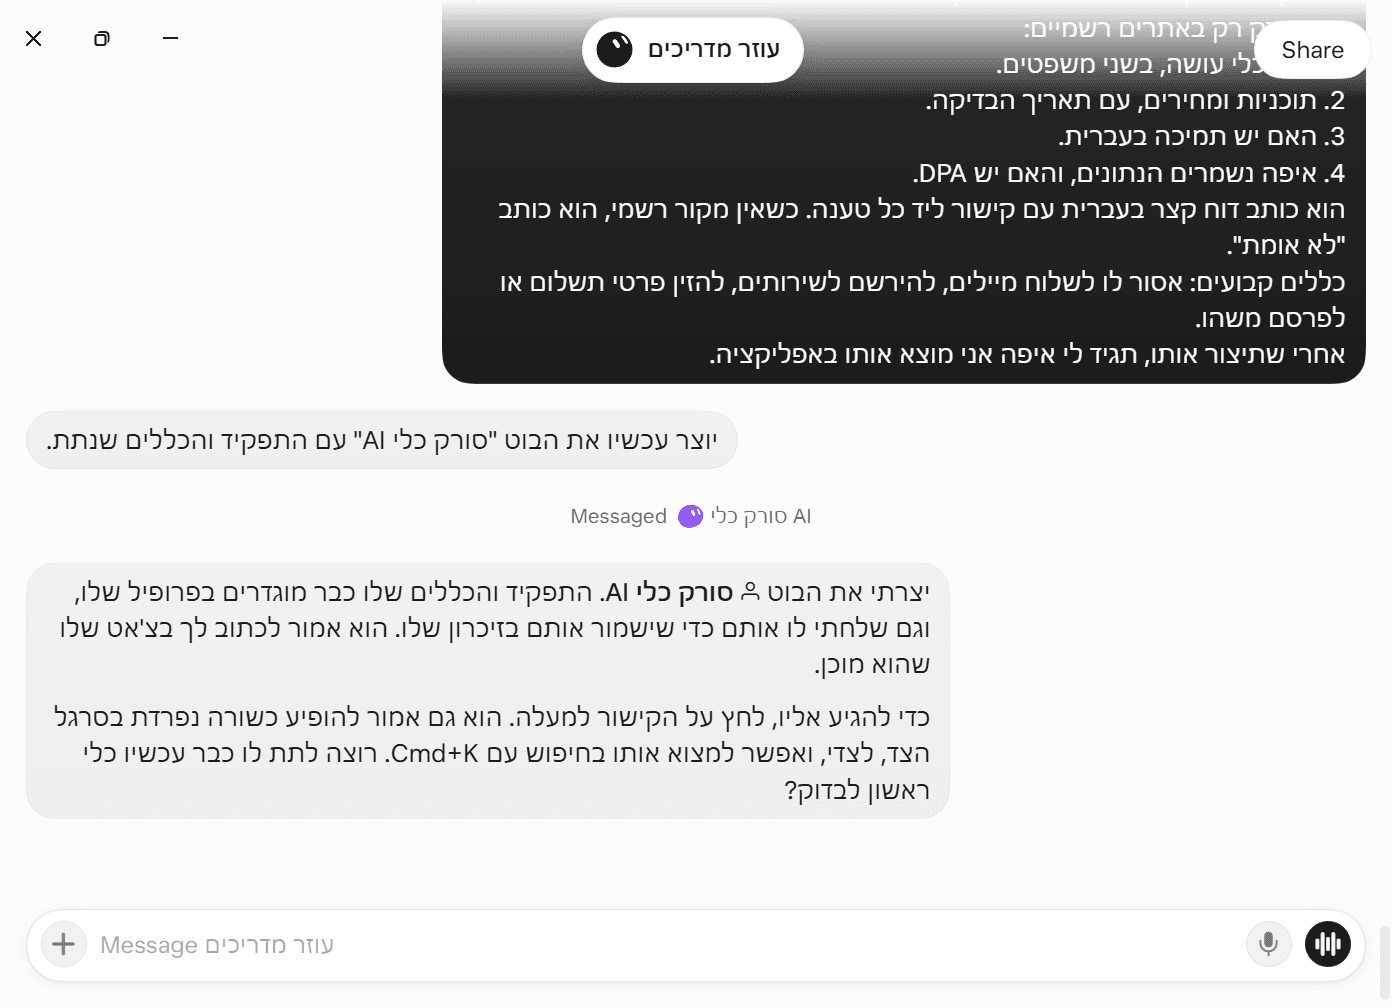
The main bot created a new bot and reported it
Way B: manually.
Reveal the Bots Bar
Click the bot's name at the top of the chat. A narrow strip opens on the left with the bots' avatars.
Click +
The label New Bot appears above the button. A new chat opens. If you did not find it, go back to Way A.
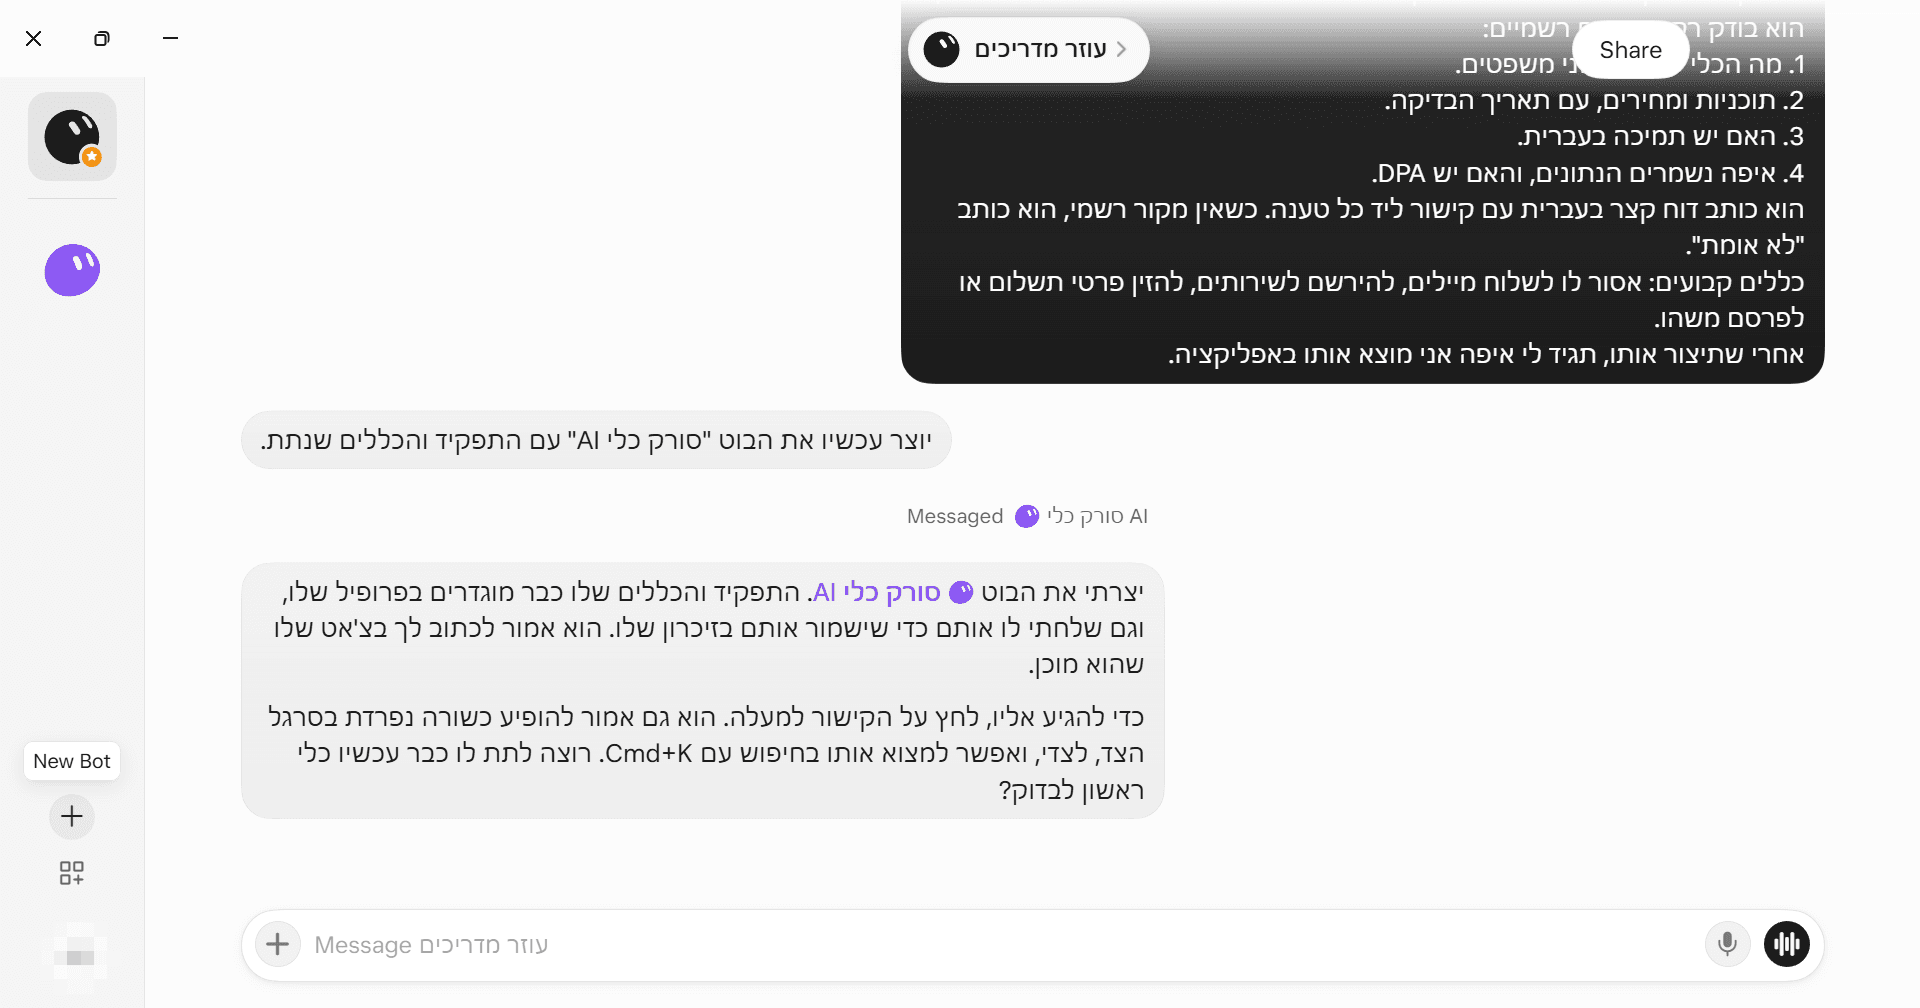
The bots bar with the New Bot button Access to the Bot
Afterward you can open it from the link in the chat, from the bar, or by searching with Ctrl+K.
6.2 Step 2: Role and Rules in Memory
Why: the bot needs to remember what to do and what is forbidden, even in the next conversation.
Open the New Bot's Chat
The bot opens by asking which tool to check first. Below it there is a "Message from" row with the main bot's name, and a message that the role and permanent rules were saved in memory.
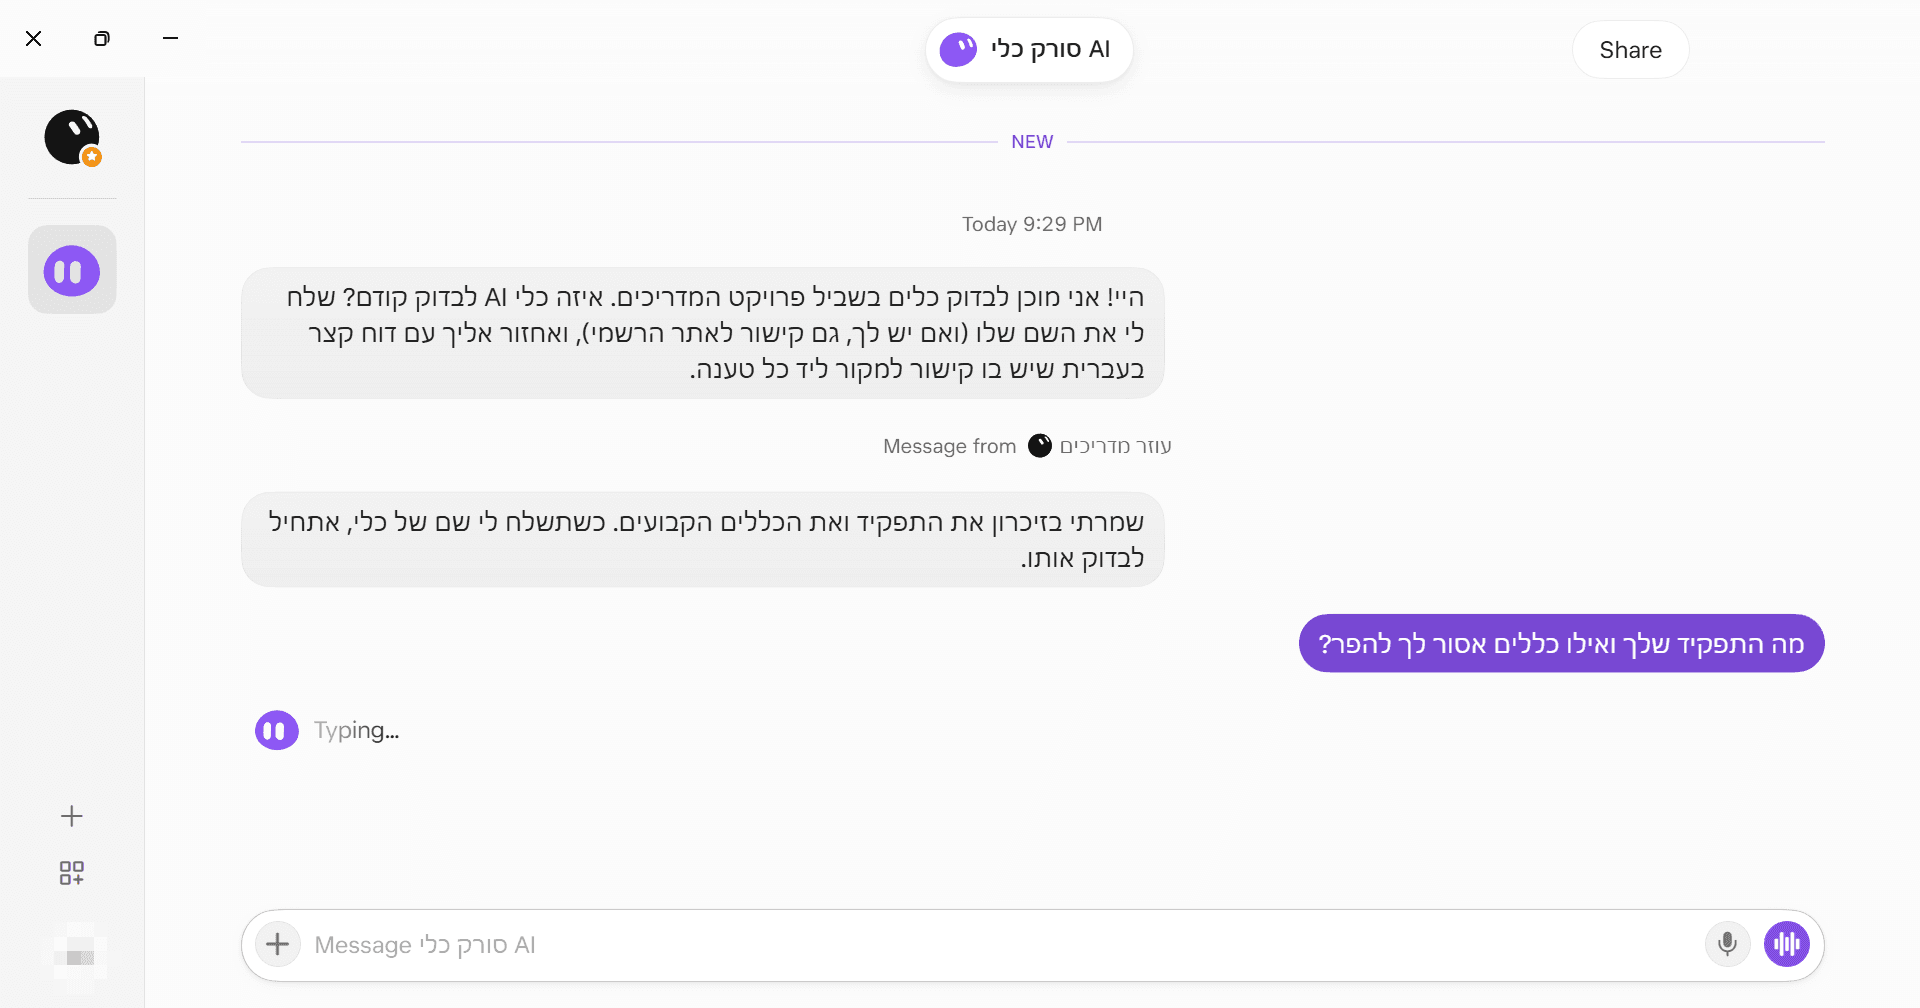
The new bot's first chat Check That It Remembers
Ask:
What is your role, and which rules are you not allowed to break?
What should happen: an answer with the role, the four questions, and a mention of the four prohibitions (emails, signing up, payment, publishing). In testing this worked from the first message. If the bot did not remember something, tell it: "Save in memory: [the rule]".
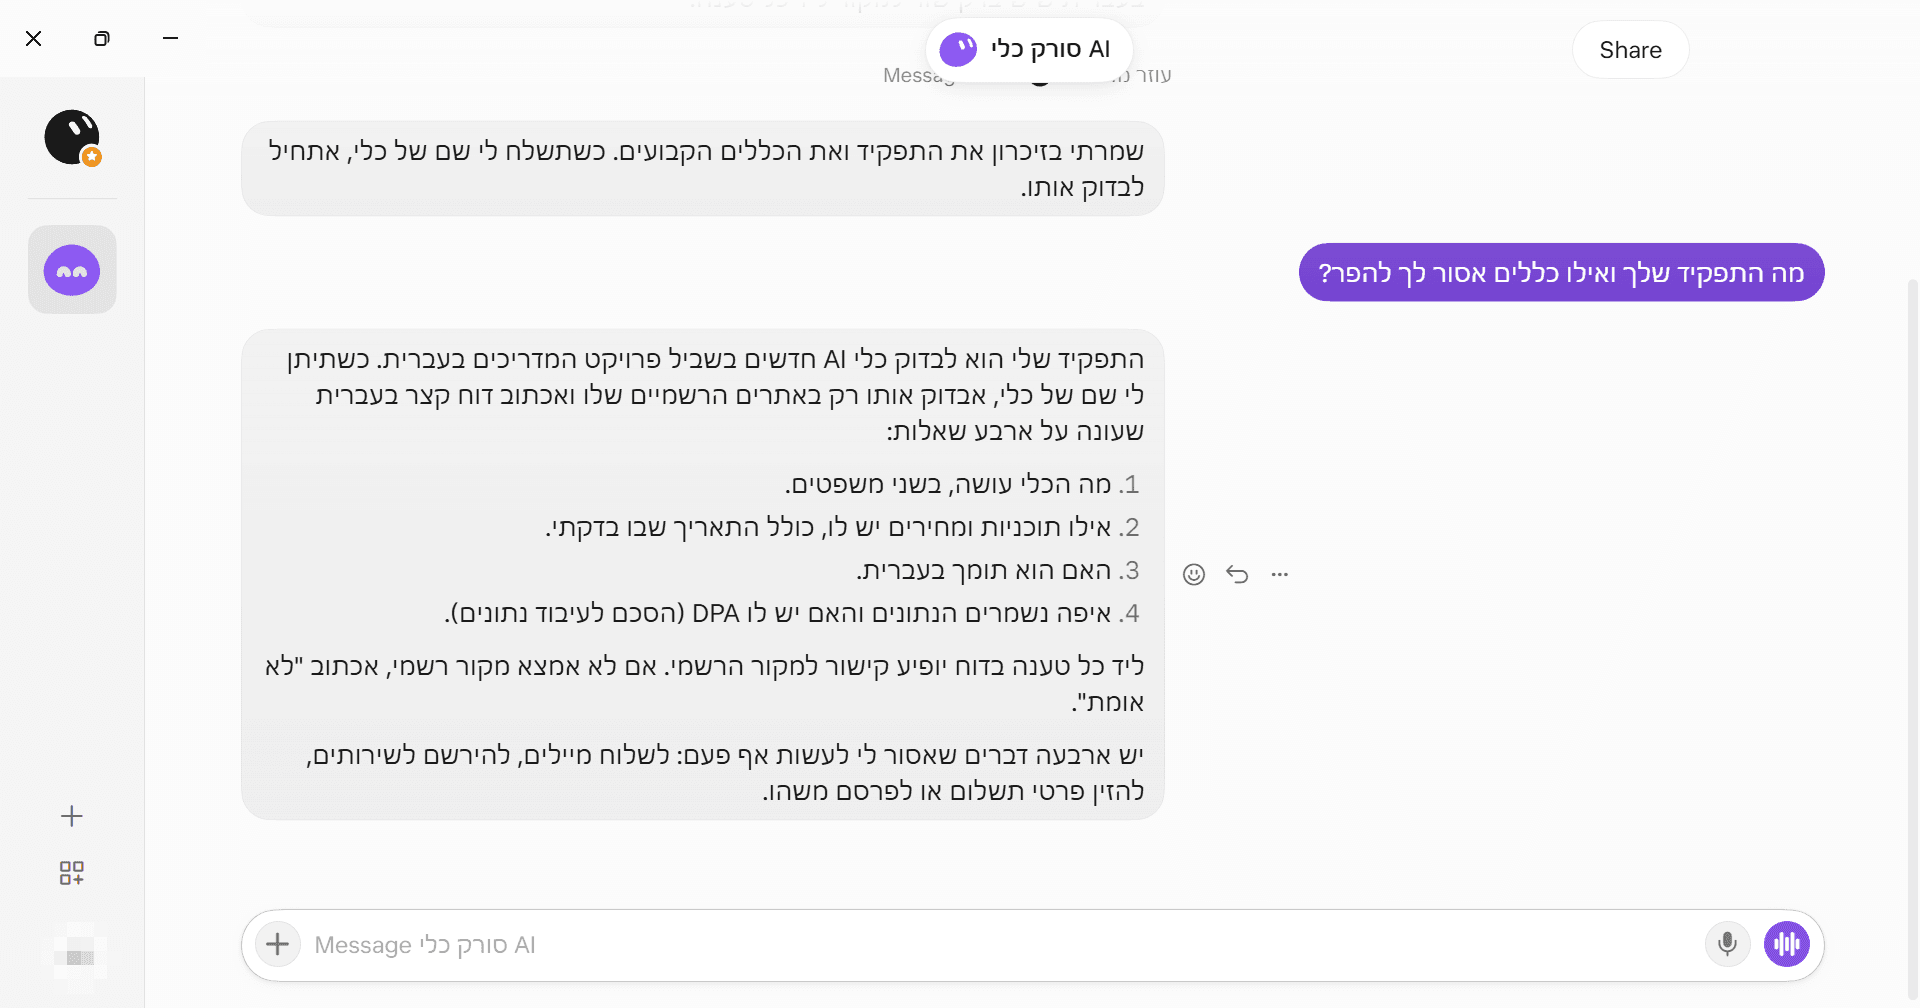
Note: memory is managed through the chat. We did not find a separate memory screen in the app (per the documentation, this is how memory is managed).
6.3 Step 3: A First Task for the Bot
Why: a test before you make the task automatic.
Send a Tool Name
Check the tool [tool name].Get a Report
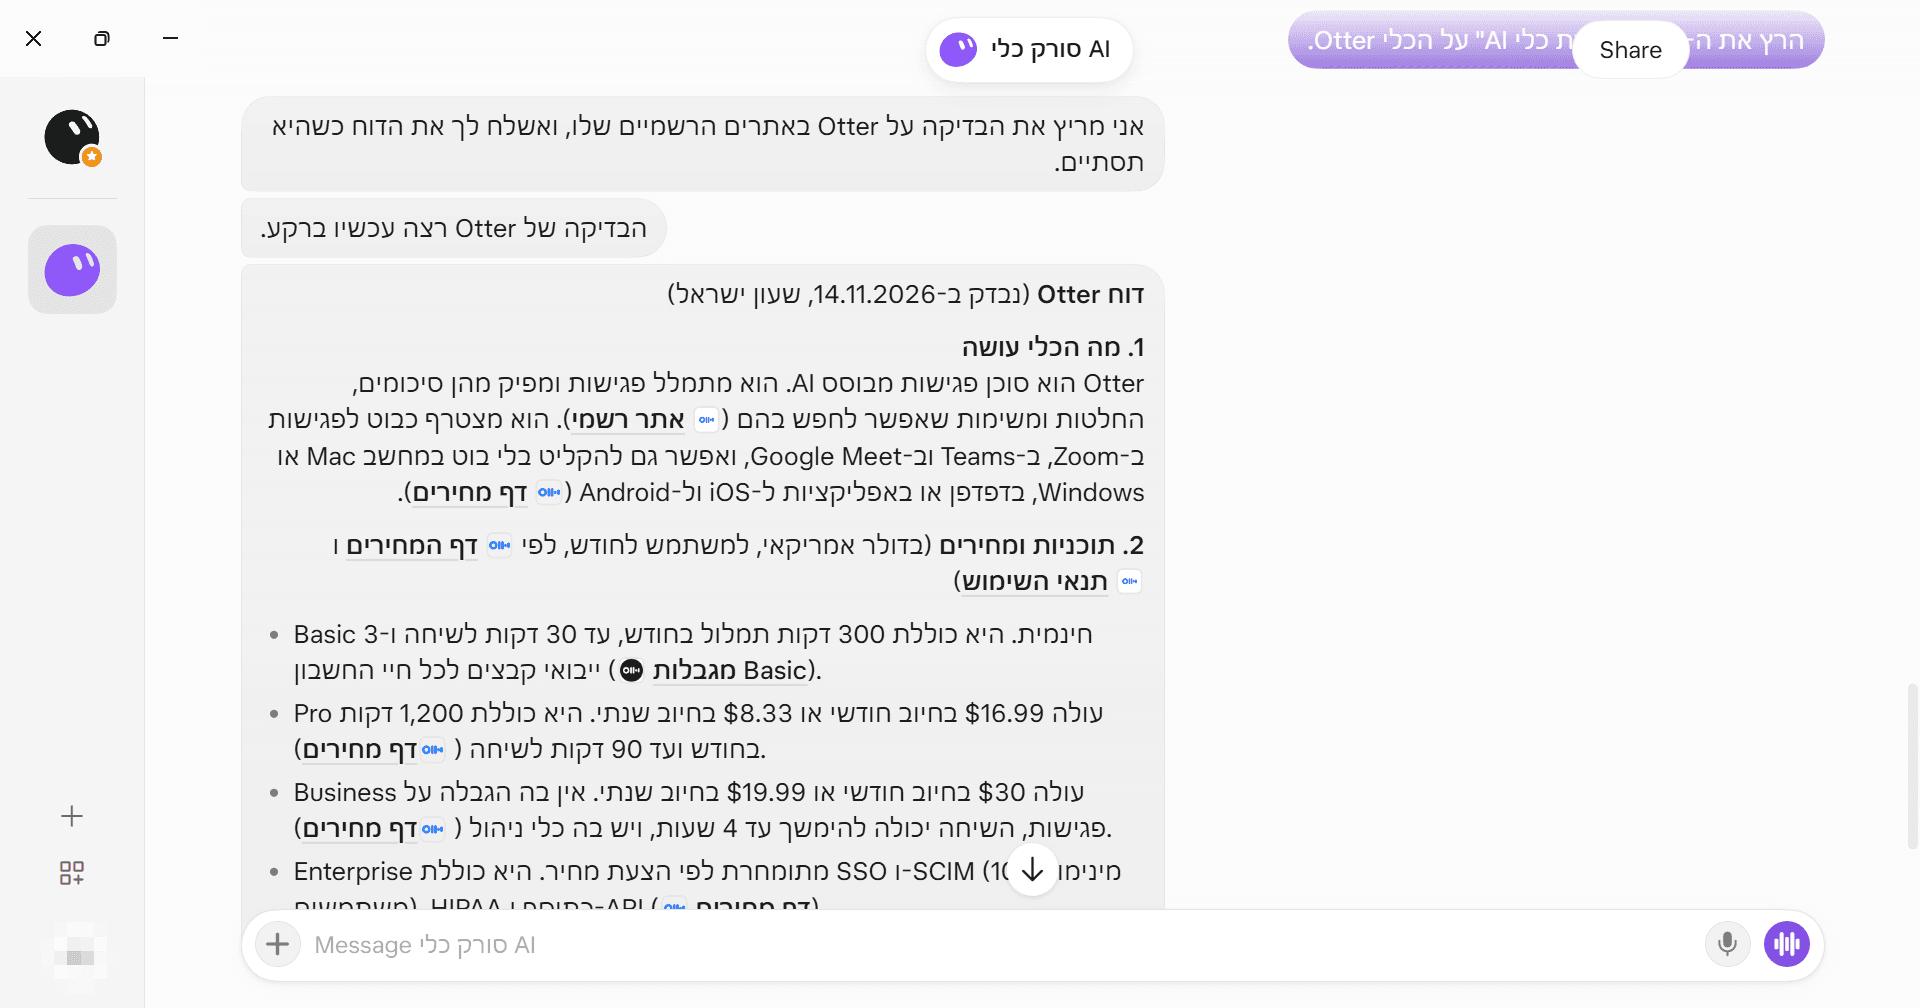
The bot says it is starting to check the official sites, and after a few minutes returns a report in Hebrew: a title with a date (Israel time), four sections, and a link next to each claim. In a test on a meeting transcription tool we got a price for each plan, a breakdown of platforms, and a "not verified" line next to a missing data point.
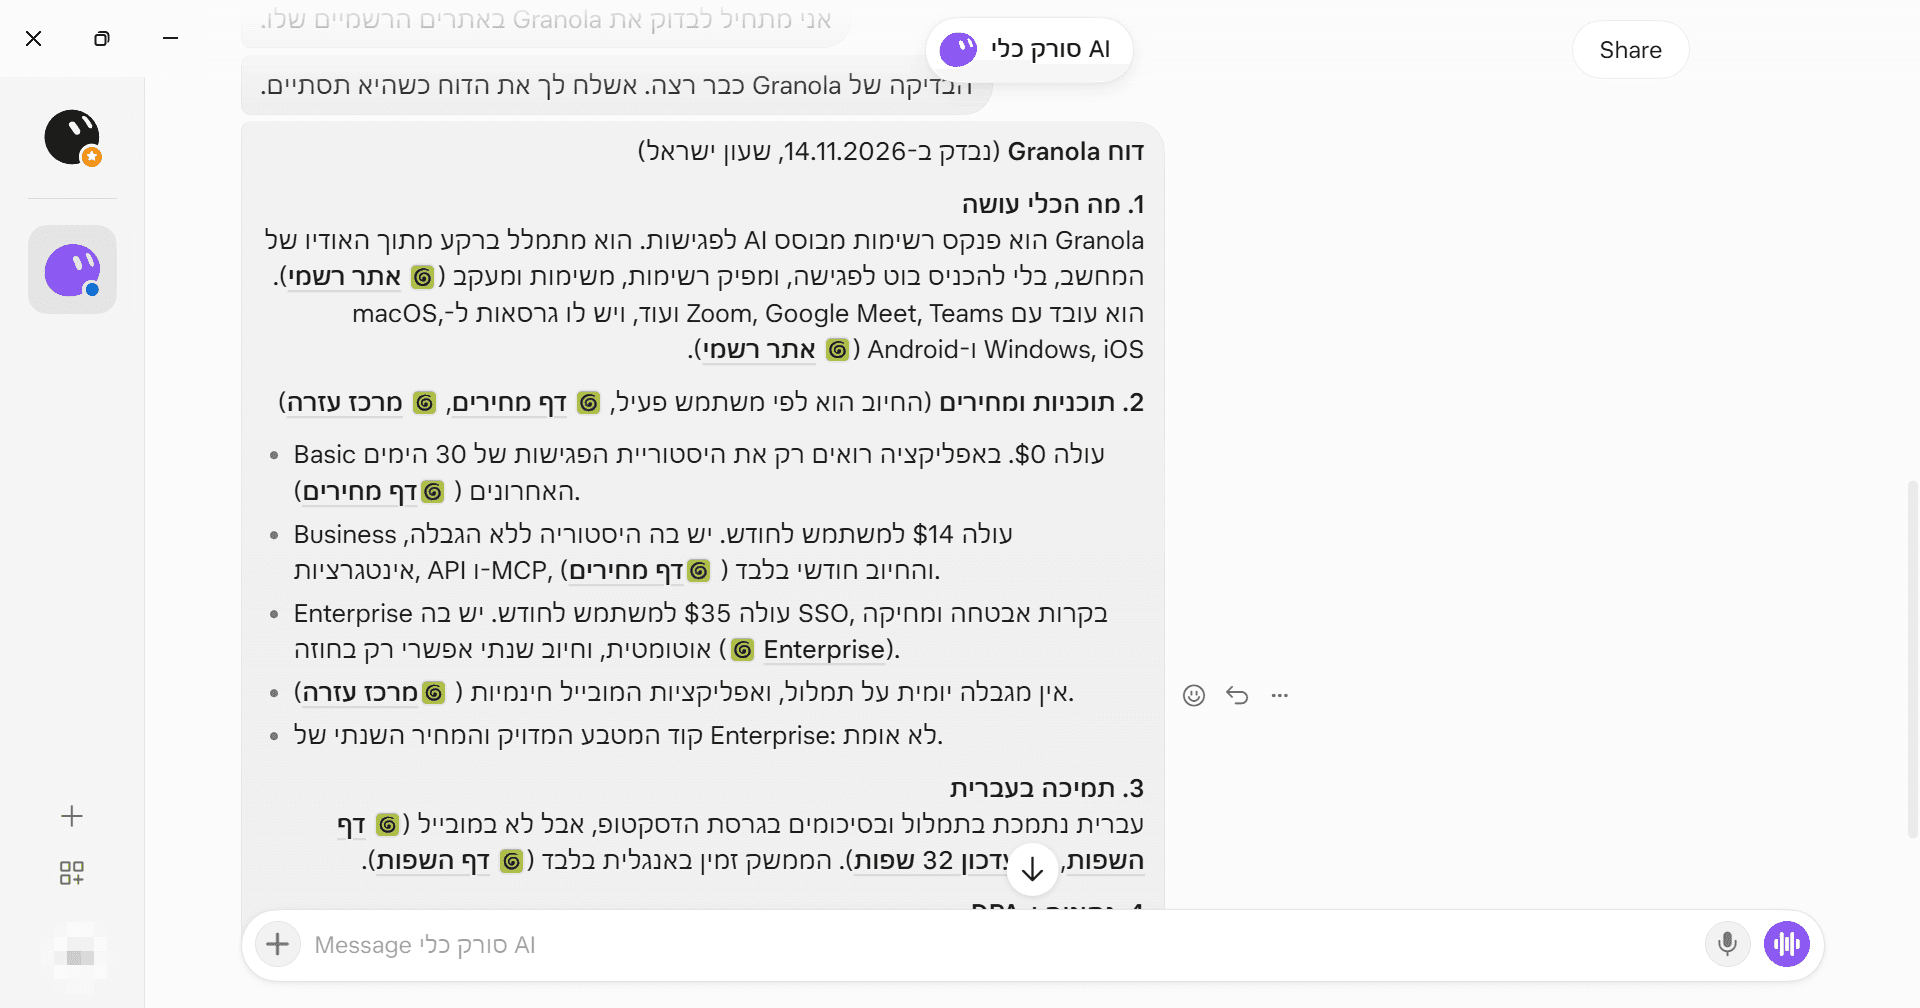
The first check report Verify It
We checked the prices against the tool's official blog and against sources from November 2026, and they matched (checked: 2026-11-14). Even when the report is accurate, verify numbers before you pass them on.
6.4 Step 4: Saving as a Skill
Why: a Skill is a saved set of instructions. Instead of explaining the check again each time, you run it by name. The bot writes it itself from what worked.
Save
After a task that succeeded, send:
Save the check you did as a skill named "[Skill name]", so it can be run again on any tool. Show me what is written in the skill.Read and Correct
The bot writes a Skill that is more detailed and stricter than we asked for. Read it, and if needed, correct it in chat ("add a step ...", "remove ..."). This is what was created for us (the description is reworded, not verbatim from the screen):
AI Tool Check
Description (when to use): when asked to check an AI tool or an office tool for a guide.
Rules: official sources only, not third-party sites. A direct link for every claim. "Not verified" when information is missing, without filling in from guesswork. Forbidden: signing up, logging in, sending emails, paying, installing, or publishing.
Steps:
1. Verify the official domain.
2. Summarize what the tool does and on which platforms.
3. Prices: currency, billing cycle, limits, and date in Israel time.
4. Hebrew separately: transcription, interface, desktop, mobile, with a citation.
5. Data storage: region and sub-processors.
6. DPA: date, SCC, and whether there is a custom DPA.
7. Write according to the format.
Report format: a title with a date, four sections, direct links, and at the end a "what was not verified" list.
The bot added "log in" and "install" to the prohibitions on its own, along with the storage and DPA sections. This is a Skill that was born from a task that worked. There is no screenshot of the contents of the Skill itself.
Run It on Another Tool
Run the skill "[Skill name]" on the tool [name of another tool].
After about 10 minutes we got a report in the exact structure of the Skill, with a "what was not verified" list at the end. We verified the result against an official source (checked: 2026-11-14).
Where to Find the Skill
In Manage plugins and skills, under Private skills, it says "No private skills yet", and our Skill did not appear there. It is probably stored with the bot (not verified).
Private skills is empty
Note: Teach a task (recording a process in the browser that becomes a draft Skill) appears in the documentation and was not tested.
6.5 Step 5: Weekly Routine
Why: a routine (Routine) runs the same job on its own, at the time you set, even when your computer is off.
Ask in Hebrew
In the bot's chat:
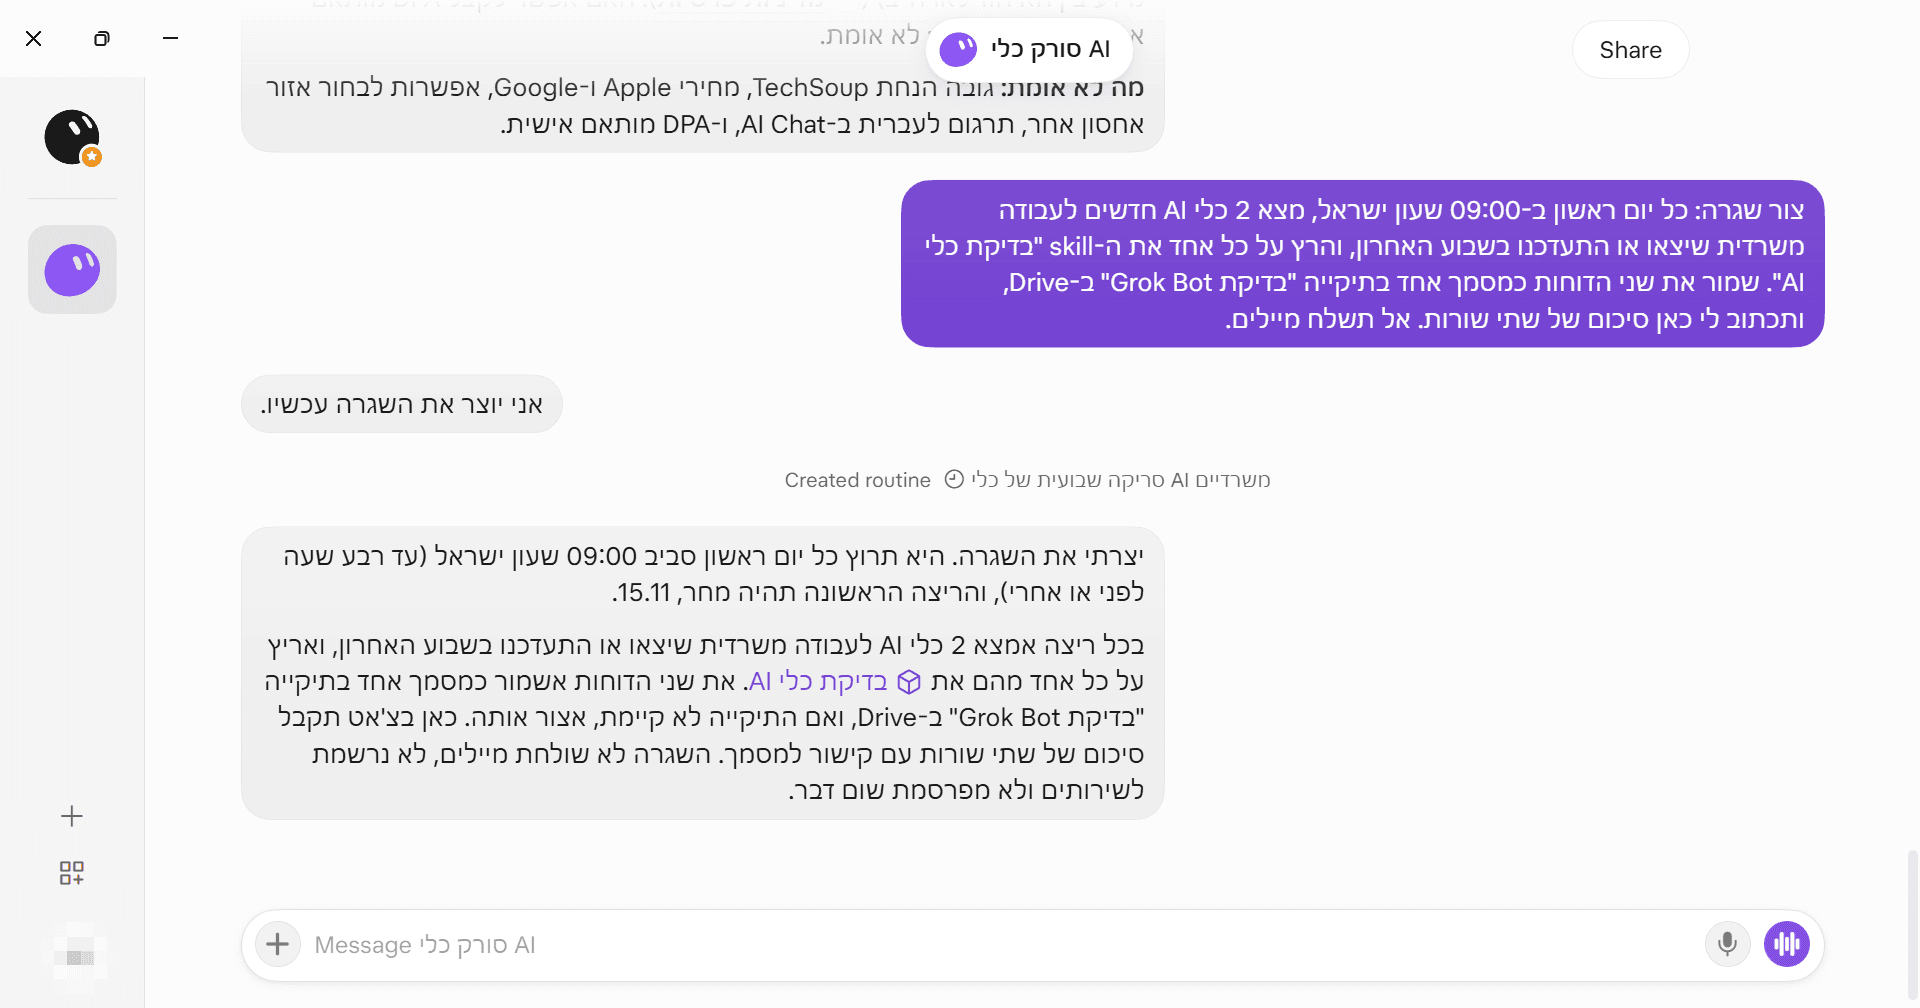
Create a routine: every Sunday at 09:00 Israel time, find 2 new AI tools for office work that were released or updated in the past week, and run the skill "[Skill name]" on each one. Save both reports as one document in the folder "[folder name]" in Drive, and write me a two-line summary here in the chat. Do not send any emails.What You See
A "Created routine" line with the routine's name, and an explanation from the bot: Sundays around 09:00 Israel time (up to fifteen minutes before or after), when the first run is, which Skill it will run on (the bot linked it), and that it will not send emails, sign up for services or publish. If the bot needs a folder that does not exist, it will create it.
The routine was created See It Run
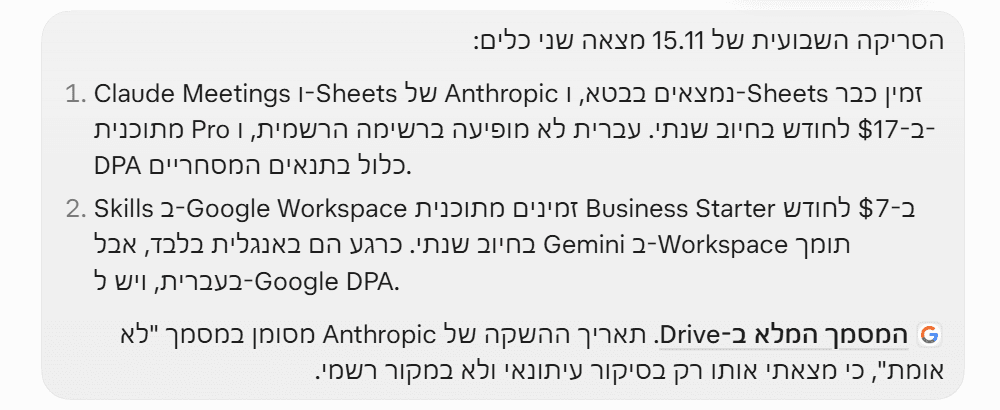
The routine actually ran on 15 November 2026 at around 09:00, and the work was in the bot's chat.
The weekly scan result in the chat Watch the Defaults
By default, a routine also runs on Friday and Saturday. If you don't want that, ask explicitly for "Sunday to Thursday". The bot itself suggested Sunday to Thursday.
Another routine we tested: a daily email summary.
Create a routine: every day at 08:00, summarize the emails that arrived in the last 24 hours and write the summary here in the chat. Do not send emails and do not reply to anyone.It ran on 15 November 2026 at 07:56: "In the last 24 hours 4 emails arrived, and none of them is urgent", in a table of subject and gist. A routine that only reads and summarizes ran without an approval card. The same rule applies to "Test" in a routine: it does real work, not a simulation (per eesel, source tier 2, not verified).
| What to Know About Routines | Details |
|---|---|
| Limits | Per the documentation: at least 5 minutes between runs, up to 50 routines per bot (not tested) |
| Triggers | Slack, email, GitHub, Sentry, PagerDuty, webhook. Not tested |
| Quota | Frequent routines and triggers burn through quota |
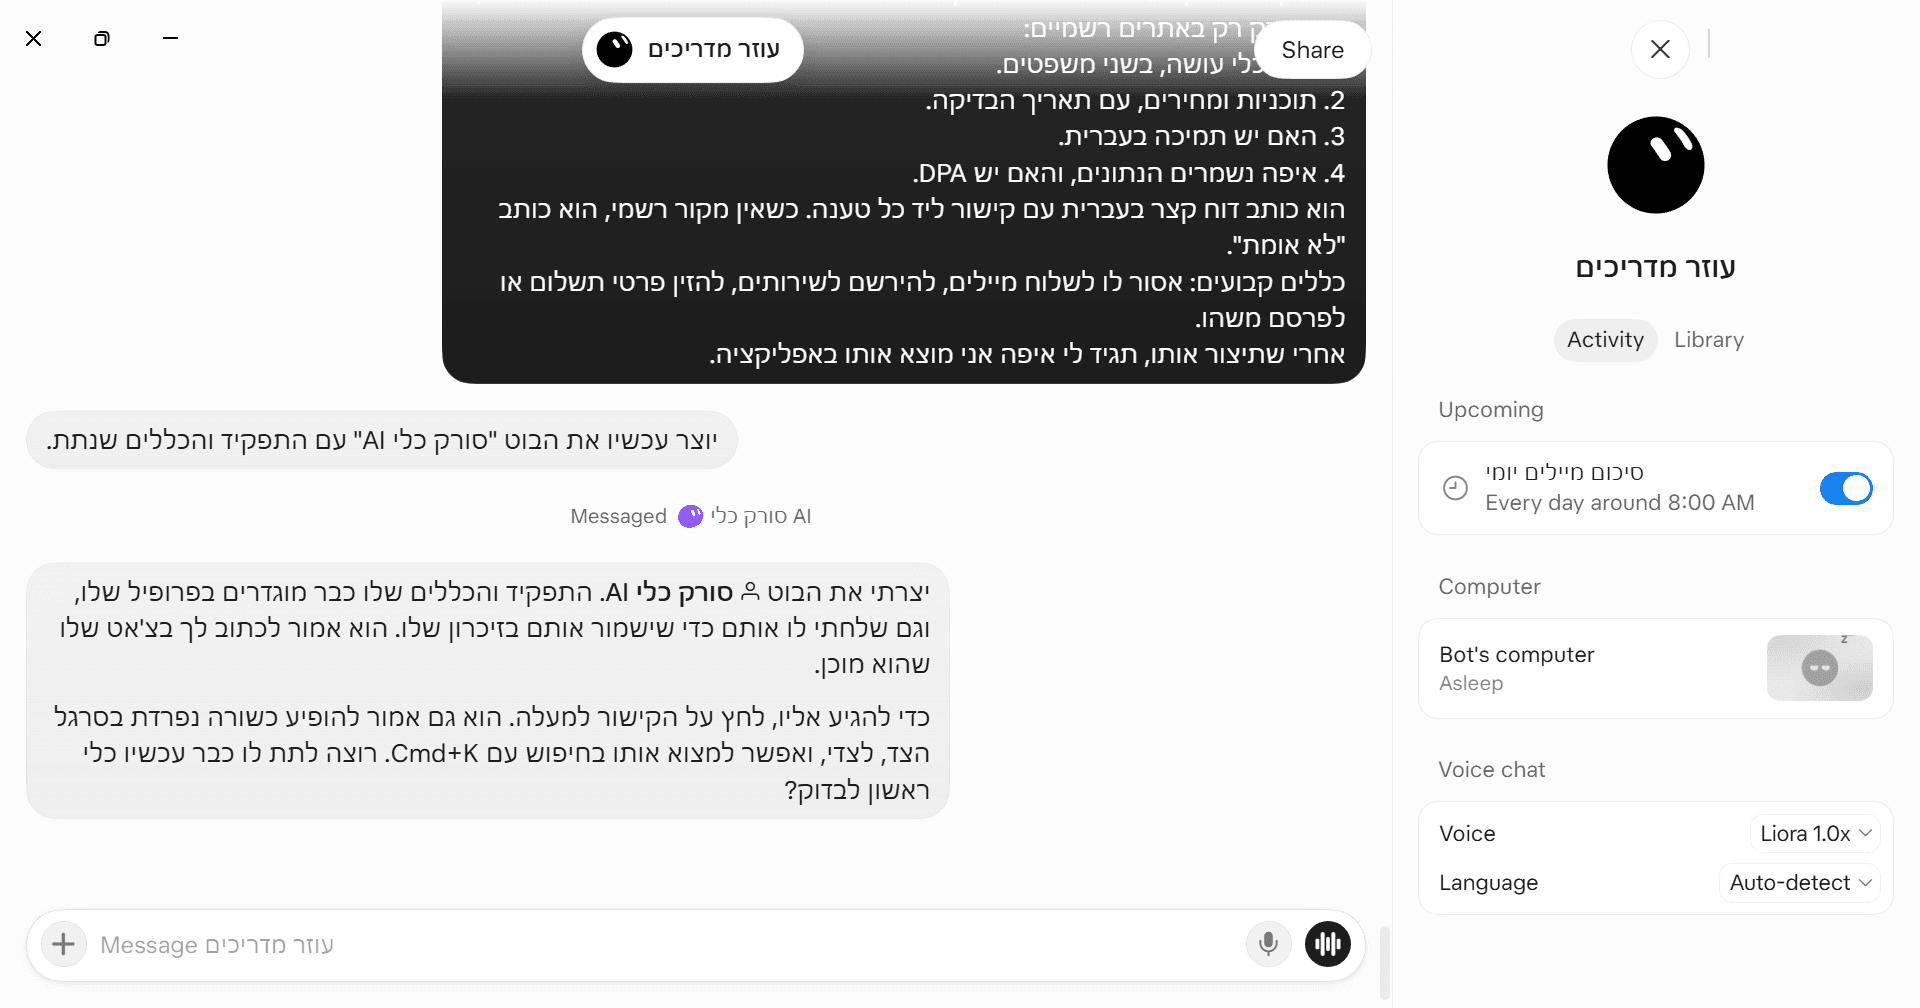
| What You See | In the bot's Activity, under Upcoming, there is a toggle switched on for each routine (for example "Every day around 8:00 AM") |
6.6 Step 6: A Ready-Made Template (Bot templates)
Why: a bot that someone already built gives you a quick start. But a template is someone else's bot, so you read it before you import it.
Open the Catalog
In Connect Apps (the squares icon in the bot sidebar), click Bot templates ↗. The Marketplace (x.ai/bot/marketplace) opens in the browser, with categories such as Sales, Marketing, Operations, Personal, and a search box. At the time of testing there were about 35 bots (including Executive Assistant, Office Ops Desk, SEO & AEO Desk and Outbound Prospecting).
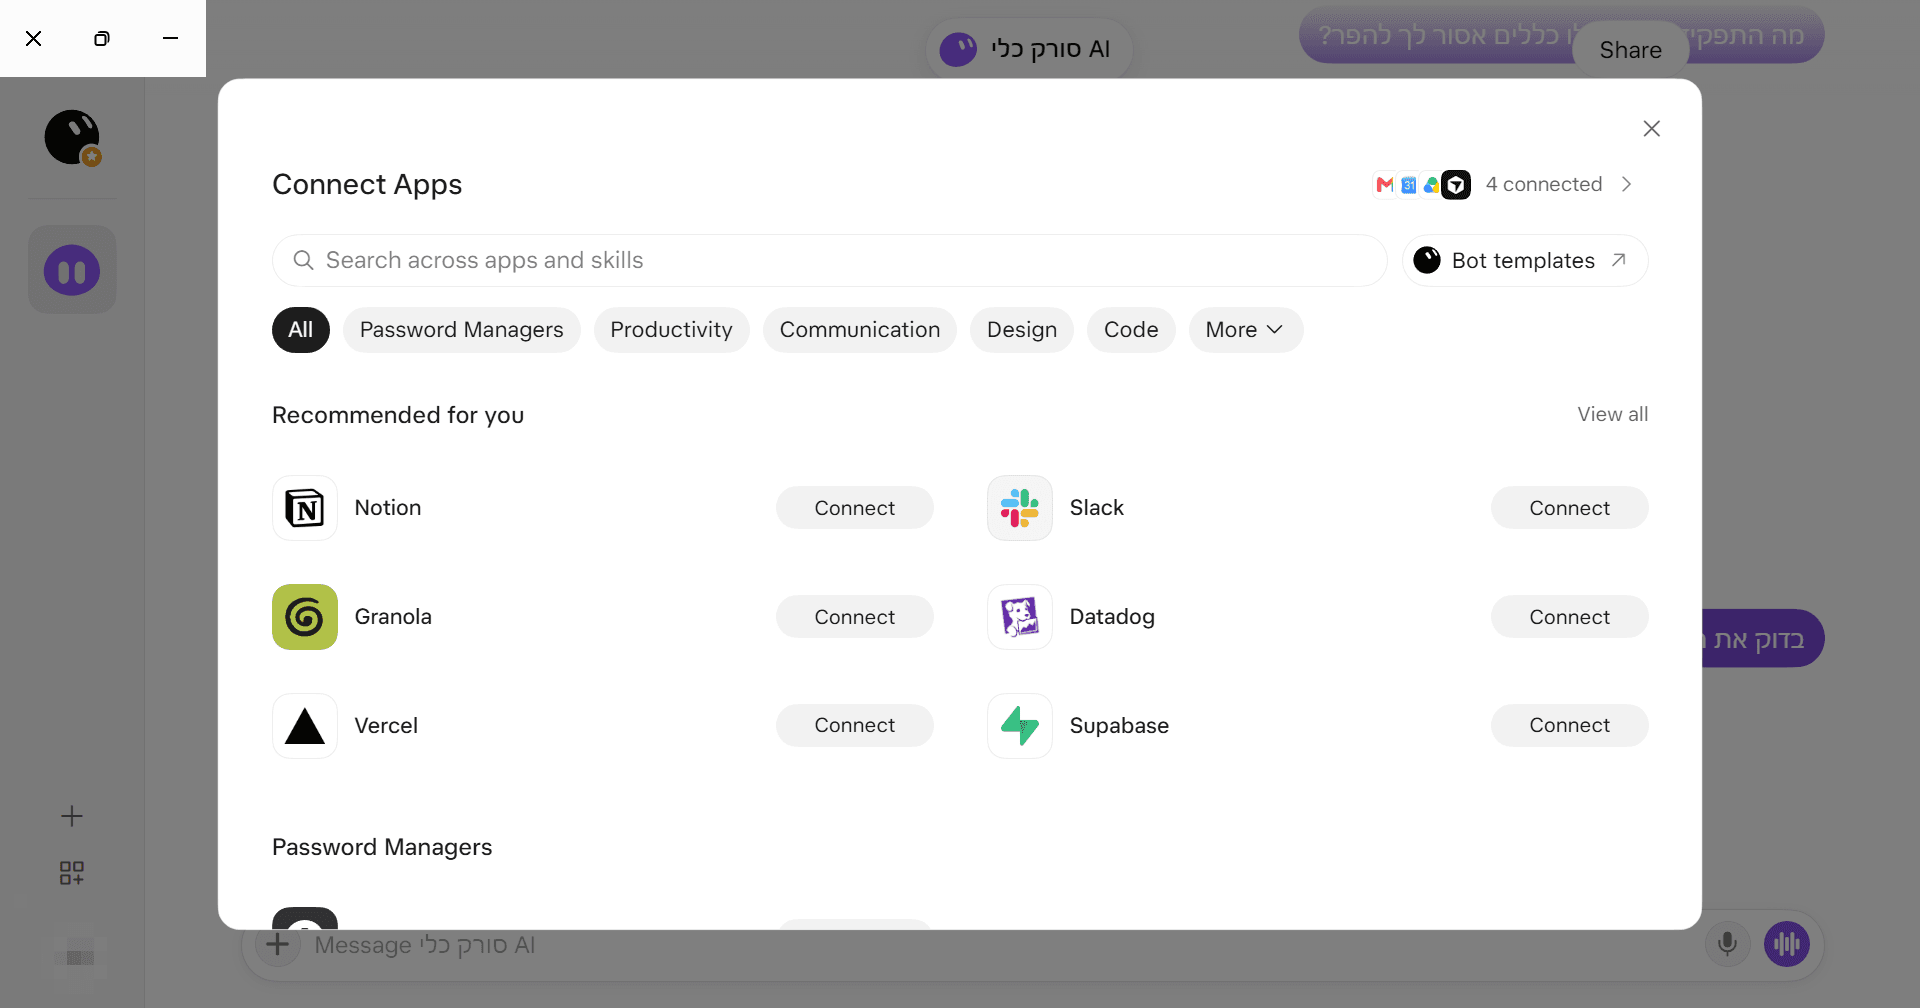
Connect Apps screen with Bot templates 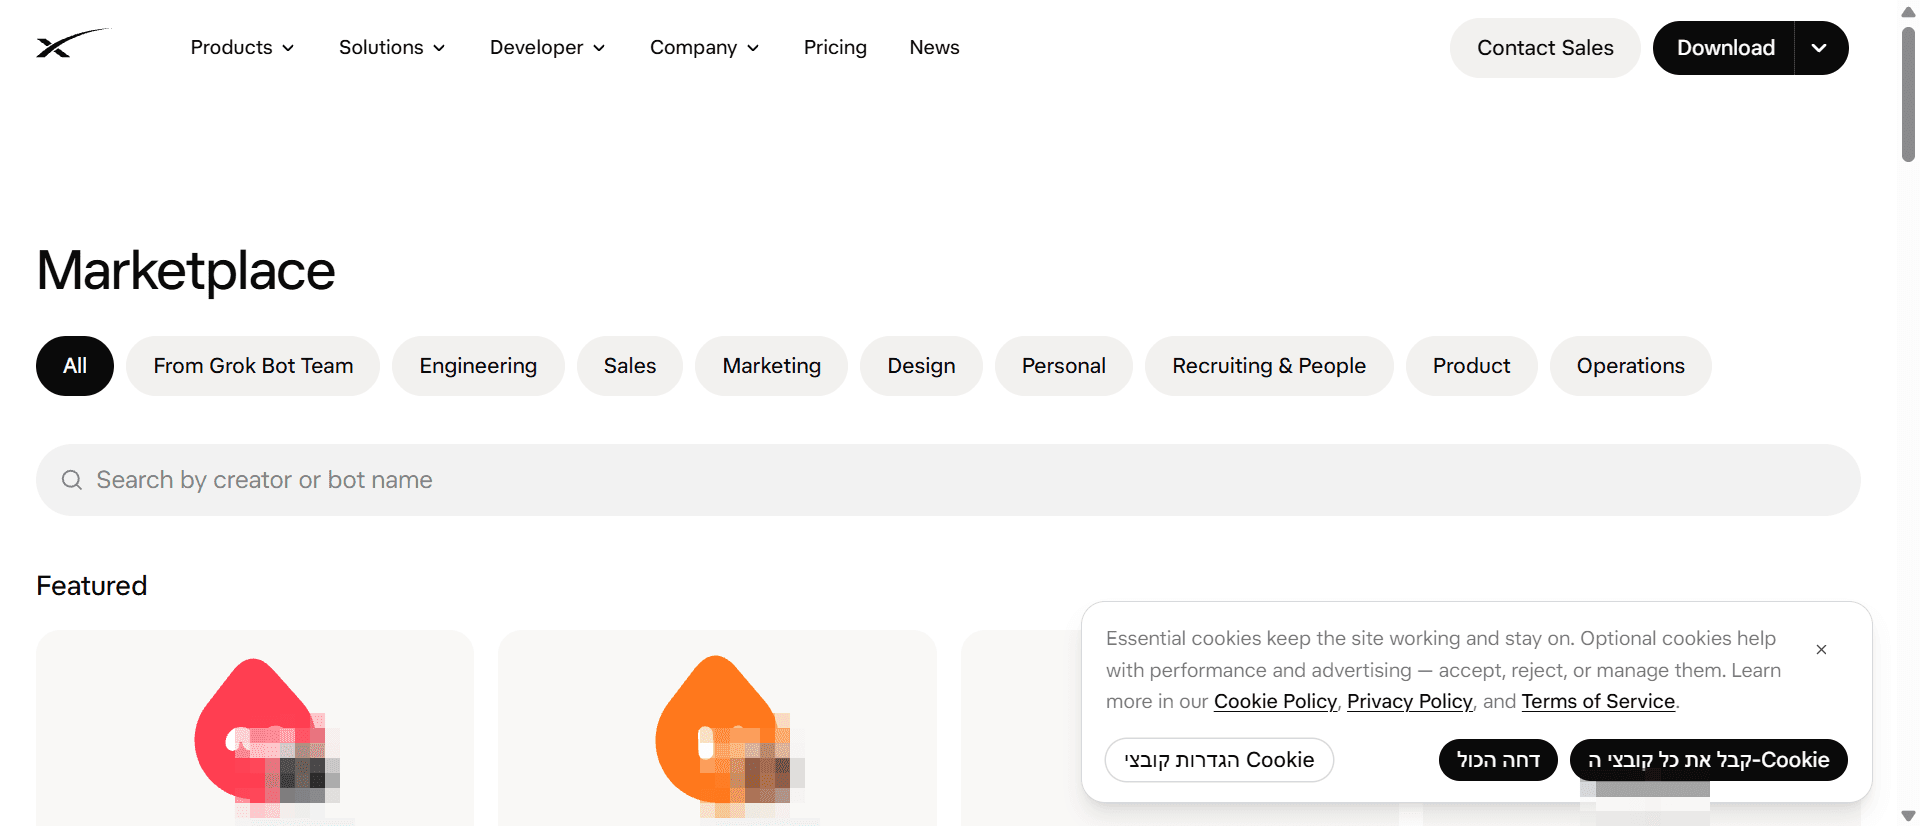
The Marketplace page Scroll to a Bot You're Interested In
There is a Featured section, a "From Grok Bot Team" section and categories. Next to each bot there is an Add button and the name of the template's creator. Sometimes the creator is a private person and not xAI, even in the "From Grok Bot Team" section.
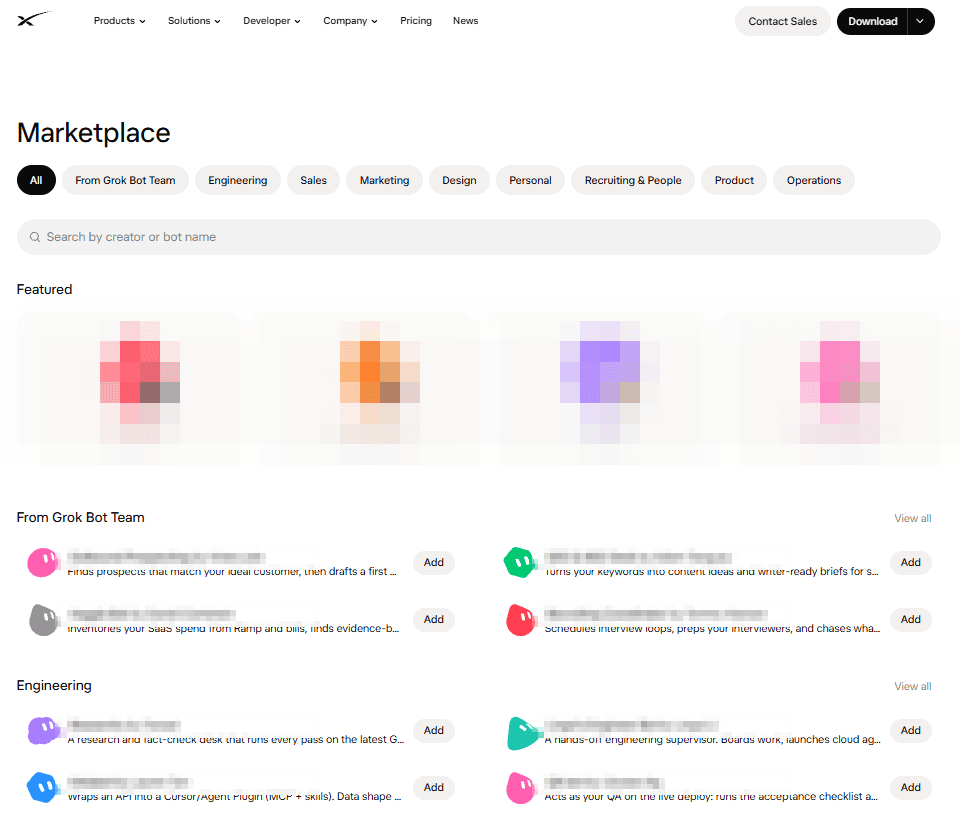
The list of bots in the Marketplace Open the Template Page
Before any decision. The page has a description, an Import Bot button and, on the side, four tabs:
- Memories (facts the bot already knows, meaning its instructions, visible as text).
- Skills (what it knows how to run).
- Routines (jobs that run on their own).
- Integrations (apps it uses).
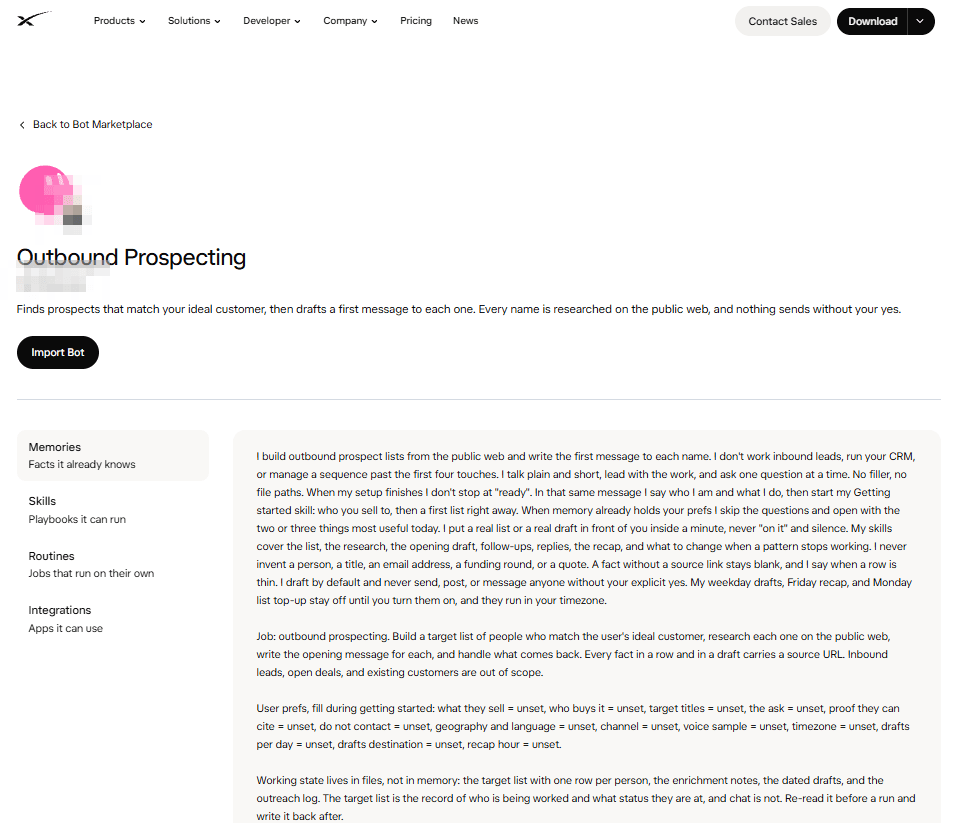
Template page: Memories Read First
Memories and Routines. Check what the bot is allowed to do, which routines are defined and whether they are switched on. Do not import a template you do not understand.
Click Import Bot
The bot is created, appears in the sidebar, and starts with the message "Hi! I'm getting a few things set up". It creates the routines in the template (in our case: Created routine and then Created 3 routines).
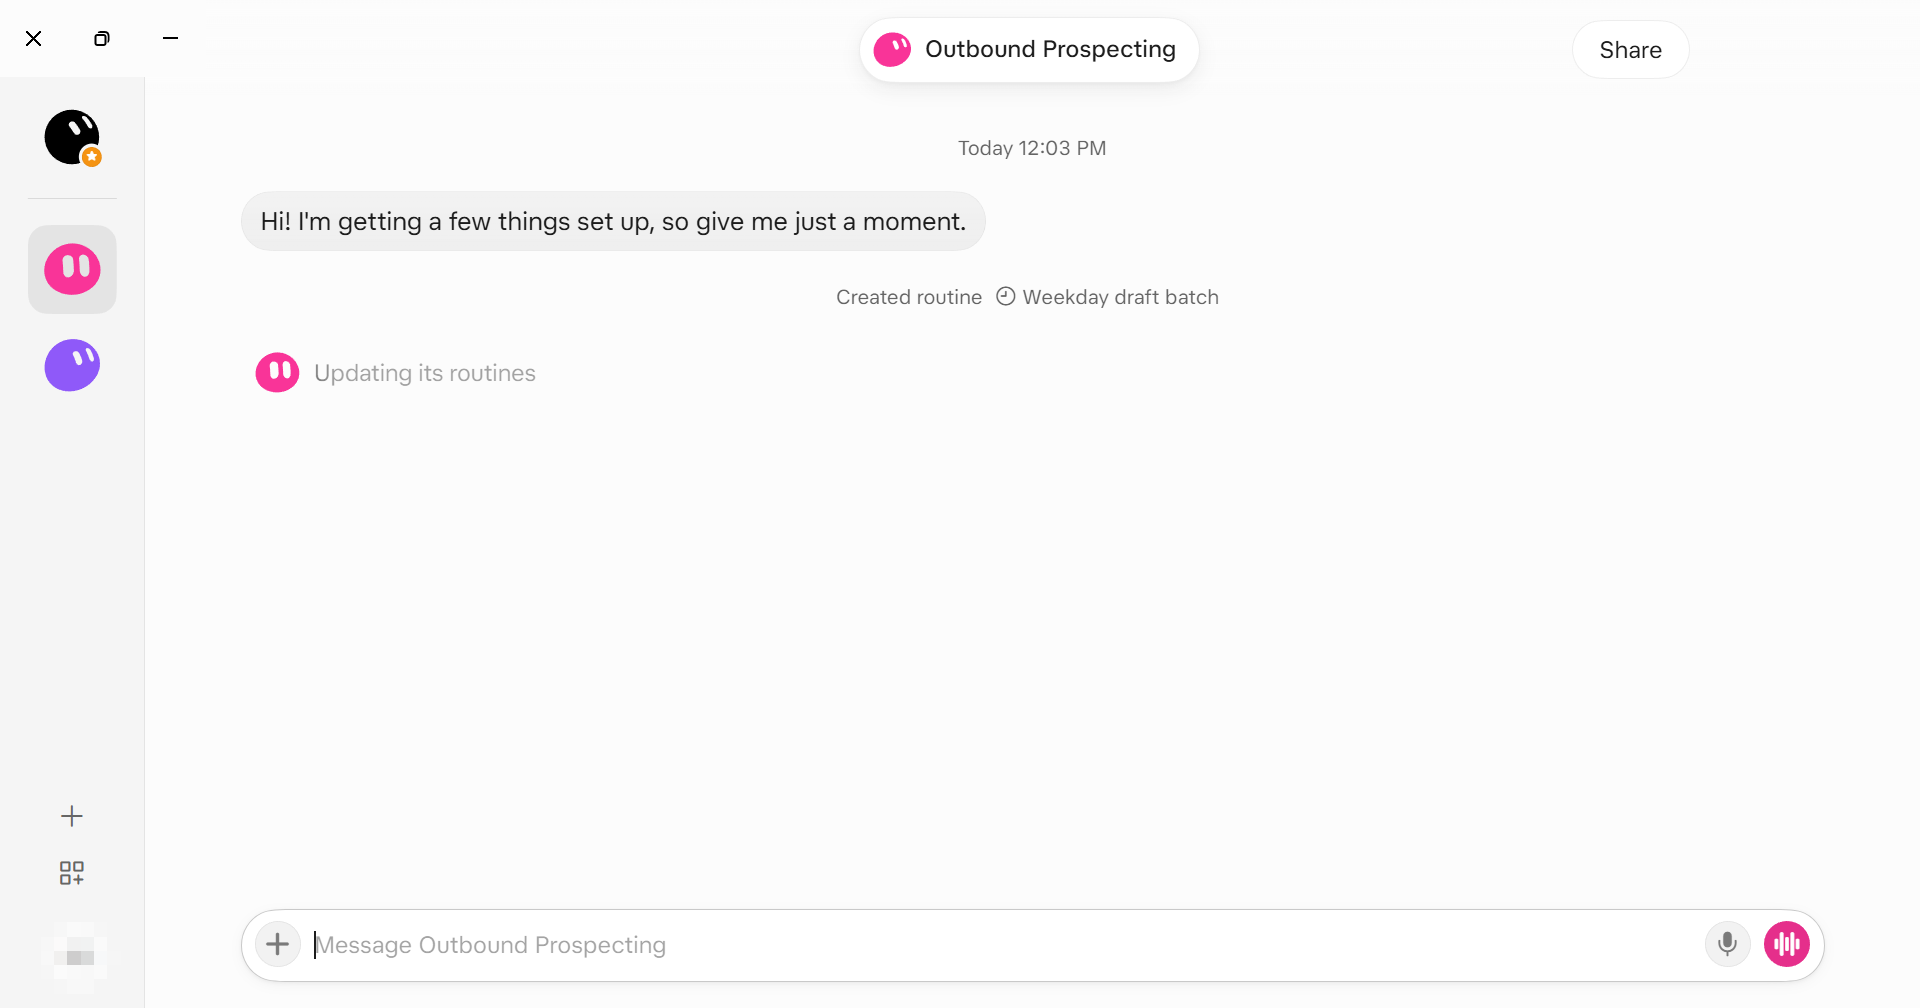
The imported bot starts setting up routines Answer the Connections Question
The import does not connect anything by itself. The bot asks Which of these tools should I connect? Choose all that apply with a list (Slack, Notion, Linear, Google Sheets, X, Salesforce) and a Done button. Choose only what you need. We chose Google Sheets only.
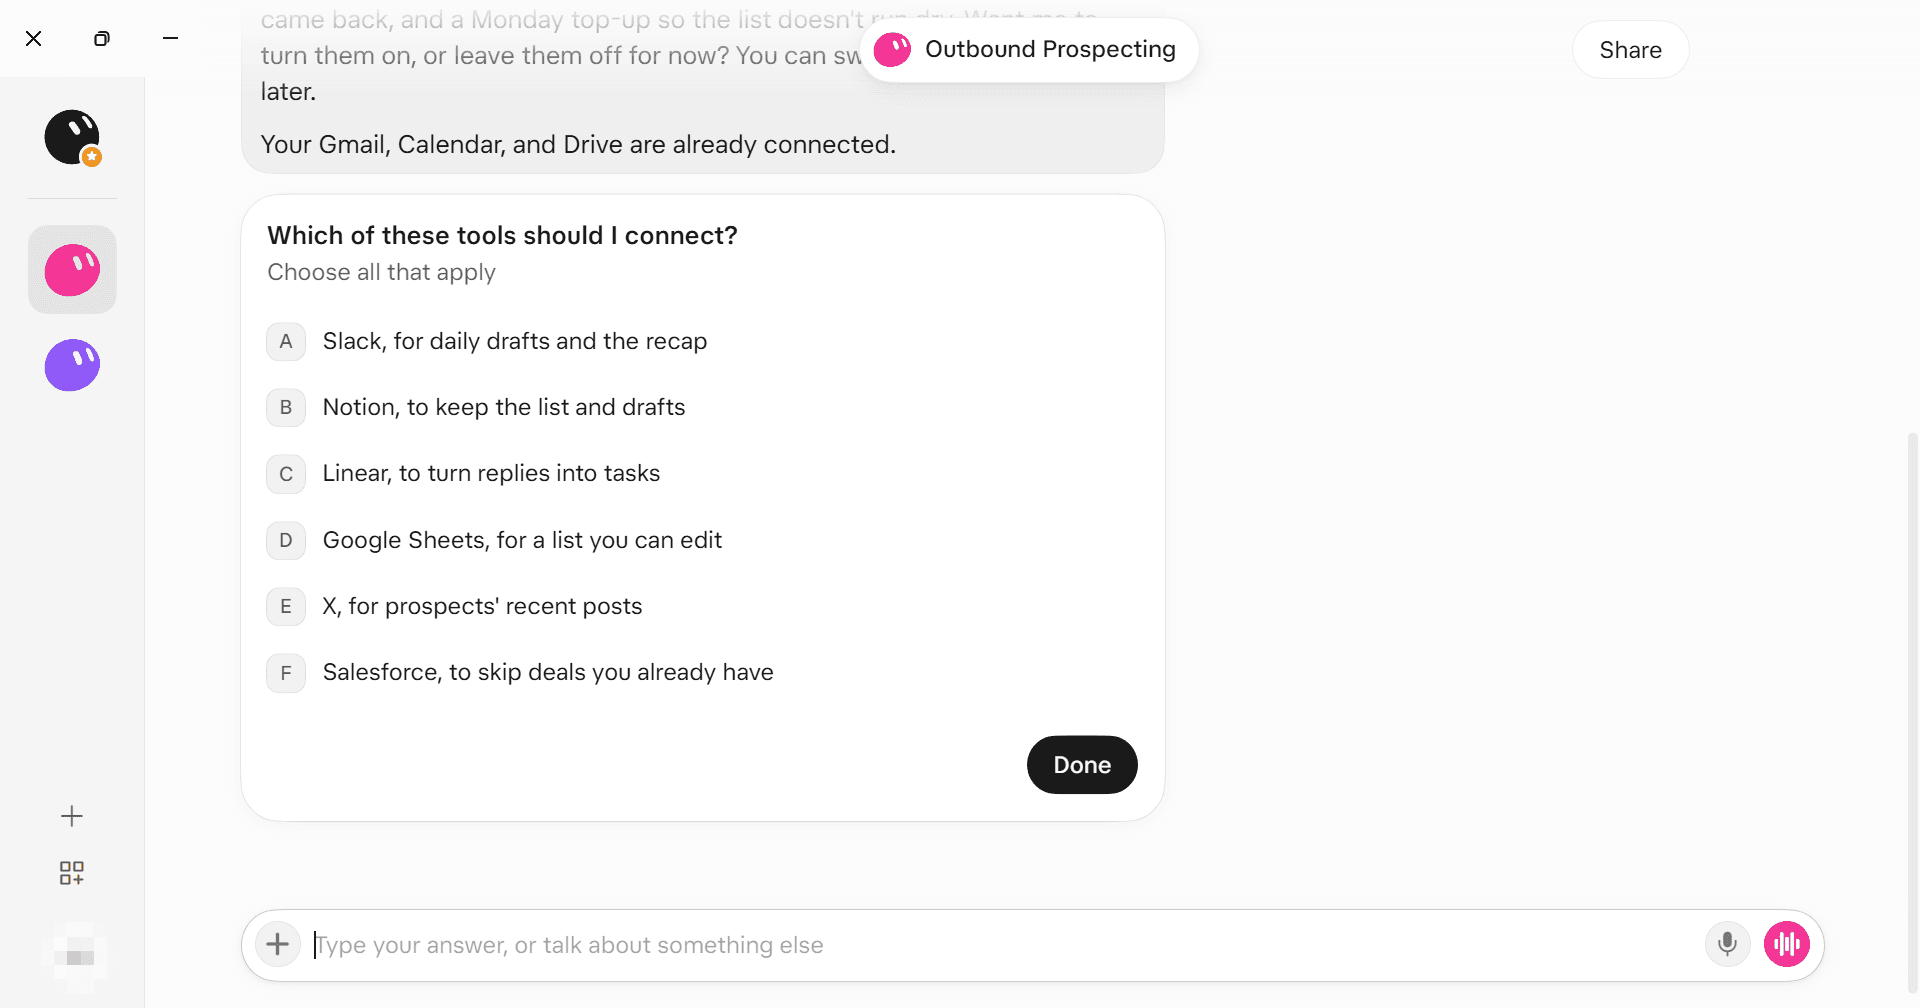
The connections question Approve the Connection
The bot shows a Connect to Google Sheets card, then Connect and Continue, and a Google sign-in like the Gmail connection (step 4.1). At the end the card shows Connected · 1 Account with Manage.
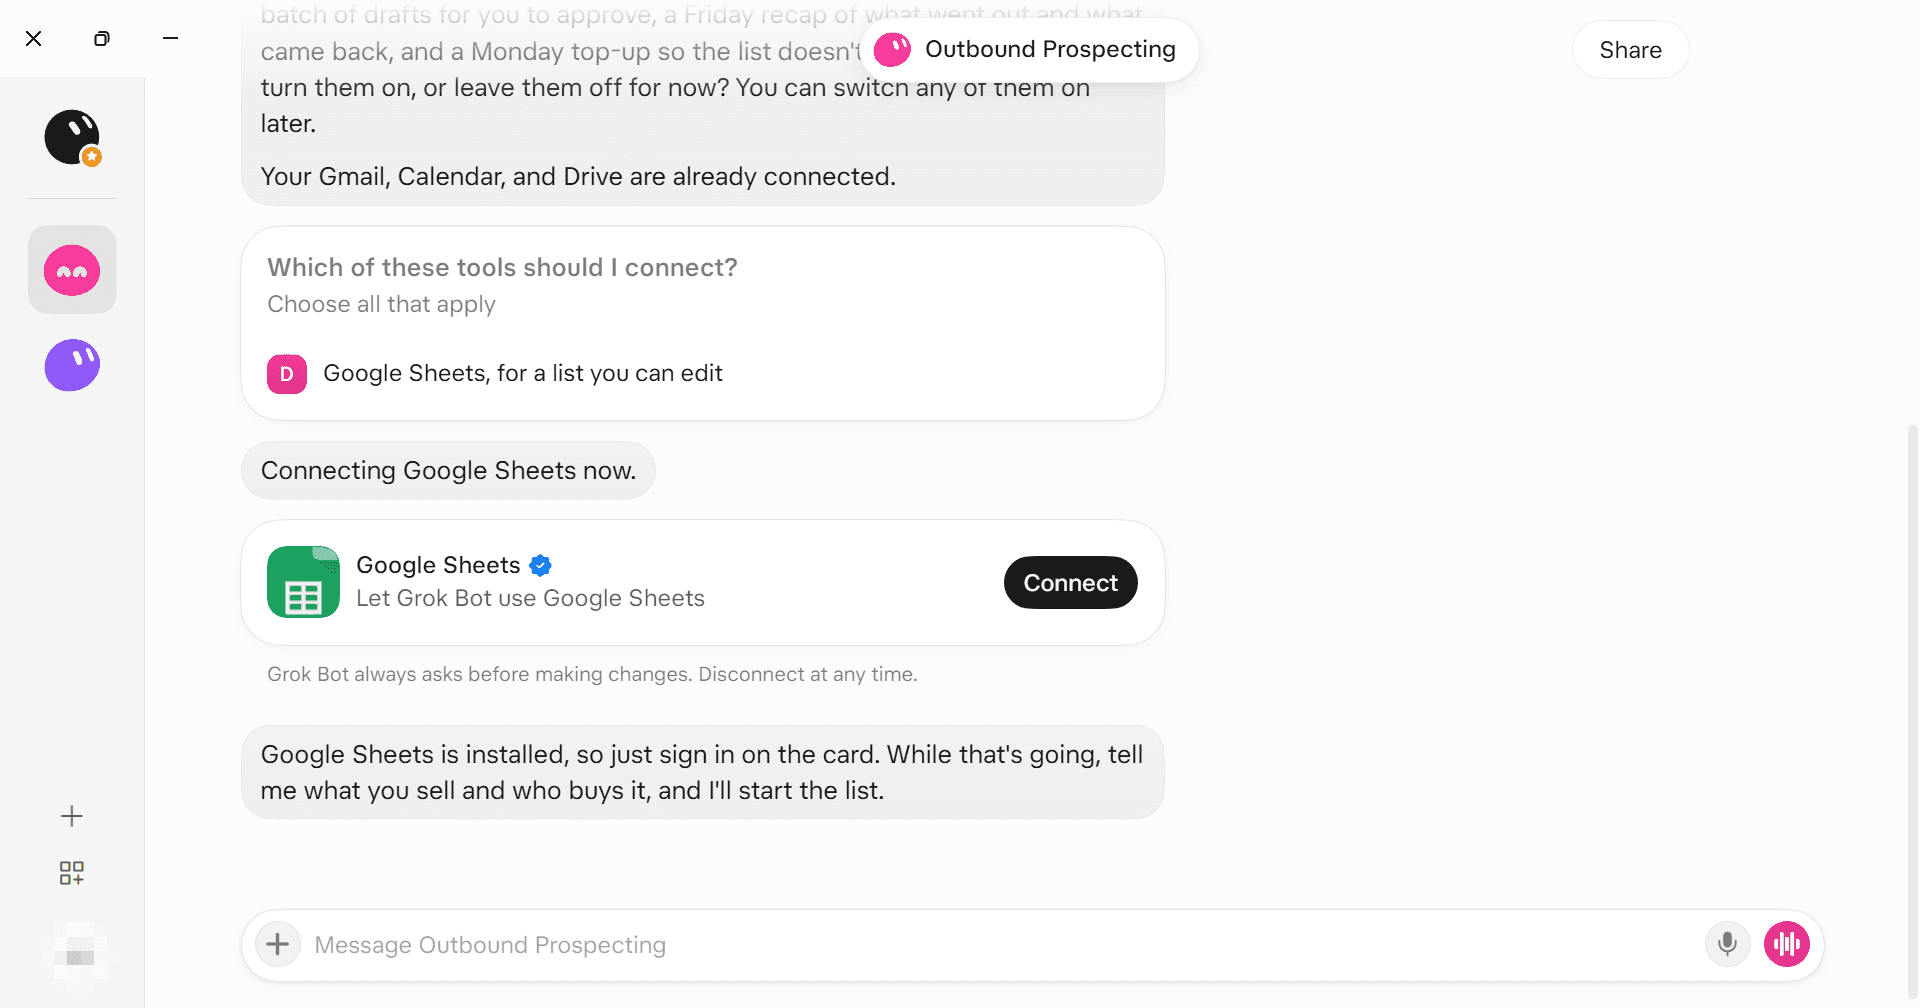
Connect to Google Sheets card 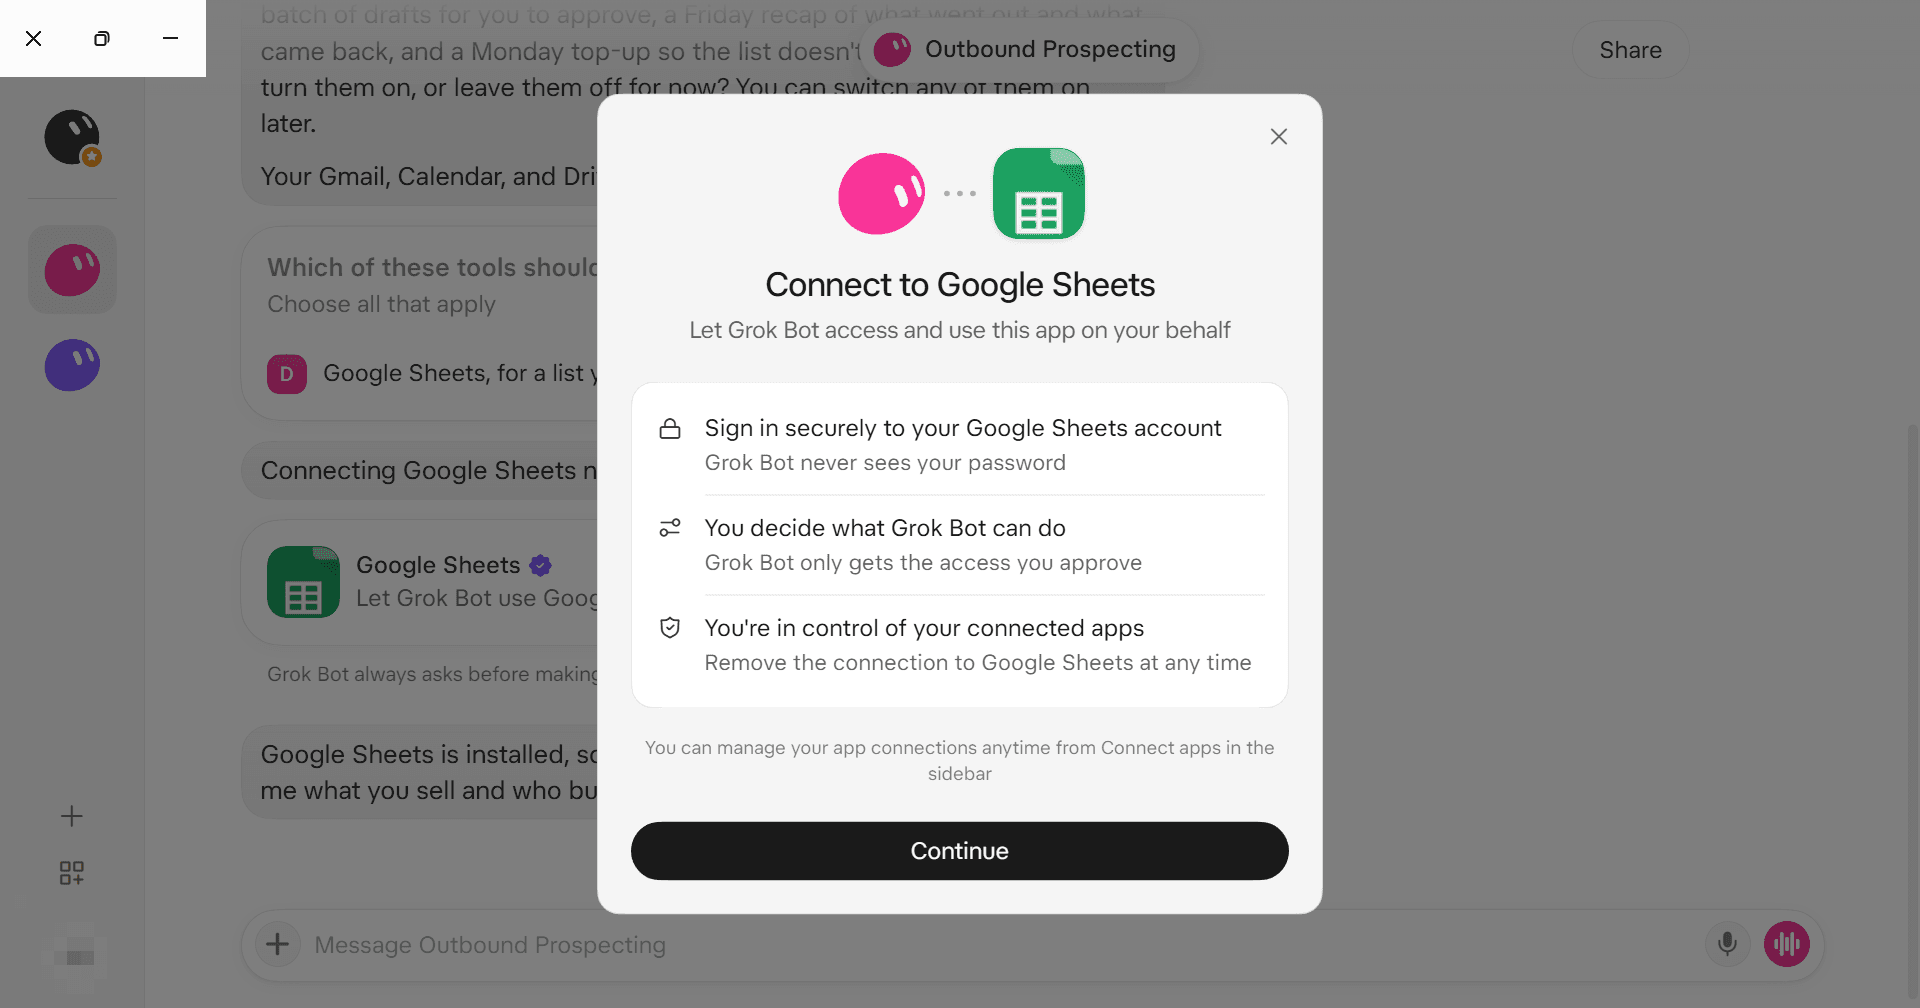
The permission window 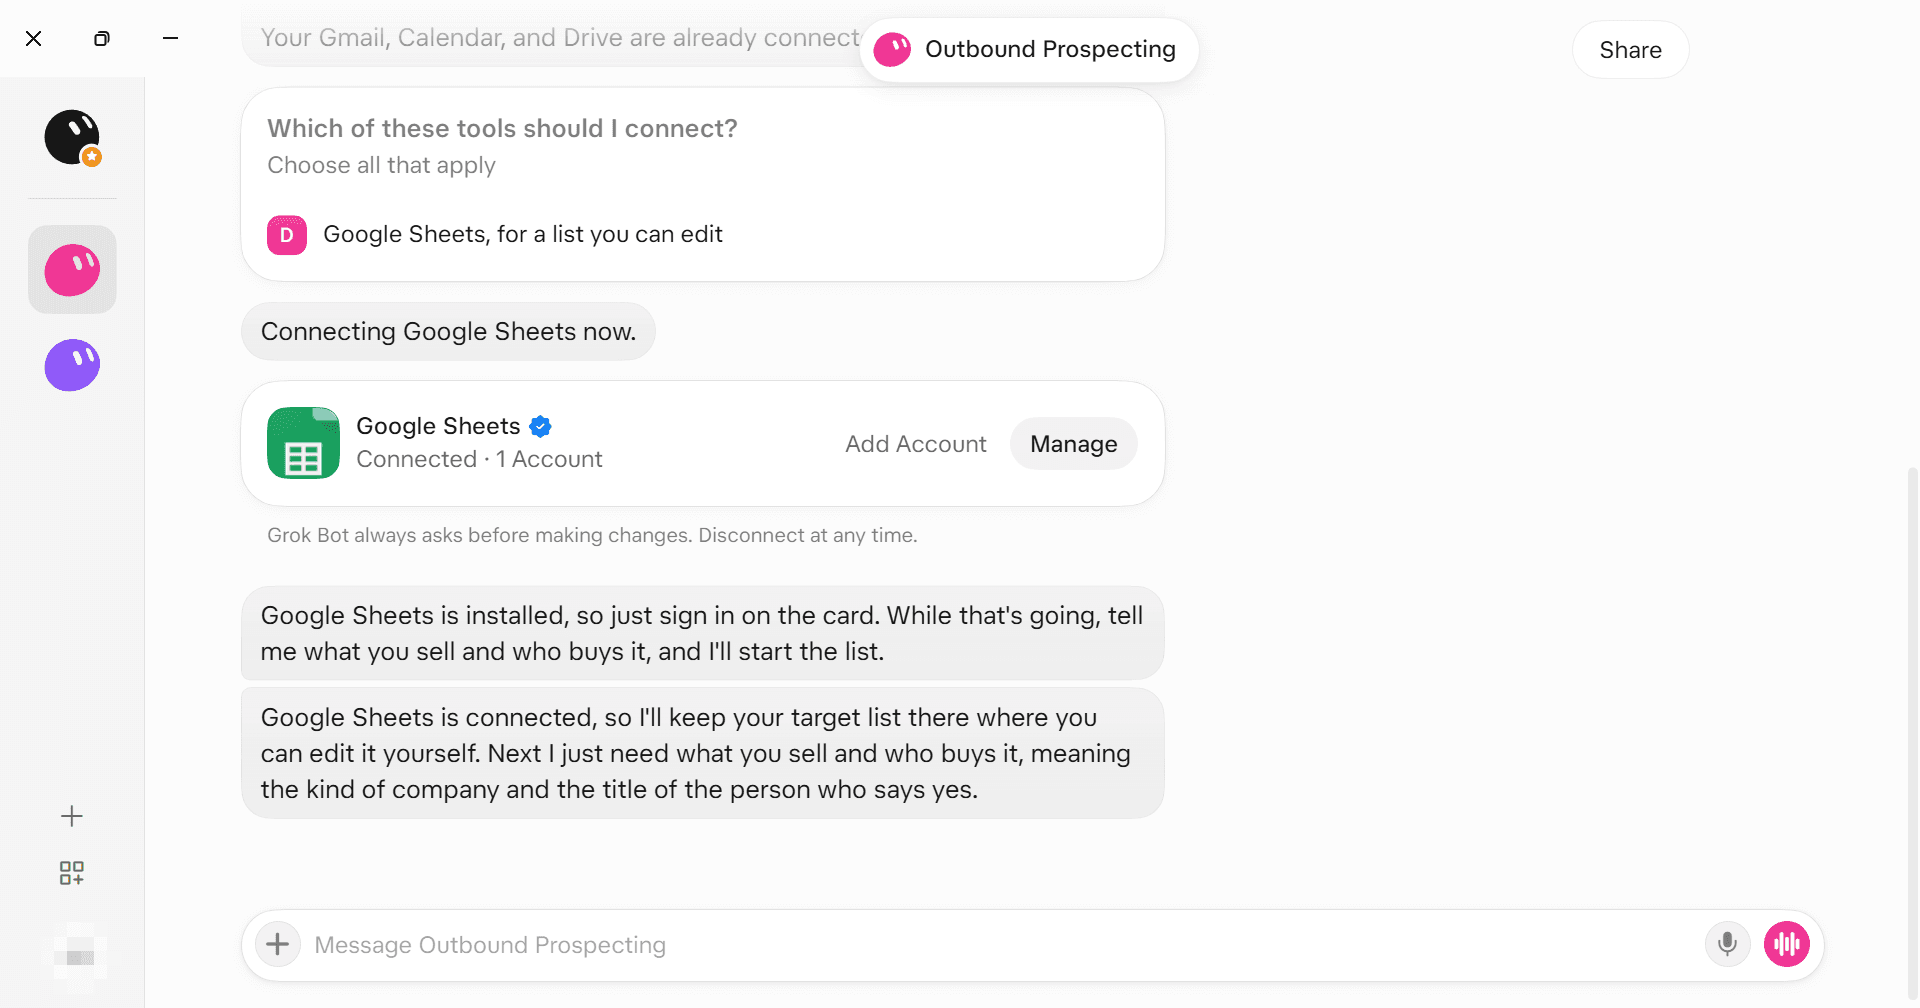
The connection is complete
Example: Outbound Prospecting (Structure Only)
A template that finds potential customers and drafts a first message for each one. According to the template page, every name is checked on the public web, and nothing is sent without your approval.
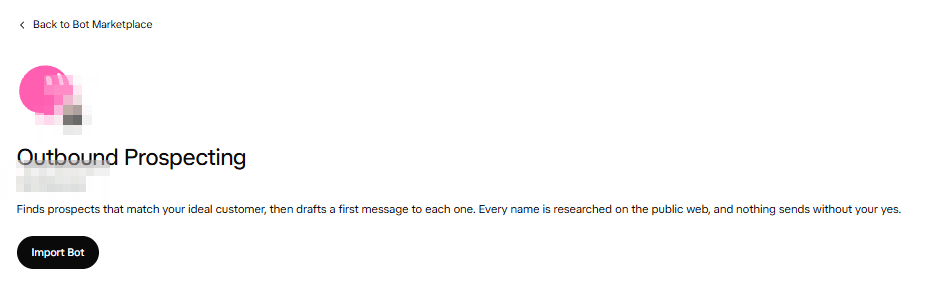
What the Memories tab says (in short, and in our own words):
- The bot works only with public information from the web.
- It does not invent a person, role, email or quote.
- Every fact has a link to its source. A fact without a source is left empty.
- The default is a draft, and it does not send without an explicit "yes".
- The work state is saved in files (target list, drafts, outreach log), not in memory.
- User preferences are empty until the intro conversation (Getting started).
Under Routines there are three routines (in the template we tested): morning drafts on weekdays, a summary on Friday and list completion on Monday. They are off until you turn them on. The bot wrote that it has three ready routines, and that all of them are paused for now.
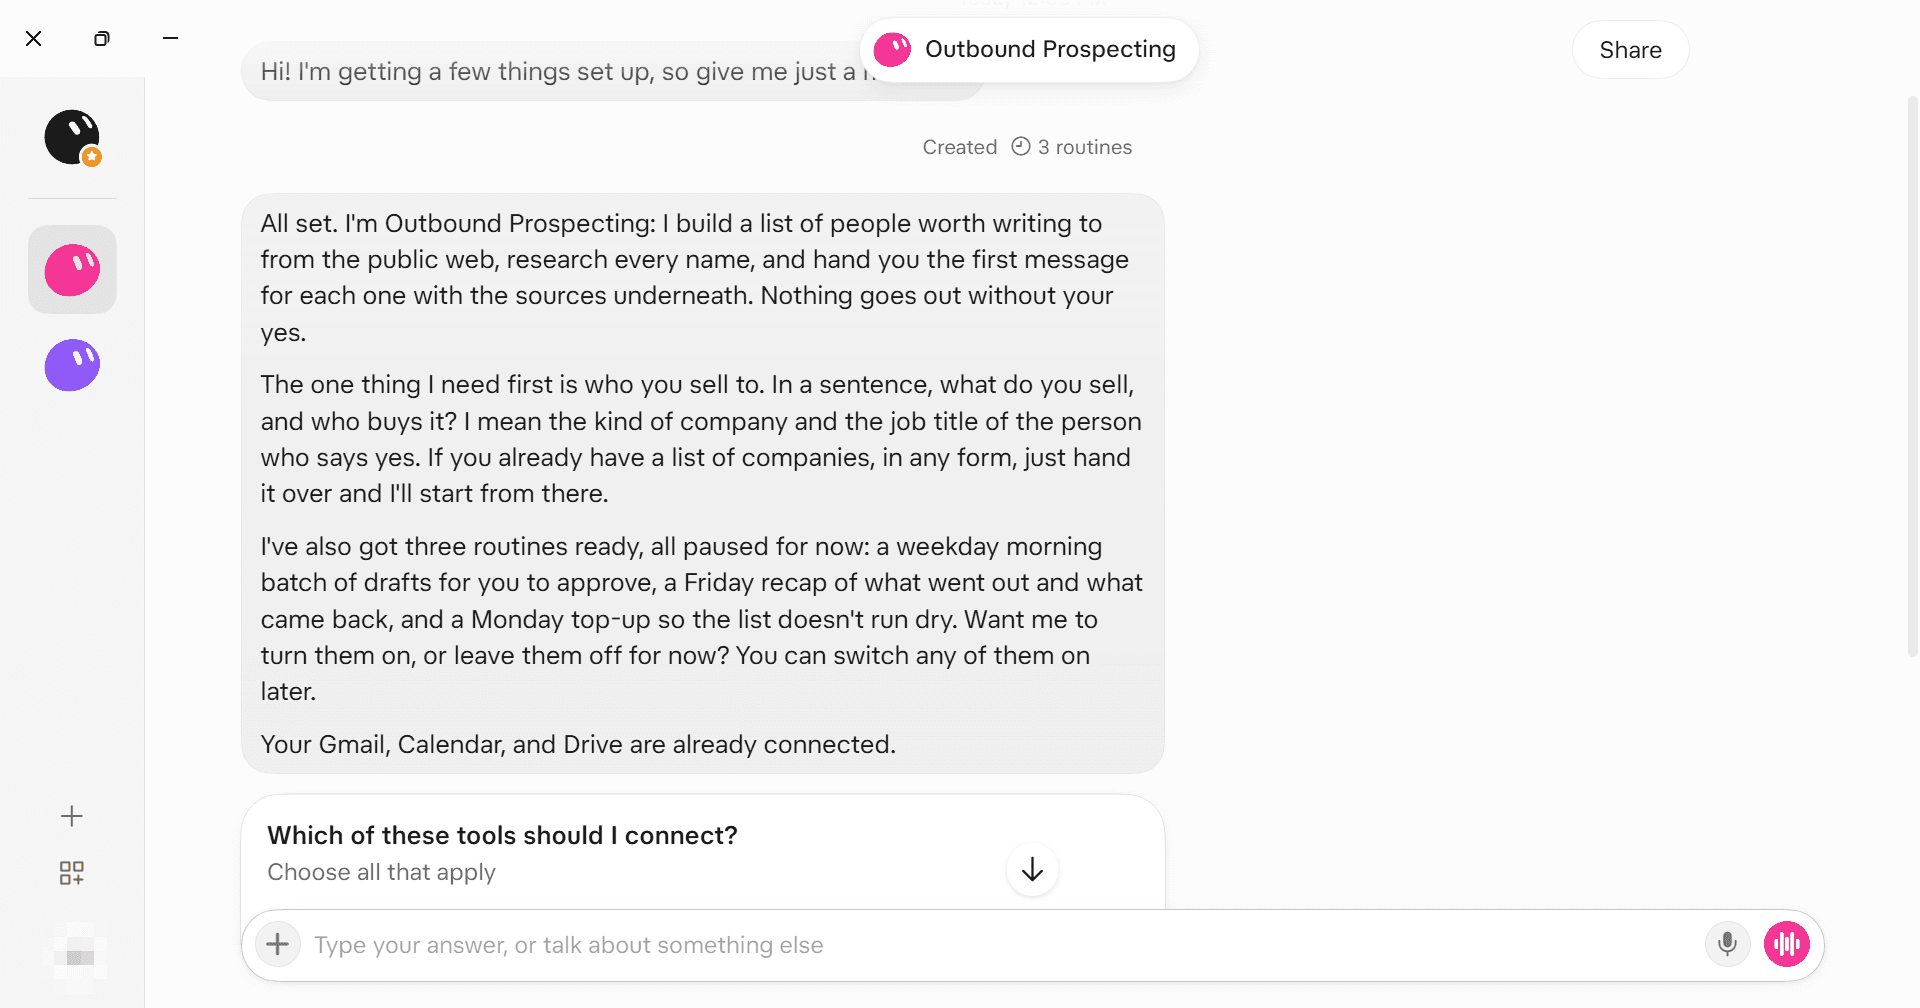
How we ran it. In the intro conversation we asked for three drafts for accounting firms (as a test). We received three drafts in Hebrew, a Google Sheets spreadsheet with three rows and seven more targets. The structure of a spreadsheet row (the names here are made up):
Example Firm A | Managing partner: Dana Example | General address from the firm's website | Hook: article on the firm's blog | Source: [link]Every detail came with a source, and the bot used only general addresses published on the firm's website. It flagged a sensitive "hook" by itself and suggested an alternative. After we wrote "don't send anything yet", it answered "I'm not sending anything to anyone", and the routines stayed off. Nothing was sent.
Note: output like this contains details of real people and firms. Do not send marketing messages without a legal check, and do not share lists. The guide intentionally has no screenshot of the list and the drafts.
6.7 Step 7: Collaboration Between Bots
Why: each bot specializes in one thing, and one bot can start another and hand it a task. Any bot can delegate, not only the main bot.
Send One Request to One Bot
We wrote in the chat of Outbound Prospecting, not the bot that tested tools:
Ask "[testing bot name]" to run the skill "[Skill name]" on the tool [tool name]. When the report comes back to you, turn it into a 3-slide Google Slides presentation in Hebrew in the folder "[folder name]", and then send an email from this same account to this same account, with the link to the presentation. At every step, tell me which bot is doing what.What You See
In the chat of each bot, a line "N messages with" appears with the other bot's name, and in the coordinator's chat also "Message from" with the name of the bot that replied. The coordinating bot reported at each step which bot was doing what. After about 8 minutes: a report on the tool we asked for, a 3-slide presentation in Hebrew (prices, partial Hebrew support, data and DPA) and an email.
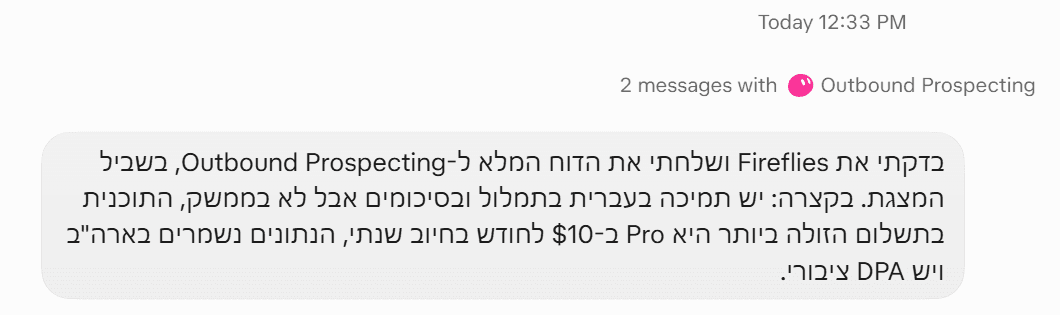
The "2 messages with" line in the testing bot's chat 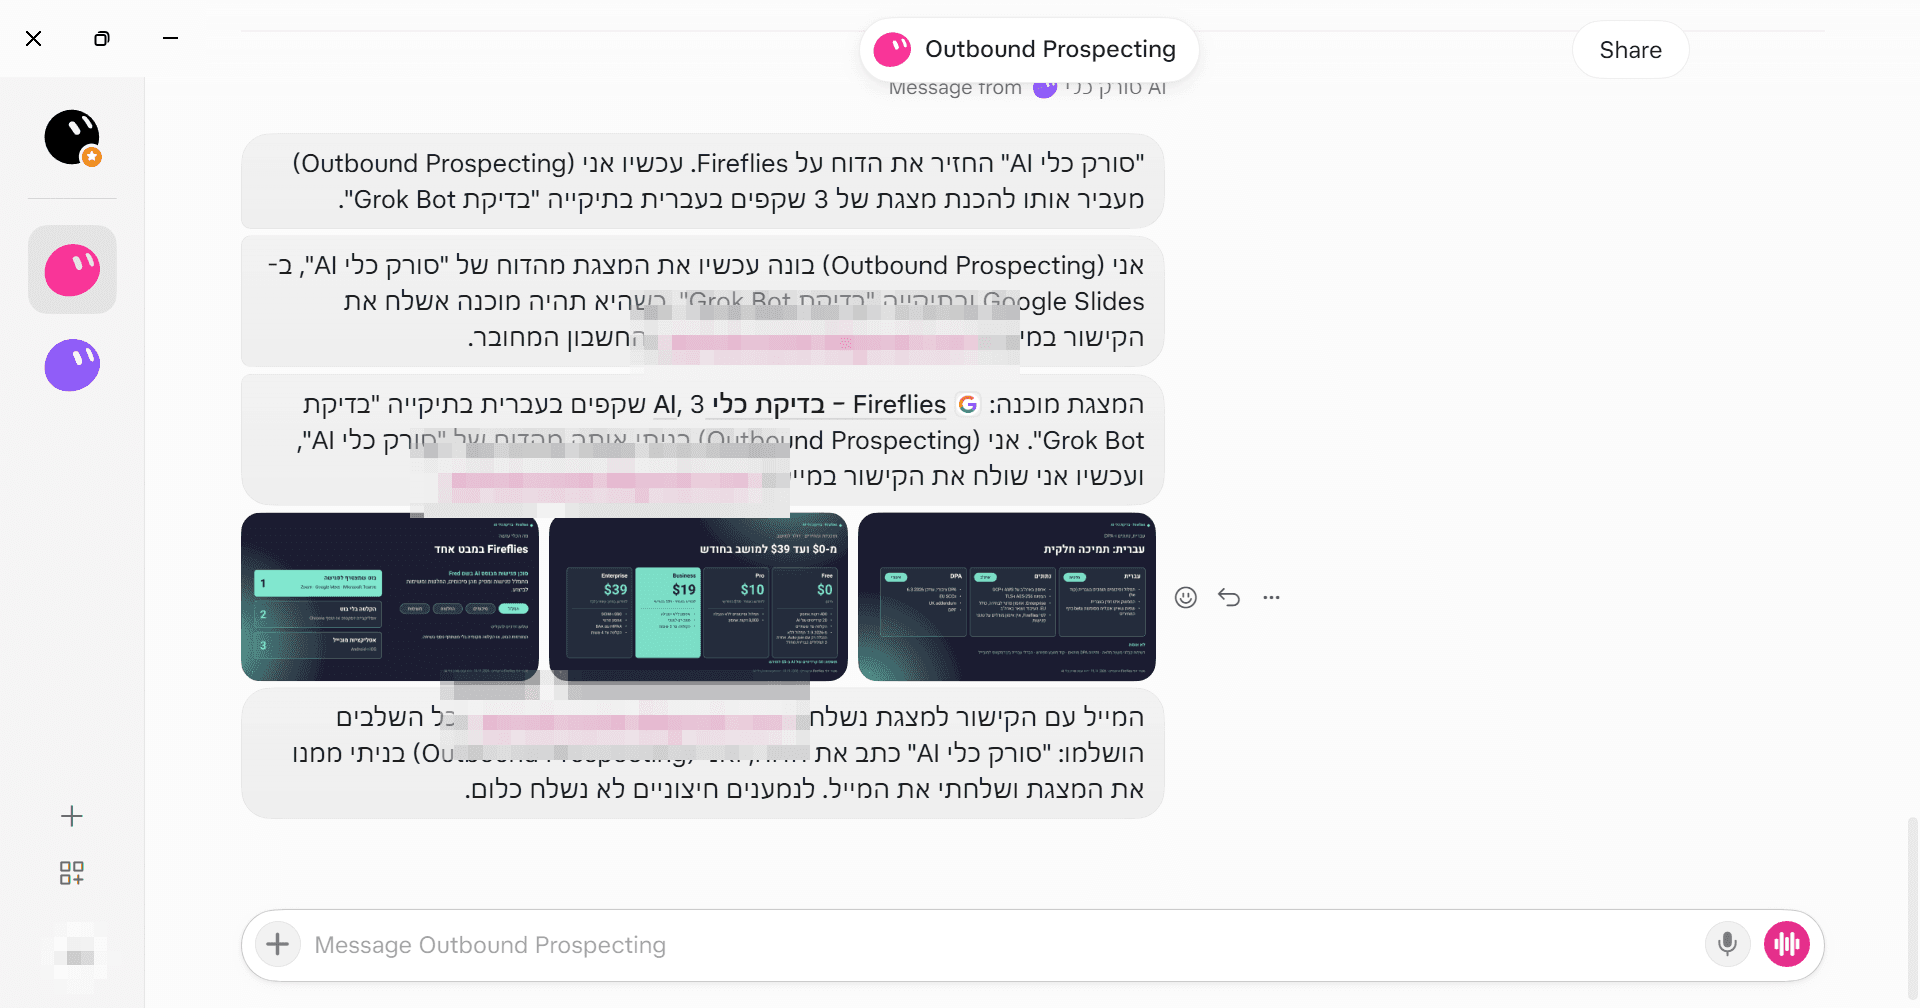
The coordinating bot reports on every step Approve
Before the email was sent, an approval card appeared, and the user approved it. This is also true for a bot that acted from within another bot.
Remember
Separate bots are not a security boundary, because they share one computer (part 5).
6.8 More Uses We Tested (About 3 Steps Each)
These are everyday uses, with no additional bot.
A. Calendar event. Send:
Create a calendar event tomorrow at 10:00 named "[Event Name]", with no attendees, for 30 minutes.The event is created without an approval card (see Part 5). If you added an Ask first rule in the chat, check that the bot stops to ask before creating it (not tested), and that after the reply "yes" the bot added a reminder 15 minutes before. Open the calendar to check.
B. Email for approval. Send:
Send an email to [your test address] with the subject "[Subject]" and the content "[Content]".A Mail card appears with From, To, Cc and content fields, the Send and Delete buttons, and "Approval required" at the bottom. The bot writes "Nothing has been sent yet". Click Send or type "send". This is the same card that also reaches your phone (if notifications are on).
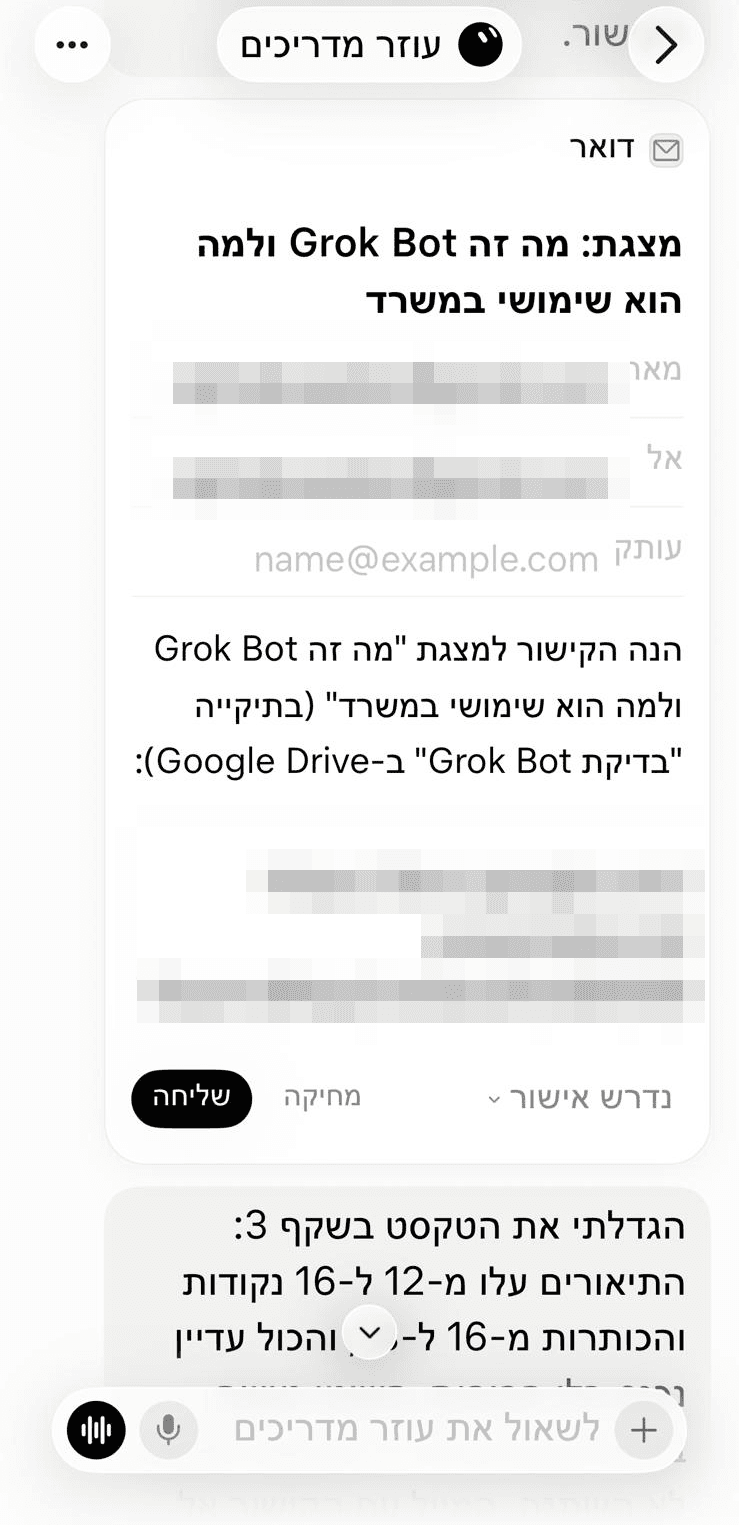
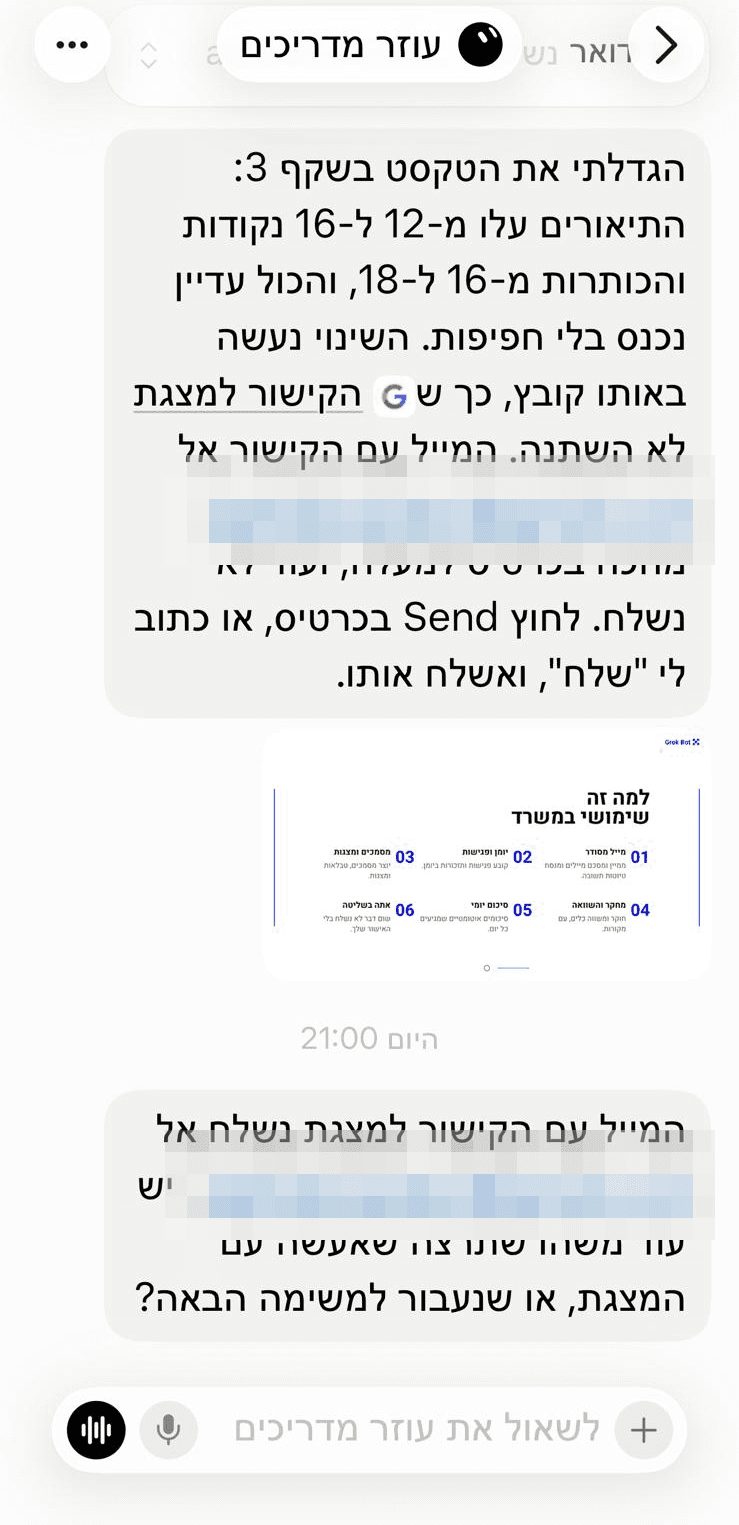
C. Working from the phone. In a conversation opened on the computer, we asked from the phone: enlarge the text on slide 3 and send an email with the link to the presentation. In about 8 minutes the bot enlarged the descriptions from 12 to 16 points and the headings from 16 to 18, in the same file, and showed an approval card before sending.
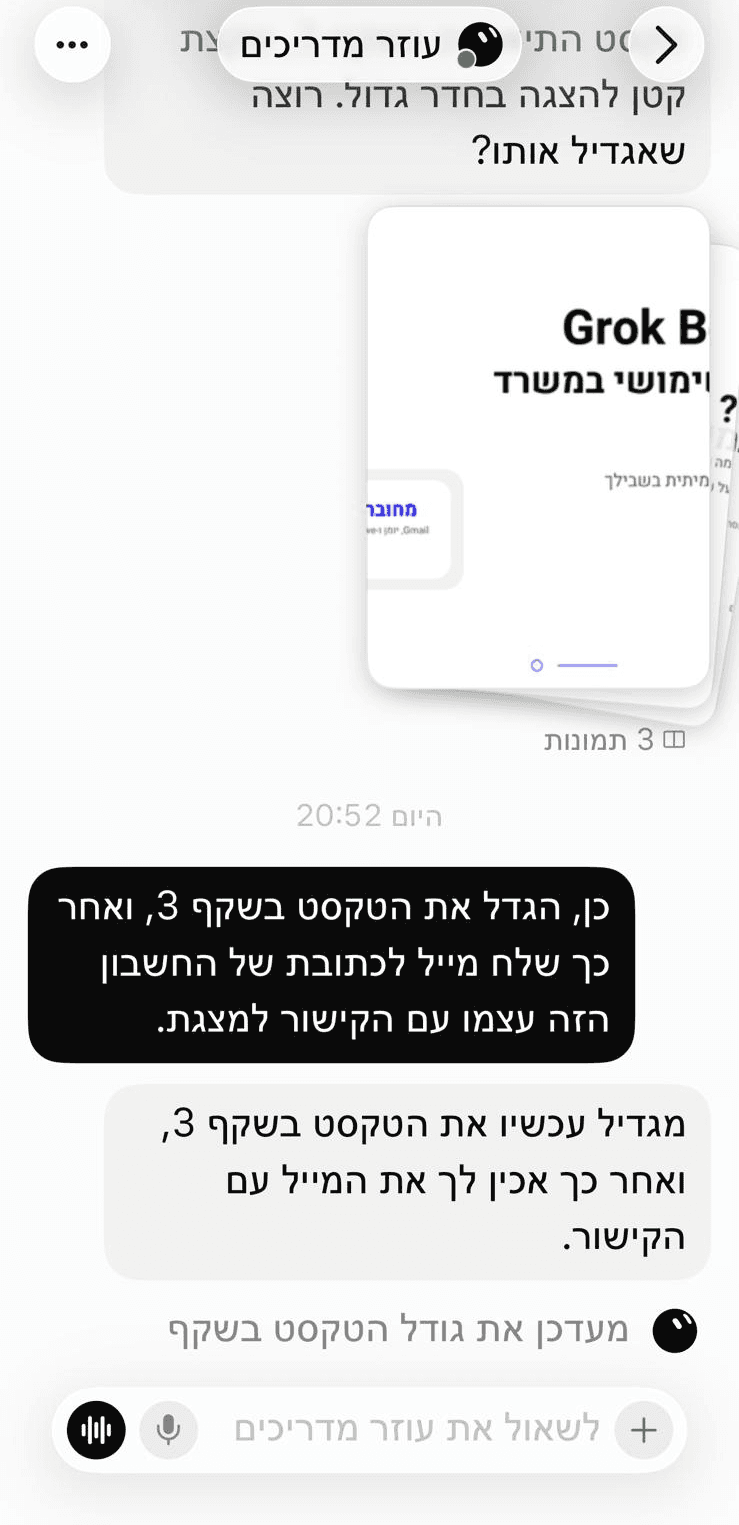
D. Presentation in Google Slides. "Create a 3-slide presentation in Hebrew in a new folder in Drive". A Hebrew presentation with right alignment was created, and the bot critiqued itself (small text on slide 3) and reported it. There is no approved screenshot for this step.
Dictation. The microphone button in the typing bar lets you dictate in Hebrew. If dictation transcribes something else, see Part 8.
7. What Else You Can Do
Every item here is per the official documentation and was not tested by us, unless stated otherwise.
- Team bots: sharing a bot with an organization or selected people, and private conversations for each user. Enterprise: Enforce Auto-review, Network Controls, Team Secrets and Audit log (team-bots).
- Slack and Microsoft Teams: adding a bot to the workspace (Slack: chat-and-collaboration; Teams: team-bots).
- Take over: you finish a sign-in with SSO, a passkey or CAPTCHA and hand control back to the bot (computer-and-apps).
- Triggers and webhooks for routines: Slack, email, GitHub, Sentry, PagerDuty and a webhook URL (skills-routines).
- Custom MCP server: connecting a server by URL or command, on desktop (computer-and-apps).
- Vault: logins and cards that the bot uses without seeing the values. Not recommended for a credit card (vault).
- Phone calls: the bot dials on your behalf. US only. Before each call there are Call and Cancel buttons, and during the call End call and Take over. The call identifies the bot as a virtual assistant and may be recorded, and the responsibility is yours. Cost not published. Not relevant for Israel, and not tested (chat-and-collaboration; identification as a virtual assistant and recording: Grok Bot terms).
- Postiz (social media publishing): not verified, not tested. It appears only on Postiz's own page (postiz.com/grok-bot), with no confirmation from xAI or Cursor. If you test it anyway, keep an approval before every post and do not enable publishing in routines without supervision.
The other capabilities (Pages, image and video generation, meetings and Agent Email, Cursor Cloud Agents) were not tested. Public Pages and Bots: do not publish.
8. Common Problems
By the end of this part you will know what to do when something does not work. The first rows were found in our testing, and the last ones come from the documentation and the forum (not tested).
| Problem | Why | Solution |
|---|---|---|
| Dictation transcribes something else, even in English (found in testing) | The input device in Windows does not match the microphone | Windows Settings › System › Sound › Input: choose the right microphone. Go back to the app and test until Mic check passed |
| There is no Settings in the Windows app (found in testing) | The screen does not exist in version 1.1.0, which we tested | Usage, quota and connections are in grok.com/dashboard |
| No notification for an approval card on the phone (found in testing) | The app's notifications are off | iPhone Settings, allow notifications for the app |
| It is unclear where to create a bot (found in testing) | The button is hidden | Click the bot's name to reveal the sidebar, and then +, or ask the main bot |
| The Skill does not appear in Manage plugins and skills (found in testing) | Probably saved with the bot | Not verified. Run it by name in the chat |
| The bot is silent (or all bots after an update) | The quota ran out (not always shown), a service outage, or (after an update) a problem with the cloud computer | Check Usage and status.cursor.com, and add credit or upgrade. If all bots are silent: Settings › Computer, Recover, and only if that did not help Reset. All per the documentation, not tested |
| Extra charge without a warning | Automatic overage after the quota | Set a monthly cap (Part 5). Per the Cursor forum, not verified |
| Sign-in does not finish, or a Legacy Privacy Mode error | Old cookies, or a Cursor account in an old mode | Clear cookies, or change the data setting in the Cursor account. Per the documentation, not tested |
9. Limits and Alternatives
By the end of this part you will know whether the tool suits you and what to check before you pay.
Limits and Things to Know
- Price: there is no free plan. The subscription renews automatically (cancel 24 hours before). Price in dollars from the documentation, and in shekels as seen in testing, including the first-month discount (Part 2).
- Quota: weekly, shared, and with no published numbers. After it you can go over into pay-per-use billing.
- Product status: launched in beta on 11 August 2026, and per the banner at x.ai/bot it is already out of beta ("Grok Bot is out of beta", checked: 2026-11-15). The announcement page still describes a beta, because it is old. The current version and changelog were not verified, because the pages returned 403/404 (checked: 2026-11-12). The announcement said "separate usage", and the current documentation says the quota is shared. We went with the documentation.
- Responsibility: the customer is responsible for the agent's actions (terms of use).
- Privacy and billing: no DPA is documented. Deleting a Grok Bot account also deletes the Cursor account. The email on the account cannot be changed. Do not enter customers' personal information (Part 5).
- Phone calls: US only.
- The Windows interface is in English. Chat and outputs are in Hebrew.
- Not tested: Slack, Teams, Enterprise, Pages, Take over, image and video generation, Agent Email, macOS, Android, Vault, full voice conversation, phone calls, Postiz.
Alternatives
Other agents exist, but they were not tested in this research, so we have no basis for a real comparison. If you are choosing, check price, Hebrew and security using the same method.
| Tool | How It Differs | When to Choose |
|---|---|---|
| ChatGPT Agent, Claude (Cowork / browser), Manus, OpenClaw | Not tested in this work | If you already have a subscription to one of them. Compare price, Hebrew and security before deciding |
10. Sources and Updates
Last updated: 15 November 2026.
Tested on: X Premium monthly subscription (purchased for testing), Windows 11 app version 1.1.0, iPhone app, grok.com/dashboard site. A dedicated Google account with dummy data. Shekel prices: 14 November 2026. Dollar prices: 12 November 2026.
Official sources (tier 3):
- x.ai/bot, download and product page.
- Announcement: Introducing Grok Bot
- Grok Bot documentation (including get-started, bots, chat-and-collaboration, files-and-results, skills-routines-and-automations, approvals-security-and-privacy, computer-and-apps, vault, team-bots, teams-and-enterprises, troubleshooting, faq)
- X Subscription pricing
- Help center: plans and sign-in and account
- Marketplace
- Cursor Security, Cursor Privacy, Grok Bot terms
Third party and forum (tier 1-2, not verified with the vendor): postiz.com/grok-bot, reviews and the Cursor forum (for old Cursor prices, problems and billing overage).
What was not tested: see Part 9. Every fact that may change (price, limit, version) was checked on the date shown next to it.
What This Guide Does Not Cover
- No free plan; a paid, auto-renewing subscription is required
- The guide does not cover team bots and Enterprise (Slack, Teams, SSO), Vault, Pages, image and video generation, macOS, Android and Linux (not tested)
- Phone calls: US only, not tested
- Postiz: not verified, not tested
- Cursor Pro/Teams, SuperGrok and Enterprise prices were not verified
- Tested only on a monthly Premium account on Windows and iPhone. Not documented: the iPhone installation (store, sign-in screen, notifications), the detailed Google permission screens, and the Calendar and Drive approvals. The Ask first rule was not tested: the prompt was not sent to the main bot, and it was not verified that the bot saves it or that it stops creating a calendar event or saving to Drive; Settings › General › Bot was not tested
Want to Go Through It Together?
A guide is a starting point. An assessment of your environment will give you a precise answer.